

A complete kitchen remodel runs $13,000 to $35,000 and takes 6 to 12 weeks, but most of that time and money gets wasted if you approve cabinet drawings before you know which appliances you’re installing.
The exact dimensions of your refrigerator, range, and dishwasher decide cabinet opening sizes, panel requirements, and whether you end up with filler strips patching gaps that shouldn’t exist.
1. Define How Your Household Uses the Kitchen
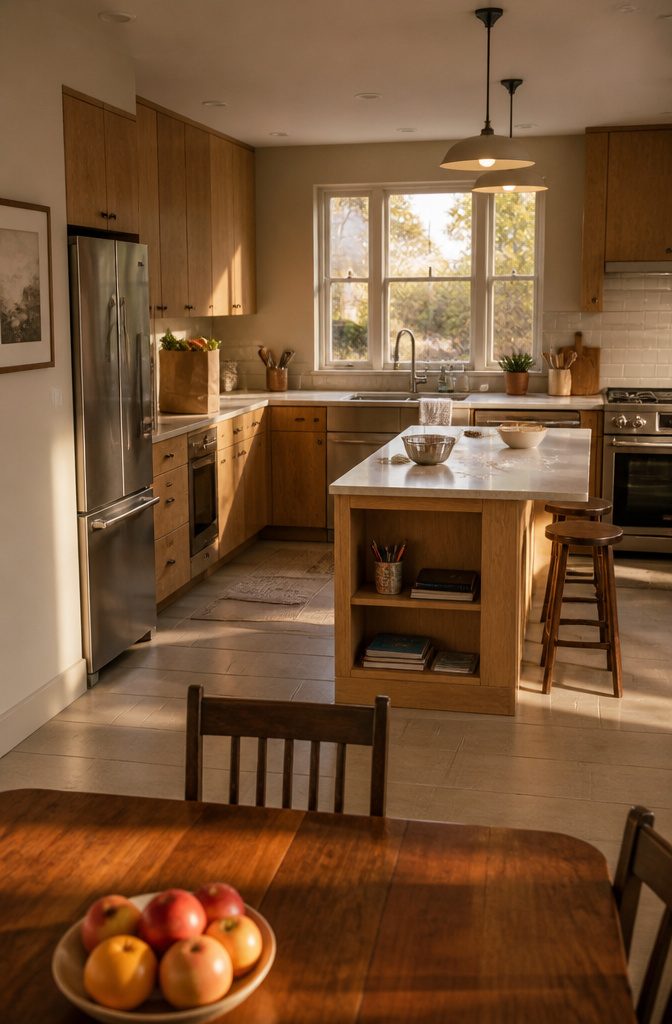
I start by recording what breaks down in the current space: where two people collide during dinner prep, which cabinet you can’t reach without moving something else first, how groceries land on the floor because counter space runs out six inches from the door.
Write it as a list if that helps, but name the problem specifically enough that the solution becomes obvious.
A vague "not enough storage" doesn’t decide anything. "No place to store sheet pans upright" points straight to a vertical divider in the base cabinet nearest the oven.
Then I separate must-haves from wants.
Must-haves are tied to how the household actually operates: how many people cook at the same time, whether anyone needs counter height or aisle width adjusted for mobility, where kids do homework while dinner happens, which appliances stay on the counter daily versus twice a year.
Wants are finishes, extras, the waterfall edge on the island.
Prioritize the first list before you touch the second, because the layout that fits two cooks and a homework station won’t fit if you decide on it after the island is already drawn.
Answer these before you look at layouts: who cooks, how often, and do they work alone or alongside someone else. Where do groceries enter, and where do they need to land without blocking the path to the fridge.
What needs to stay within arm’s reach of the cooktop, the sink, the main prep zone. That page of answers will settle more decisions than any inspiration photo.
2. Set Your Scope and Budget
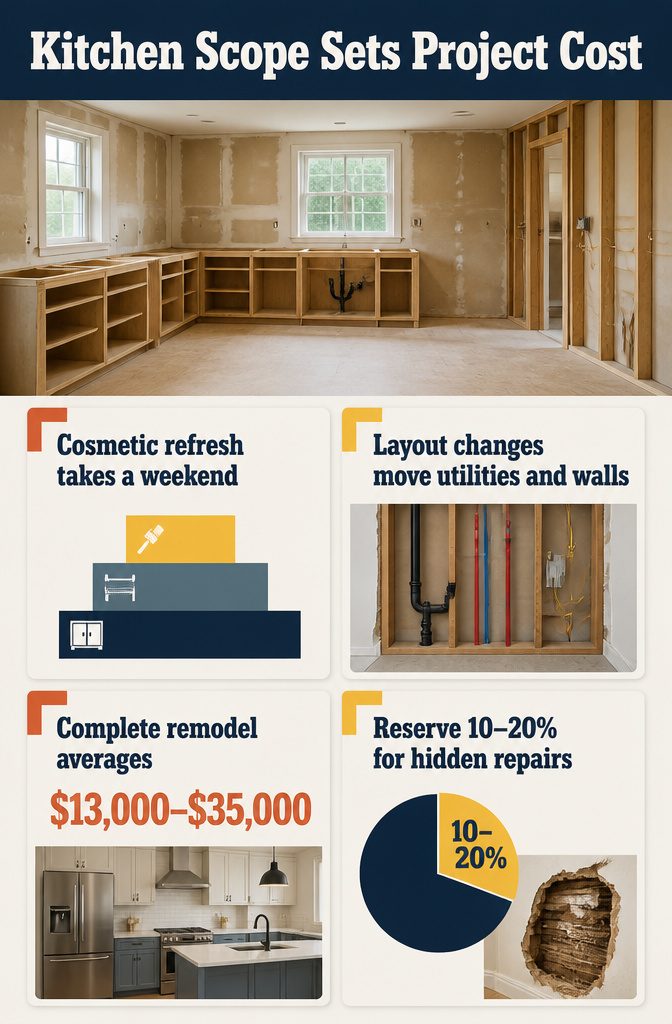
The first question is whether you’re painting cabinets and swapping hardware or ripping the kitchen down to studs.
A cosmetic refresh costs the least and takes a weekend; a same-footprint remodel replaces cabinetry and counters but leaves plumbing and walls where they are; a layout change moves utilities and opens walls, which adds weeks and thousands to the bill.
Structural changes affect cost and schedule more than any finish choice. If your budget doesn’t stretch to moving the sink or removing a wall, decide that now before you fall in love with a plan you can’t afford.
A complete remodel runs $13,000 to $35,000 on average. Build your budget by category: cabinets usually claim the largest share, then countertops, appliances, labor, and permits.
Add a 10–20% contingency for the repairs you find once walls open. I always tell people to set a spending limit before they start shopping, because it’s the only way to know where to save and where to spend.
Knowing your maximum spend up front keeps the project from turning into a series of expensive corrections later.
3. Measure and Document What You Have

Record room dimensions wall to wall, plus ceiling height before you settle on anything.
Mark window and door locations with their sizes and which way the doors swing, because a swing path decides whether a cabinet door can open or not.
Note wall thicknesses, soffits, and any bulkhead that will drop into your plan whether you want it there or not.
Document where the plumbing supply and drain lines sit now, along with gas lines, electrical runs, and existing vent ducting. Mark the electrical panel location and its available capacity.
Record the flooring type, its thickness, and how it transitions into the next room. Call out walls that are out of square, floors that are out of level, and soft spots in the subfloor near the dishwasher, sink, or refrigerator.
If you plan to move or open a wall, note whether it holds up the house.
Your measurements work for early planning and for confirming an appliance fits.
They should never replace professional field measurements for cabinet fabrication. A half-inch error becomes a filler strip at best and a re-order at worst.
4. Choose a Layout and Plan Traffic Flow

Start by matching the room to how your household moves. A galley layout fits a narrow space and keeps one cook efficient, but a second person will wait for clear passage.
An L-shape opens one wall for seating or traffic and works well when the kitchen doubles as a gathering spot.
A U-shape surrounds the cook with counter on three sides and suits someone who preps and cooks alone most of the time, though visitors entering for a glass or a snack will cross the work zone.
An island adds prep surface and seating, but only when the room allows 48 inches of clearance on each working side for two people to pass comfortably, or 42 inches when one person cooks.
The work triangle still holds: sink, refrigerator, and range should sit 4 to 9 feet apart, totaling no more than 26 feet. Test it by walking the path with a hot pan or a full bag.
Can the dishwasher open while someone stands at the sink? Is there landing space beside each appliance?
Generous landing zones calm the workflow more than total square footage does. Tight aisles make even a large kitchen feel frantic, and counter space distributed across zones beats one long run interrupted by a walkway.
5. Select Appliances and Confirm Specifications

I choose appliance models before I approve cabinet drawings, because the dimensions and service requirements of the actual unit decide what the cabinets need to accommodate.
A wider refrigerator or a larger range can reduce storage or prep space in ways that only become obvious after the cabinets are ordered, and exact model numbers drive cabinet opening sizes, panel requirements, dedicated circuits, water line locations, and duct routing.
Approving drawings before appliances are specified is how a cabinet run ends up needing a filler patch.
A floor plan breaks the space down into its component parts—dimensions and all—so that when you’re determining things like cabinet configurations and appliance sizes you know what will fit and where.
That means getting the spec sheet for each model before the plan is final.
Ventilation deserves its own decision: a hood that exhausts cooking air directly outdoors usually removes heat, grease, and smoke better than one that recirculates it, and the duct route has to be resolved before walls and ceilings close.
The largest appliance that fits is not always the best appliance for the layout. Choosing a slightly more compact unit can free enough space to improve the entire room.
6. Plan Storage and Cabinet Configuration

Storage configuration starts with where you actually use things, not how much you can cram in.
Pots belong near the cooktop, plates near the dishwasher, pantry items close to the fridge and prep counter. That geography matters more than total volume.
I treat base cabinets as drawer space first.
Full-extension drawers let you see everything without crouching, and you won’t spend five minutes digging for a lid. A tall pantry cabinet with pull-out shelves is the single highest-return choice if the floor plan allows it.
Corners get a lazy Susan or pull-out system so the back corner stays reachable. Vertical dividers in a narrow cabinet hold baking sheets and cutting boards upright where you can grab one without unstacking the pile.
A 2024 survey found 70% of homeowners requesting floor-to-ceiling cabinets and walk-in pantries, which tracks with how kitchens now double as command centers.
High shelves work fine for items you reach twice a year. Everything else should open in one motion.
7. Select Materials and Finishes

Cabinetry, countertops, flooring, backsplash, fixtures, and hardware arrive together in nearly every kitchen plan, but the order you lock them in matters more than most people expect.
I always pin down counter material and cabinet finish first, because those two decisions shape color temperature, texture, and the budget ceiling for everything else.
Cambria, Silestone, and Dekton all offer engineered quartz and porcelain surfaces that hold up to daily wear without the maintenance natural stone demands, and knowing which one you want early keeps the timeline from stalling when lead times stretch.
Flooring and backsplash come next, chosen to work with the cabinets and counters rather than against them. A warm wood-look tile softens an all-white kitchen; a cool grey floor keeps dark cabinetry from feeling too heavy.
Fixtures and hardware close the loop, and this is where I see people either pull a room together or let it drift.
Matte black, brushed brass, and polished nickel each read differently depending on what surrounds them, so test a pull or faucet finish against your actual samples before you order thirty of them.
8. Plan Lighting and Electrical Details

Lighting location gets locked in at electrical rough-in, so this is the moment to get the layers right.
Ambient lighting fills the room and typically comes from ceiling fixtures or recessed cans. Task lighting shines directly on work surfaces, and under-cabinet strips do more for daily usability than almost any other upgrade.
Accent lighting adds depth inside glass-front cabinets or along toe kicks. Pendant lights over an island handle both task and style, so I size and place them against the island dimensions, not just the ceiling grid.
Changes are nearly always easier before walls and ceiling are closed. Island pendants can cost under $50 each or several hundred dollars, often with surprisingly similar appearances, so shopping around makes sense if the timeline allows it.
Plan outlets at the same time. Every counter run needs power for small appliances, and islands benefit from outlets on the end panels or pop-ups in the surface itself.
9. Develop the Design and Handle Permits
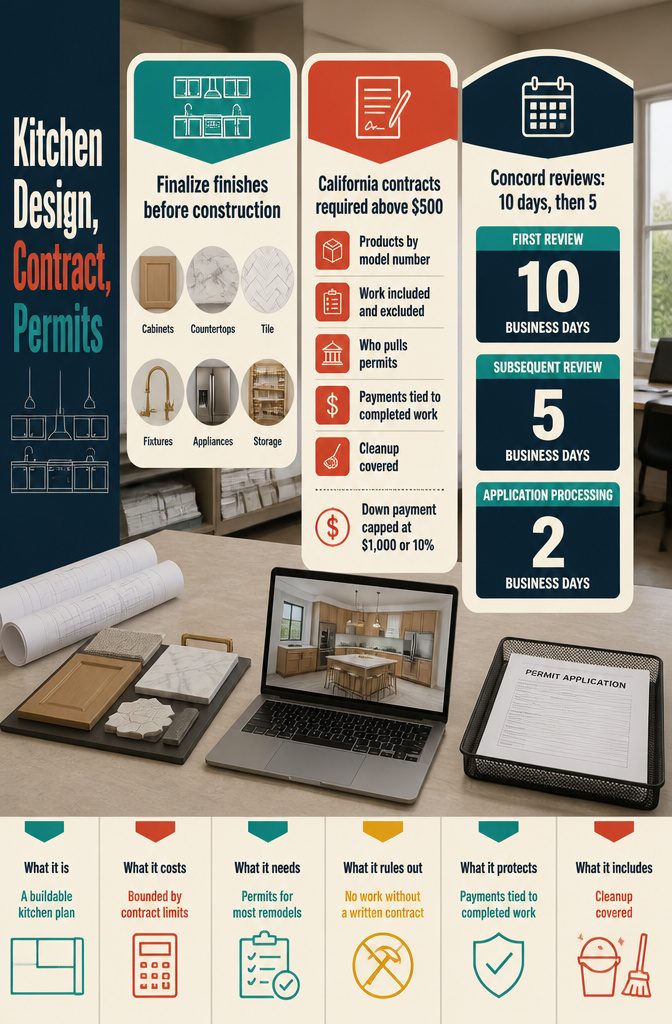
Once the layout is set and you know which appliances are staying or moving, the designer turns your ideas into drawings you can actually build from. That process is collaborative, and it matters more than most people think.
A good designer will show you 3D renderings so you understand what the finished room will look like, then refine the layout based on how you cook, how much storage you need, and what fits the budget.
You finalize cabinets, countertops, tile, fixtures, and appliances during this phase, not during construction.
Put the whole scope in a written contract before anyone picks up a hammer.
That document should list products by model number, spell out what work is included and what is not, name who pulls permits, tie payments to completed work, and cover cleanup.
In California, any home-improvement contract over $500 must be written, and the standard down payment cannot exceed $1,000 or 10% of the price, whichever is less.
Most kitchen remodels in California require permits.
Concord’s published plan-review schedule estimates about 10 business days for first review and 5 business days for subsequent review on residential alterations, plus roughly 2 business days for application processing. Confirm current timing with your local building division, since turnaround shifts with workload.
10. Prepare for Construction and Disruption
Your contractor should give you a clear work sequence before demolition begins: gutting the old kitchen, rough-in work for plumbing and electrical, cabinet and countertop installation, then finishing touches like paint and hardware.
Construction typically takes 6–12 weeks, though a minor refresh moves faster than a full remodel that changes the layout. Lock in those dates early and plan around them.
You lose kitchen access during most of the job. Dust and noise follow the crew whether they tape off doorways or not.
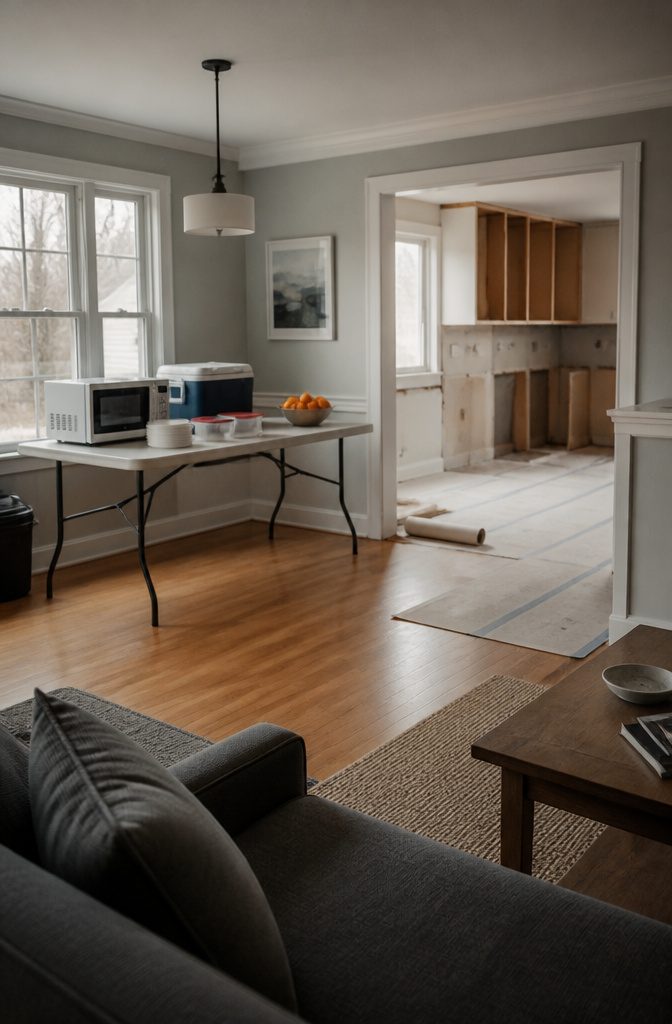
I set up a temporary kitchen in the dining room for projects that run longer than a week: a folding table, a microwave, a cooler for perishables, paper plates to skip the dishwasher you won’t have.
Plan meals that need no stove.
Order in more than usual or prep cold foods. The disruption is real, but short if the timeline holds.
Test the Plan Before You Order

I tape out the full footprint on the floor before I commit to anything permanent. Painter’s tape is cheap, sticks without residue, and lets you mark exactly where the island, the counters, and each appliance will land.
I use boxes to approximate height and bulk—a stack for the fridge, a shorter one for the range, something waist-high where the island goes. Walk through your actual morning and dinner routines in a mocked-up version of the space.
Open the imaginary dishwasher door while someone stands at the sink. Does it block the path to the fridge?
Pretend you are unloading groceries and putting a pot on the stove. Are you pivoting three times to cover six feet, or does the flow feel direct?
Try opening the oven door with the island in place. If the clearance feels tight on tape, it will feel worse with a real 24-inch door swung open at knee height.
This is the step that catches layout problems while they still cost nothing to fix.
A flaw you find now gets redrawn. One you find after the cabinets arrive becomes something you live with, and I have seen enough cramped kitchens to know that regret does not fade.
Consider Accessibility and Changing Needs
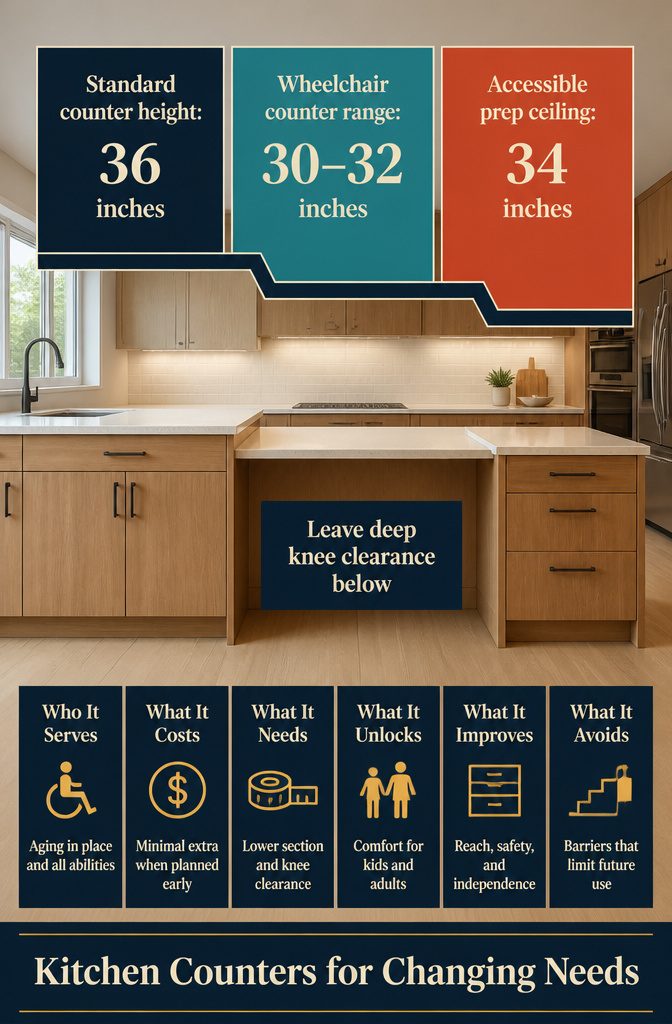
A kitchen that works now should still work ten years from now, and that means thinking through who will use it and how their needs might shift.
Standard counter height sits at 36 inches, but wheelchair users need counters between 30 and 32 inches, with 34 inches as the absolute ceiling for accessible prep areas.
If you’re planning for aging in place or expect mobility to change, run at least one section of counter lower and make sure the knee clearance underneath is deep enough for a seated user.
Children add their own layer. A family with young kids benefits from a kitchen where the sight lines stay open and floor space lets more than one person move at a time.
Cabinet pulls instead of knobs are easier for small hands, and drawer storage beats deep lower cabinets when a child needs to reach something without climbing.
These moves don’t announce themselves as accessibility features, but they make the room more forgiving as bodies and abilities change.
Frequently Asked Questions
What is the best kitchen layout?
The best layout depends on your room dimensions, how many people cook at once, and how the space is used.
A galley fits narrow spaces and single cooks, an L-shape opens one side for seating or traffic, a U-shape surrounds the cook with counter on three sides, and an island adds prep surface when you have 48 inches of clearance on each working side.
What is the kitchen work triangle?
The work triangle connects the sink, refrigerator, and range to organize movement between key work areas.
Each leg should sit 4 to 9 feet apart, with the three sides totaling no more than 26 feet, so you can move through prep, cooking, and cleanup without wasted steps.
How wide should kitchen aisles be?
An aisle needs 42 inches when one person cooks and 48 inches when two people work at the same time.
Walkways that only pass through the room require at least 36 inches, but working aisles between counters or appliances need the wider clearance so cabinet and appliance doors can open without blocking the path.
How high should kitchen counters be?
Standard counter height is 36 inches from the finished floor.
Wheelchair users need counters between 30 and 32 inches, with 34 inches as the maximum for accessible prep areas, and mixing counter heights in one kitchen works well when different tasks or users require it.
How much counter space does a kitchen need?
The amount depends on how you cook, but every kitchen needs landing space beside the fridge, sink, and cooktop, plus dedicated prep zones.
Generous landing zones distributed across the work areas improve workflow more than one long unbroken counter run, and tight aisles make even a large kitchen feel frantic.
Does a kitchen need a range hood?
A hood that exhausts cooking air directly outdoors usually removes heat, grease, and smoke better than one that recirculates it.
Requirements vary by location and cooktop type, so check your local code and the appliance manual before you settle on a ventilation plan.
Do you need a permit to remodel a kitchen?
Most kitchen remodels require permits, especially when the work moves or opens walls, changes plumbing or gas lines, or alters electrical systems.
Concord, California estimates about 10 business days for first plan review and 5 for subsequent review on residential alterations, though timing shifts with workload, so confirm current requirements with your local building division.
What order should you remodel a kitchen in?
The typical sequence starts with gutting the old kitchen, then rough-in work for plumbing and electrical, followed by cabinet and countertop installation, and finishing with paint and hardware.
Lock down counter material and cabinet finish before flooring and backsplash, because those two decisions shape color temperature, texture, and the budget ceiling for everything else.
How long does it take to plan a kitchen remodel?
Planning can take a few weeks to several months, depending on how complex the project is and how quickly you make decisions.
Construction adds 6 to 12 weeks once it begins, with a minor refresh moving faster than a full remodel that changes the layout or opens walls.
Can I live in my home during a kitchen remodel?
Most homeowners stay in the house during a kitchen remodel, but you lose kitchen access for most of the job and should expect dust and noise even when the crew tapes off doorways.
Set up a temporary kitchen in another room with a microwave, a cooler, and paper plates, and plan meals that need no stove.
What is a realistic budget for a kitchen?
A complete remodel runs $13,000 to $35,000 on average. Cabinets usually claim the largest share of the budget, followed by countertops, appliances, labor, and permits, and you should add a 10 to 20% contingency for repairs you find once walls open.
How much space between island and counter?
You need at least 48 inches between an island and perimeter counters when two people cook, or 42 inches when one person works. That clearance lets two people pass comfortably and allows appliance doors to open without blocking the aisle.