Indoor plant display ranges from a single shelf to a full living wall, and the right approach depends on how much vertical space you have and whether you’re willing to drill into walls.
South-facing windowsills deliver the brightest natural light, but darker corners and bookcases stay usable year-round once you add LED grow lights.
Layering plants at different heights—floor specimens anchoring the base, medium stands in the middle, trailing varieties overhead—gives a room depth instead of a flat green line across one surface.
1. Use Shelves, Ledges, and Bookcases
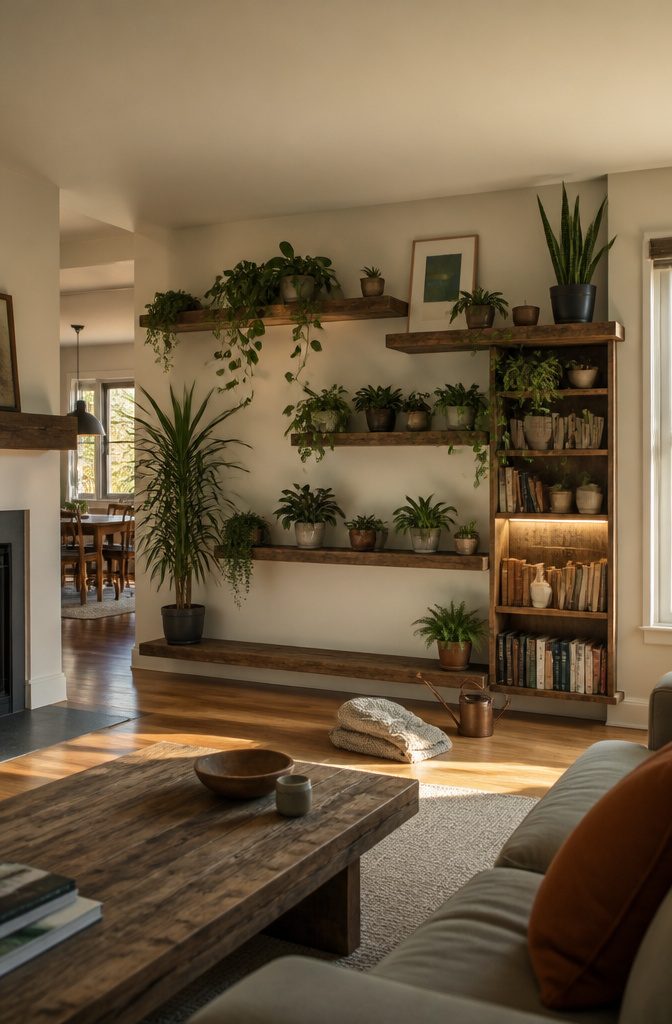
Bookshelves and built-ins are the workhorse of indoor plant display because they’re already there, already at varied heights, and they let you layer plants the way a designer would without mounting anything new.
I use floating shelves in reclaimed wood for trailing pothos or string of pearls at the top, compact peperomia or pilea on the middle tier, and a tall dracaena or fiddle-leaf fig anchoring one end at floor level.
The arrangement draws the eye from floor to ceiling instead of stopping at table height.
Window seats, fireplace mantels, and open hutch cabinets work the same way.
Deep windowsills take trailing succulents or African violets if the light is good. Shaded bookcases need grow lights, but once those are in, forgotten storage becomes green display space.
Aim for asymmetry and movement, not perfection: one plant reaching farther on the left, a sculptural sansevieria balancing the other side, trailing vines spilling over the edge wherever they land.
2. Hang Plants from Ceilings or Walls
Hang Plants from Ceilings or Walls
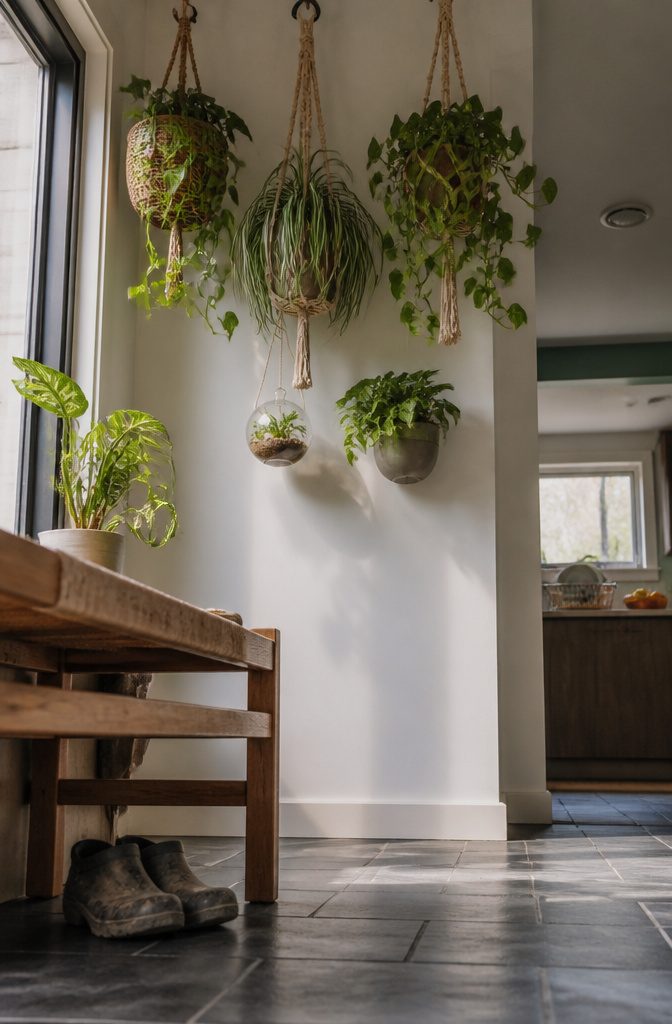
Suspending plants from the ceiling pulls the eye upward and makes a room feel more spacious without claiming any floor area.
Macramé or rattan hangers work well for trailing varieties like philodendrons, spider plants, or pothos vines, which look best when their leaves can cascade freely.
Clustering several hangers in a corner or hanging one above a sitting area creates impact without requiring much wall-to-wall coverage.
For lower ceilings, smaller terrariums and planters work better than full baskets.
Slow-growing ferns and air plants stay compact and won’t overwhelm the vertical space. Wall-mounted planters are another option when ceiling hooks aren’t practical.
They lift greenery off surfaces and preserve floor area, but you’ll need sturdy anchors matched to your wall type. I prefer this approach in entryways and kitchens where counter space is already tight.
3. Use Plant Stands, Pedestals, or Risers

Plant stands, pedestals, and tiered risers let you stack height into a room without drilling into walls.
A slim black metal etagere against a blank wall or in a corner creates a vertical display that fills the space like a piece of living art.
I usually mix materials across the same setup: curved ceramic stands, geometric glass risers, and natural wood pedestals of varying heights scattered across a bookshelf or console table.
Give each plant its own level so the eye moves up and down instead of skating across a flat row.
Trailing ivies and potted palms read better when they sit at different elevations.
On the bottom tier I place floor plants as focal points, medium-height specimens like monsteras or pilea peperomioides go on mid-level stands, and smaller foliage fills the top shelves.
The flexibility is the real win here: you can rearrange stands and pots as often as you like without committing to a fixed layout. That matters more in a rental or a room where the furniture changes seasonally.
4. Arrange Plants in Entryways and Corners

A tall plant in the corner of an entryway pulls the eye up and turns dead floor space into something that looks intentional the moment someone walks in.
I like a fiddle leaf fig or an areca palm in a tall woven coconut basket planter for this, and the basket itself adds texture without looking fussy.
You can underplant with smaller green foliage at the base to fill out the look.
Large plants work the same way in any unused corner. Their height anchors a room and softens the hard line where two walls meet, which matters more in open floor plans where you need separation without actually closing things off.
A tall plant beside a sofa or near a doorway defines the space while keeping sightlines open.
One thing to watch: pick the plant for its mature size, not the size it is when you buy it.
Many indoor plants keep growing for years, and a corner that feels balanced now can look crowded two seasons later if you chose something that wants more room than you have.
5. Display Plants on Windowsills or in Built-Ins

A sunny windowsill is ready-made display space, and south-facing windows generally provide the brightest conditions for plants that want a lot of light.
Deep sills work especially well for trailing succulents or compact flowering plants like African violets, where the light stays strong and the arrangement sits at eye level without blocking the room.
If the sill is shallow or the light comes from the east or west instead, you still have workable conditions for most foliage plants, just not the all-day intensity a south window delivers.
Built-in cabinets and bookcases turn into plant displays the moment you open the doors or clear a shelf, and I like using them for spaces that would otherwise sit empty.
A glass-front hutch or curio cabinet works particularly well because the enclosure holds humidity while the glass lets light through.
For darker shelves or corners where natural light does not reach, add grow lights so the space stays usable year-round. That opens up forgotten nooks and underused storage without waiting for the sun to cooperate.
6. Use Baskets as Planters or Cachepots

Woven baskets work well as oversized cachepots or drop-in planters when you want to add warmth and texture without buying another ceramic pot.
I line the interior with pebbles and drainage material, then set the plant in its grow pot inside. The basket hides the plastic and gives you flexibility to swap plants seasonally.
A single statement basket on a pedestal can anchor a corner or landing. For something more dynamic, try nesting trios or small collections on a stair landing or as a centerpiece.
Desert roses, ornamental grasses, and bamboo all look good in baskets without needing an additional inner container, which simplifies watering and keeps the look clean.
The appeal is partly practical.
Baskets cost less than most decorative planters, and the woven texture softens hard surfaces in a way that smooth ceramic does not. That matters in rooms with a lot of tile, painted walls, or glass.
7. Repurpose Household Items as Plant Displays
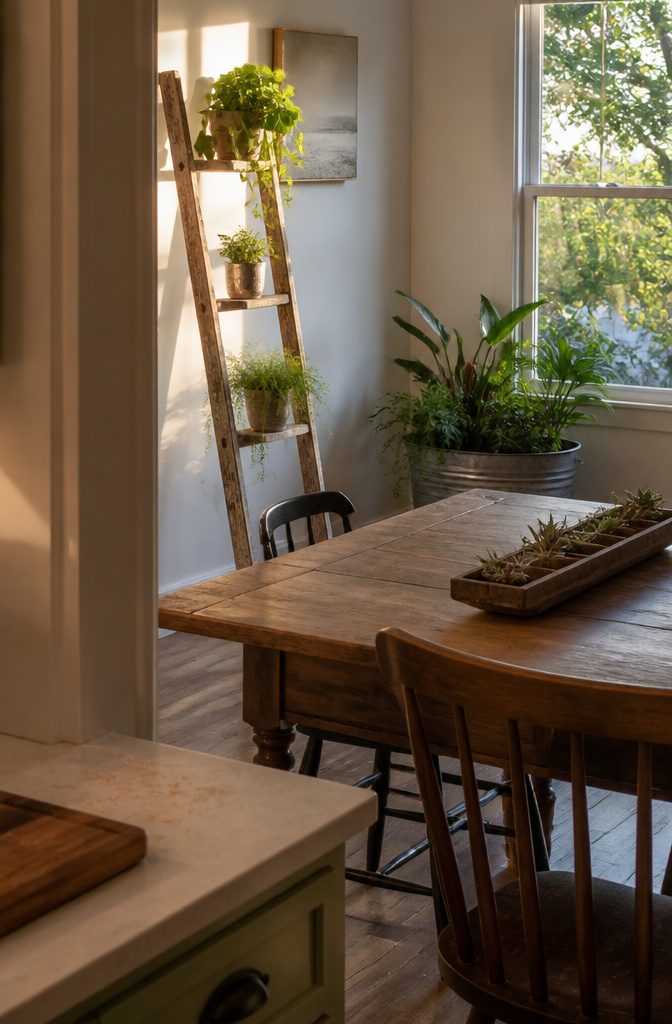
I’ve found old wooden ladders work better than most of what you can buy new, because the patina keeps the display from looking staged.
A three- or four-rung ladder leaning against a wall holds plants at staggered heights without taking up floor space the way a multi-tier stand does.
The wood grain matters here — anything too clean reads as craft-store décor rather than furniture — so I look for pieces that already show wear or age.
A vintage sugar mold running down the center of a dining table gives each plant its own compartment, which solves the problem of pots clustering together and losing their shape as a group.
The mold itself becomes half the display, so the plants can stay simple. I’ve seen this work best with small succulents or herbs that don’t need deep soil.
Stock tanks are another option that works when you want plants at floor level but contained.
A low galvanized tank holds multiple plants and keeps the arrangement mobile, which matters in a room where light shifts seasonally. The metal reads industrial enough that it doesn’t need to match the rest of the room.
8. Group Plants as a Collection

Group plants as a collection instead of spreading them around a room. If you’ve accumulated multiple sansevieria varieties, or a set of ferns or air plants, keeping them together makes a much stronger impact than dotting them around the house.
A collection reads as intentional when the repetition is visible, and the effect multiplies with each added plant.
The same principle applies to containers. Try all white planters in different sizes and textures rather than matching them exactly.
Another current approach blends gray, white, and terracotta in one grouping. Either way, the containers coordinate without looking like a set you bought all at once, which keeps the collection from feeling stiff.
9. Use Coordinated or Decorative Containers

The container choice sets the visual frame for everything else.
I start with coordinated containers that share a palette but vary in shape and size—all-white planters in different textures and heights, or a mix of gray, white, and terracotta that reads cohesive without looking matched.
The variation keeps the eye moving without fracturing the room into unrelated moments. Matte ceramic grounds a modern space; glass jars and terrariums work when you want something minimal and open.
If coordination feels too controlled, go fully eclectic and use whatever planters pull you in, but commit to that choice across the whole display rather than hedging halfway. The mistake is scattering styles without intention.
One other finish worth adding: cover bare soil with aquarium gravel, polished river rock, or textural moss. It looks professional and complete, the way a planting should when the container matters.
10. Create a Living Wall or Vertical Garden

A living wall turns vertical space into a display surface, and the fastest route is a modular wall panel system with attached planter boxes that mount directly to the wall.
Industrial piping works too, screwed in geometric patterns to hold small ceramic planters within the framework. For more flexibility, stagger weathered wood shelves along the wall and line them with woven basket planters.
Coverage comes down to math. You can buy enough panels to fill the space solid, or install them in a checkerboard pattern so trailing plants fill the gaps faster with fewer planters up front.
The checkerboard approach cuts the initial cost and the weight load, and once the foliage grows in, the wall reads as one continuous surface. I’ve found that pattern also makes watering easier, since you’re reaching fewer individual units.
If you’re working with shelves instead of wall-mounted boxes, mount them at intervals that let taller plants sit below without crowding shorter ones above. The ascending platforms give you room to layer without everything competing for the same sightline.
11. Display Plants on or Around Staircases

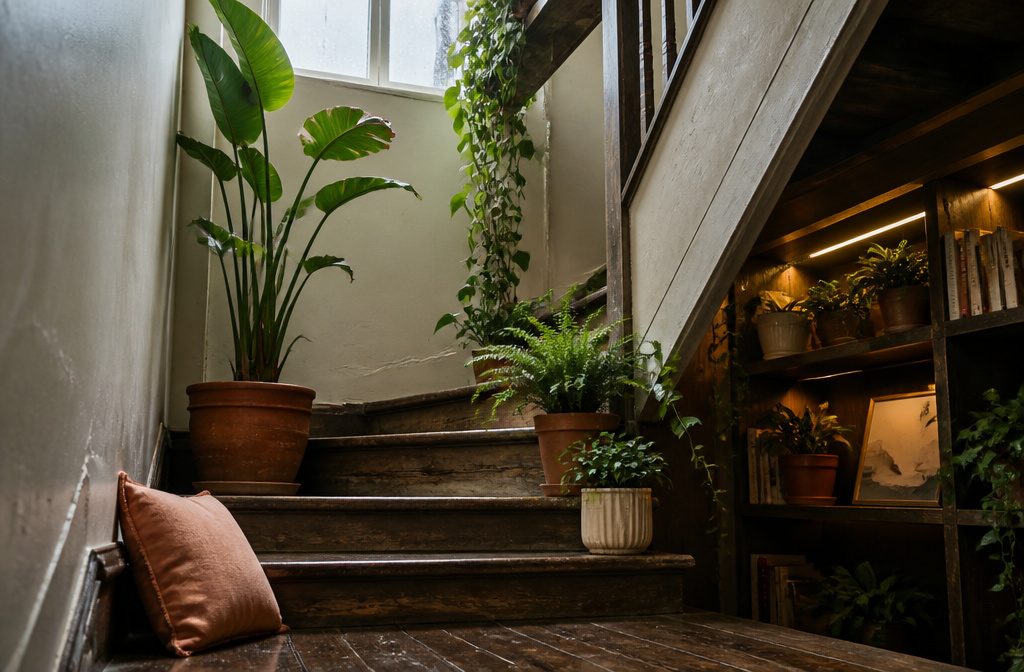
Staircases hold more display potential than most rooms give them credit for. A landing works like a shelf at eye level, and the wall alongside the climb gives you vertical space for trailing greenery that moves as you pass it.
I’ve seen ivy, spider plants, and other cascading varieties hung in woven basket planters along staircase walls or even tucked into open risers, where they drape down through the gaps.
Clear museum gel keeps hanging planters secure without drilling into rental walls.
For a more contained accent, line the actual stair treads with matching ceramic pots set along one side so foot traffic stays clear.
Blue and white pottery works well here, though any coordinated container keeps the look intentional rather than scattered.
The plants become part of the climb itself, not just background decoration. Just make sure any elevated placement still gets the light each variety needs, and water carefully so runoff doesn’t damage the wood or carpet below.
12. Make a Plant a Sculptural Focal Point
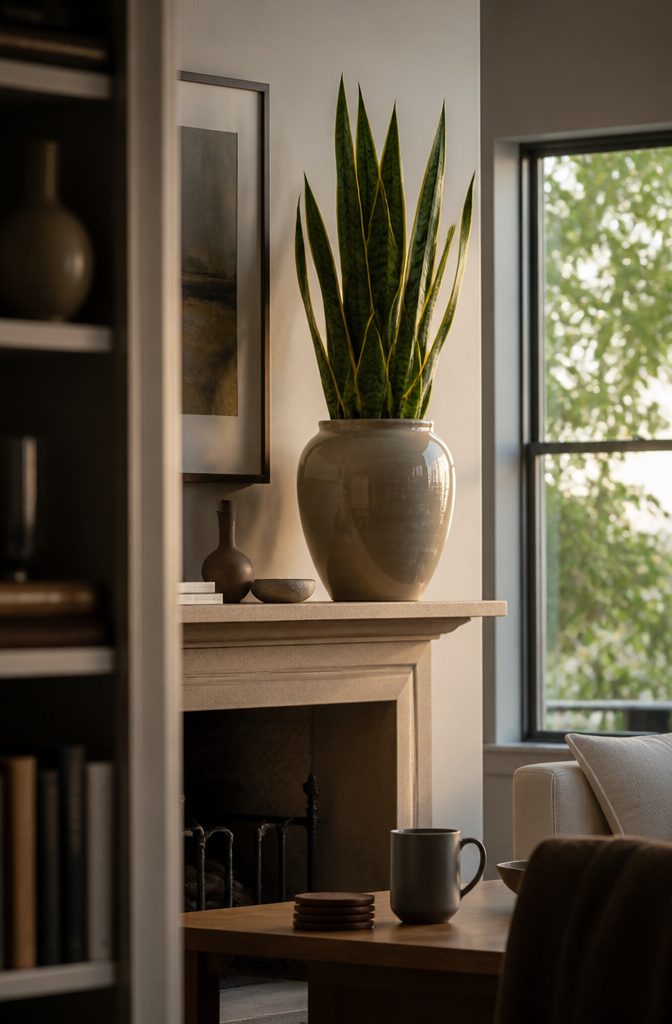
A tall fiddle-leaf fig in a metallic geometric planter on a console table or a sculptural snake plant in a glazed ceramic urn on a mantel turns the plant itself into the room’s visual anchor.
The shape of the container matters as much as the foliage: antique milk-glass vessels, woven wood baskets, or matte ceramic pots add their own weight to the composition.
I choose plants that mirror the lines of the stand or pot. Snake plants, verticillium, and succulents have clean silhouettes that hold a room without competing for attention.
For a single statement piece, place it where the eye lands first: atop a bookshelf, on a stair landing, or as an unexpected centerpiece on a table.
Desert roses, ornamental grasses, and bamboo work well in oversized woven baskets lined with pebbles for drainage.
The container can carry the room alone if the plant is simple, or the plant can be the drama if the pot stays quiet. Either way, one strong focal point beats three medium ones.
Match Plant Location to Light

Before you settle on a display location, spend several days tracking how sunlight moves through the room. South-facing windows deliver the brightest conditions and suit sun-loving varieties like succulents or jade plants.
North-facing windows offer the least direct light, which makes them better for low-light plants such as snake plants, ZZ plants, and pothos. East-facing windows provide gentle morning sun, while west-facing windows bring stronger afternoon exposure.
Large plants often end up in corners for visual impact, but corners can receive far less light than you’d expect from a quick glance. Watch the space at different times of day before committing to placement.
If natural light falls short, LED grow lights blend into most interiors without looking clinical. For shaded bookshelves or dim built-ins, aquarium-style grow lights keep foliage healthy year-round without requiring a window at all.
Height, Spacing, and Layering

Height, Spacing, and Layering
I anchor most plant displays with a floor plant where the eye should land first, then add medium-height specimens on stands, smaller pots on shelves or ledges, and hanging planters overhead.
Layering at different heights gives the room depth instead of a flat green line across one surface, and it lets each plant contribute without crowding the next.
Spacing matters as much as placement. Overcrowding limits airflow around leaves, raises the chance of fungal problems, and makes watering awkward when you can’t reach the base of the pot without moving three others.
I leave enough room that each plant gets the light it needs and stands out visually rather than blurring into a mass.
Proper spacing also makes maintenance faster, since you can check soil moisture and prune without shifting the whole arrangement. Think of it the way you’d place furniture: every piece should add to the composition without overwhelming the floor plan.
Containers and Drainage
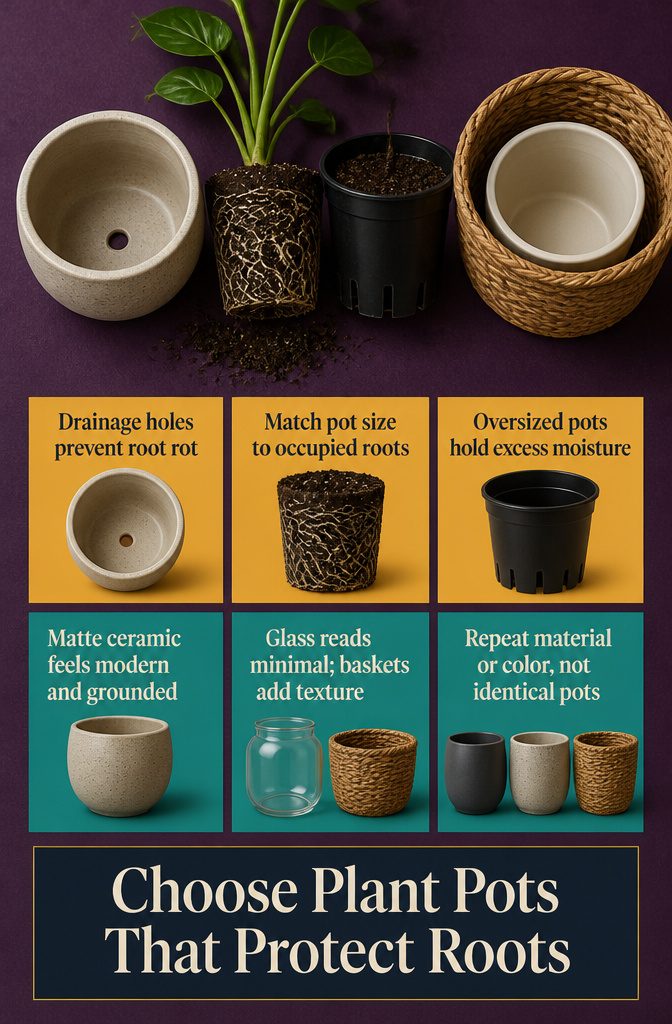
Drainage holes matter more than the pot itself. When excess water sits around the roots, rot moves in fast — one of the quickest ways an indoor plant fails.
A container that lets moisture escape through the bottom keeps the root system healthier and gives you room to overwater slightly without losing the plant.
Pot size should match what the roots actually occupy.
An oversized container holds more moisture than the plant can use, which slows growth and raises the rot risk again. Too small and the roots press against the walls with nowhere left to go.
Container style changes the feel of the room. Matte ceramic reads modern and grounded, glass jars or terrariums lean minimal, and woven baskets bring in texture.
I coordinate containers by material or color rather than matching them exactly — repeating the same finish across a few plants pulls a display together without making every pot identical.
Plant Health and Ongoing Care

A short lead-in first: staying on top of routine care keeps plants looking their best and growing evenly.
- Water when the top inch of soil feels dry, then let excess drain completely. Pooling water rots roots faster than most other mistakes.
- Rotate plants every few weeks so all sides get time facing the light. Without rotation, stems lean hard toward the window and growth turns lopsided.
- Check regularly for stress. Yellowing leaves, drooping stems, or brown tips usually mean something is off with water, light, or humidity before it becomes irreversible.
- Groom leaves when dust builds up. A damp cloth works for broad leaves; a soft brush handles ferns and succulents without tearing the foliage.
- Prune damaged leaves as soon as you notice them. Dead tissue invites pests and pulls energy the plant could spend on new growth.
- Monitor plants kept in a greenhouse or other controlled space, where conditions stay stable but problems can spread quickly if one specimen struggles.
Frequently Asked Questions
How can I add plants to my home’s small spaces?
Use tiered stands or risers to stack plants vertically, hang trailing varieties from the ceiling to free up floor area, or line a kitchen windowsill with compact succulents and herbs.
Wall-mounted planters and narrow vertical gardens also work well when counter and floor space is tight.
What are some good ways to incorporate plants without taking up floor space?
Hang plants from ceiling hooks using macramé or rattan hangers, install wall-mounted planters with proper anchors, or use floating shelves and built-in bookcases to display greenery at multiple heights. These methods lift plants off surfaces while keeping walkways clear.
What type of brackets or shelves should I use to mount plants on my walls?
Use floating shelves secured with anchors matched to your wall type, industrial pipe brackets arranged in geometric patterns to hold small planters, or modular wall panel systems with attached planter boxes.
The hardware choice depends on the wall material and the weight of the planters.
What are some good DIY plant display ideas?
Lean an old wooden ladder against a wall to hold plants at staggered heights, line stair treads with matching ceramic pots along one side, or repurpose a vintage sugar mold as a centerpiece with succulents in each compartment.
Low galvanized stock tanks also work well for grouping multiple floor plants in one mobile container.
How do I incorporate plants into my decor style?
Match container materials and colors to the room’s aesthetic: matte ceramic for modern spaces, glass jars for minimal interiors, or woven baskets for added texture.
Coordinate planters by repeating the same finish across several plants rather than matching them exactly, which keeps the display cohesive without looking stiff.