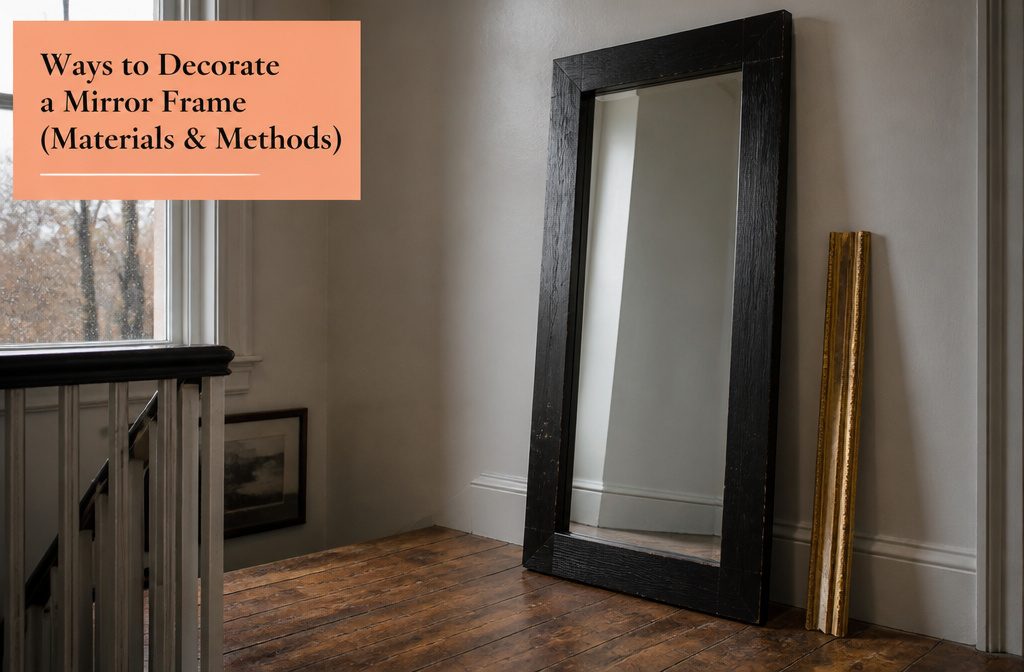
Mirror frame decoration ranges from thirty-dollar wood builds to gilded antiques, and the deciding factor is whether you want the mirror to blend into the room or become the focal point.
If you’re working on a real budget, wood framing costs less than most people expect. One full frame for a 36-by-66-inch mirror ran $29.92 using 2-by-4s, a plywood backing board, butt joints, and Glossy Ebony stain.
1. Add or Replace a Wood Frame

Wood is the most common way to frame a builder-grade mirror, and the approach works whether you want something chunky and finished or stripped back to bare lumber.
Stained or painted wood gives you control over how the frame meets the rest of the room, while raw wood keeps things natural.
Metal frames lean industrial, but wood stays the go-to for renters and first-time owners working on a real budget.
I’ve seen full mirror frames built for under thirty dollars. One project framed a 36-by-66-inch mirror using 2-by-4s and a plywood backing board for $29.92 total.
The frame used butt joints at the corners, predrilled holes to prevent splitting, and two coats of Glossy Ebony stain that dried for six hours between applications.
Assembly took 2-inch screws at each corner and five to eight screws per side to secure the backing board.
The backing board extended onto the frame by an inch on each dimension, so a mirror that size needed a 38-by-66-inch board.
Reclaimed wood works when you want visible age.
Weathered boards, pallet wood, and barn planks all carry their own patina, and the imperfections read as character rather than damage. Dowel-style frames and simple modern frames suit contemporary spaces where clean lines matter more than rustic texture.
2. Use a Mosaic Tile Border

A mosaic tile border gives a mirror the weight and color of an inlaid art piece.
I use glass mosaic tile in small sheets for the fastest layout, premixed adhesive-and-grout to skip the measuring step, and a putty knife to set each piece level.
The whole border takes about 30 minutes once the tiles are cut to fit the perimeter. Broken tiles work just as well if you want larger, irregular pieces, and ceramic fragments let you mix finishes inside the same border.
Glass reads the cleanest to me because the edges catch light differently than the grout, but ceramic holds up better in a bathroom where steam softens adhesive over time.
The tessellated surface adds visual weight without requiring a separate wood frame, and the grouted finish hides the seam where mirror meets wall.
3. Create a Sunburst or Radiating Frame

Craft sticks laid outward from the edge give a mirror the radiating structure of a sunburst without the cost of a metal frame.
The method works because the sticks are uniform in width and sit flat against the wall, so the pattern stays crisp even when you’re working with a couple hundred pieces.
I’d start by painting the sticks before you glue them, which saves time and keeps the finish even.
Arrange them in overlapping layers if the mirror is large, or a single ring if it’s small enough that one pass around the perimeter fills the wall space you want to cover.
Vintage flatware makes the same radiating shape but reads more eclectic. Spoons and forks fanned outward catch light differently than wood, and the metallic finish works when the rest of the room leans modern or industrial.
Flatware needs stronger adhesive because of its weight, and a frameless mirror may need backing support if the utensils add enough mass to pull it forward.
4. Use Etched or Frosted Decoration
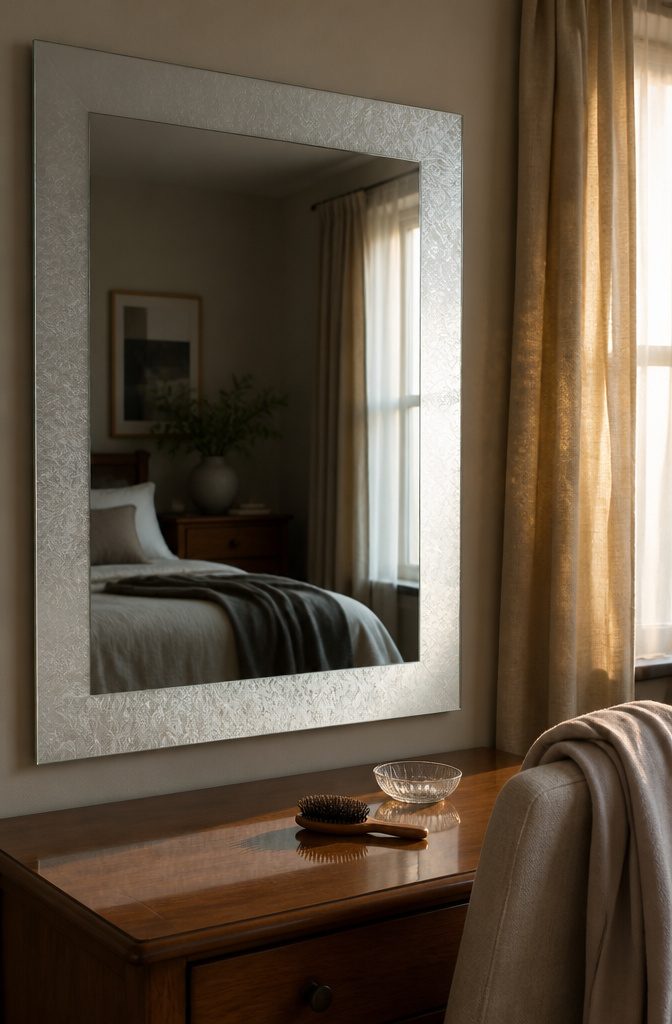
Etching cream gives you a frosted-glass border without committing to permanent cuts in the mirror itself. Tape off the edges, brush the cream where you want the pattern, wait the time printed on the jar, and rinse.
The effect is subtle enough for a bathroom or bedroom where you want texture without competing with the wall color.
For a faster result that works the same way, frosted-glass spray goes on like any rattle can and dries in minutes.
If you’re not ready to make it permanent, removable mirror-etch vinyl decals let you add a shimmer or pattern that peels off cleanly when you move or repaint.
I like this route for rentals or anywhere the look might change in a year. The decals sit flat against the glass and read as etched from a few feet back, so you get the effect without the chemistry.
5. Add Lighting Behind the Frame
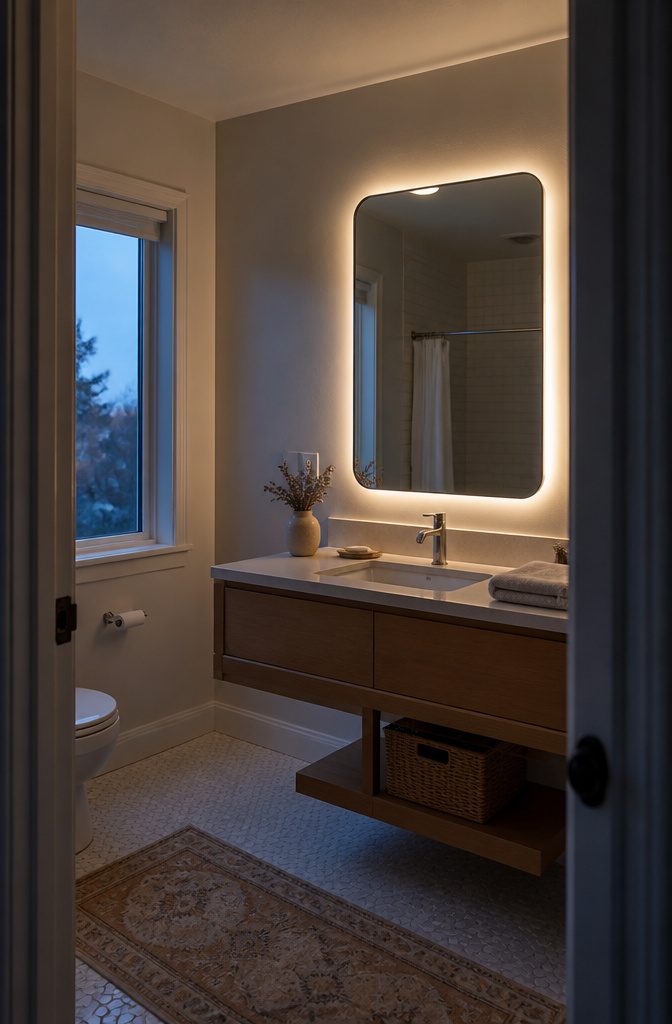
LED lights mounted behind the frame turn a basic mirror into a backlit piece that improves both function and finish.
The upgrade works especially well in bathrooms, where the extra light makes close-up tasks easier and the soft glow gives the whole room a more polished feel.
I like this approach when a mirror already has some depth to the frame or when you can add a narrow spacer strip between the wall and the back edge.
The LED strips themselves are inexpensive and adhesive-backed, so installation stays simple: measure the perimeter, cut the strip to length, press it into place along the back edge of the frame, and run the cord to the nearest outlet.
The result is modern without feeling technical, and the lighting upgrade costs less than replacing the mirror entirely.
6. Paint a Pattern on the Frame
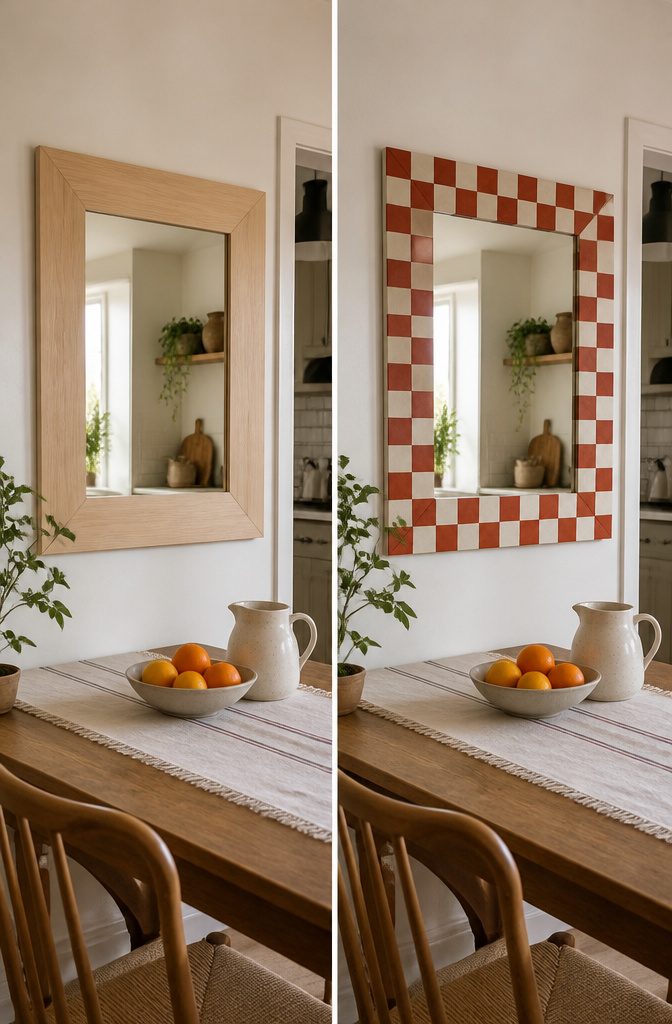
Geometric patterns bring structure to a plain mirror frame, and the effect scales to the size of the room.
Chevrons, stripes, or a simple checkerboard work best on wide frames where the pattern has room to read from across the room.
Ombre blends color from dark to light along the frame’s length, and the gradient softens the edge between mirror and wall in a way solid color does not.
I’ve found that stencils give you repeatability without measuring every mark, especially for motifs like quatrefoils or Greek key borders that need precision.
The paint itself matters less than the prep: sand the frame, prime it if the surface is glossy or dark, and use painter’s tape to protect the mirror glass.
Acrylics dry fast and clean up with water, which keeps the project moving on a single afternoon.
One approach is to paint the frame one color, then add the pattern in a contrasting shade once the base coat dries. The result depends on how much contrast you want between the design and the background.
7. Wrap the Frame in Rope

Rope wound tight around a frame adds weight and texture in a way that reads instantly coastal. I’ve found thick jute, sisal, or cotton rope all work well for this, though the finish changes with each one.
Jute gives you the roughest surface and the most obvious fiber, sisal sits in the middle with a cleaner twist, and cotton rope wraps smooth if you want the nautical look without quite as much grain showing through.
The method itself is straightforward: you wind the rope around an existing frame, keeping each pass snug against the last so no backing shows between the rows.
The natural fiber brings warmth to the mirror without adding color, which makes it easy to drop into a room that already has a palette in place.
Rope adds bulk. A rope-wrapped frame takes up more wall space than a slim wood or metal one, so measure the clearance before you commit to it.
8. Attach Seashells or Other Coastal Pieces

Attach Seashells or Other Coastal Pieces
Shells, starfish, and sea glass hot-glued around the frame build a coastal look that works best when you resist the urge to cover every inch.
I use collected beach treasures for bathroom mirrors or entryway pieces where the theme fits the space, and the natural texture adds more character than smooth paint alone.
Different shell types change the feel: smaller varieties like coquina or periwinkle read delicate, while larger conch or scallop shells anchor the corners and give the frame more structure.
Arrange pieces before gluing so the composition looks intentional rather than random.
The vacation feel comes through strongest when the shells stay natural instead of painted, and when you leave some frame visible between clusters. This option suits renters well because hot glue pulls off cleanly when it’s time to move.
9. Apply Metallic Leaf or Gilding
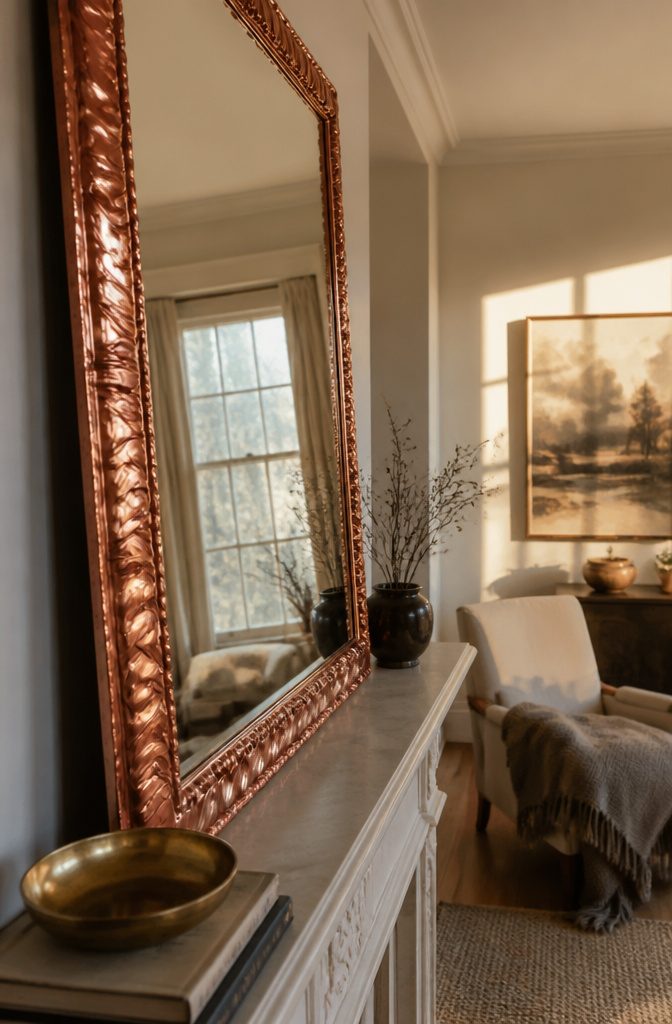
Gold, silver, or copper leaf turns a plain frame into a reflective, luminous surface that catches light the way gilded antiques do.
The metal adheres in thin sheets, leaving a finish that reads as elegant without looking new. Gold delivers warmth, silver stays cool and modern, copper splits the difference with a softer glow.
I think copper leaf works best when the room already has brass or warm metal accents, because it ties everything together without adding another color family.
Silver suits contemporary spaces where chrome or nickel already appears, and gold belongs in traditional rooms or anywhere you want a statement piece that feels anchored in history.
The shimmer changes with the angle of light, so a mirror near a window or lamp benefits most from the reflective finish.
Application takes patience, but the material itself is affordable compared to custom framing, and the result looks far more expensive than the effort required.
10. Refresh an Existing Frame with Metallic Paint or Wax

A frame that still fits the mirror but no longer fits the room gets a second life with metallic paint or wax.
I reach for oil-based finishes over acrylic when I want a convincing gold, because the color reads warmer and the sheen holds up better under handling.
Liquid Leaf in Classic Gold gives the base layer, and from there the frame needs dimension or it looks flat.
About a quarter tube of Rub N Buff in antique gold, brushed over the raised detail, breaks up the single tone without covering it entirely. The variation makes carved work look deeper.
Before any of that goes on, the frame has to be clean. Hot water, Dawn dish detergent, a small scrub brush, and Q-tips for the corners pull off years of dust and oil.
Let it dry completely, tape off the glass and the work surface, then start with the Liquid Leaf. Once that dries, the Rub N Buff goes on next, followed by MMS Antiquing Wax in small sections.
Wipe the excess with a terry cloth rag before it sets, because dried wax is harder to pull back evenly. Goo Gone cleans the brushes.
11. Cover the Frame with Fabric

Wrapping a frame with fabric gives the piece texture and a softness that paint or wood can’t match. Burlap, velvet, or patterned cotton each work, and the choice depends mostly on the room.
Burlap suits farmhouse or casual spaces, velvet adds weight and richness to a bedroom or dressing area, and patterned cotton opens up the mirror to color and print without committing to permanent decoration.
The fabric gets pulled taut around the frame and secured on the back with glue or staples, which means the mirror needs to come out of the frame first if it sits loose.
Tight corners take patience, but the padded effect that results makes the mirror feel upholstered rather than flat.
I like this method when the frame itself is plain or damaged, because the fabric hides flaws and adds dimension at the same time.
Fabric wears down faster than most other materials. Fabric collects dust and can fray at the edges, so it works better in low-traffic rooms than in a busy hallway.
12. Make a Paper-Mache Frame
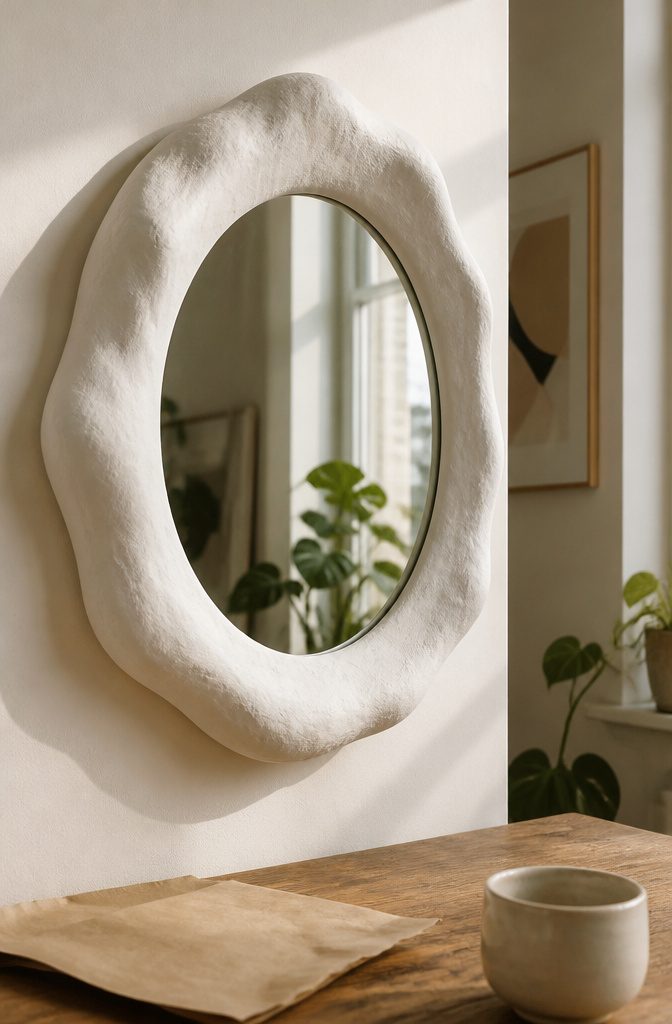
Paper-mache gives you a sculptural frame you can shape by hand, and it works particularly well around a circular mirror where you want an organic, irregular edge.
The process starts with strips of newspaper or kraft paper dipped in diluted white glue or flour paste, then layered directly over the mirror’s existing rim or over a cardboard ring you’ve cut to size.
Build up the thickness gradually, smoothing each layer before adding the next, and let the whole piece dry completely between coats.
Once the form is set, sand any rough spots and seal the surface with gesso or a coat of white primer before painting.
I’ve found that acrylic paint in matte or satin finishes reads best on paper-mache, because gloss tends to highlight any remaining texture.
If the mirror will hang in a bathroom or anywhere humid, finish with a clear polyurethane topcoat to keep moisture from softening the paper over time.
13. Paint a Mural Around the Mirror
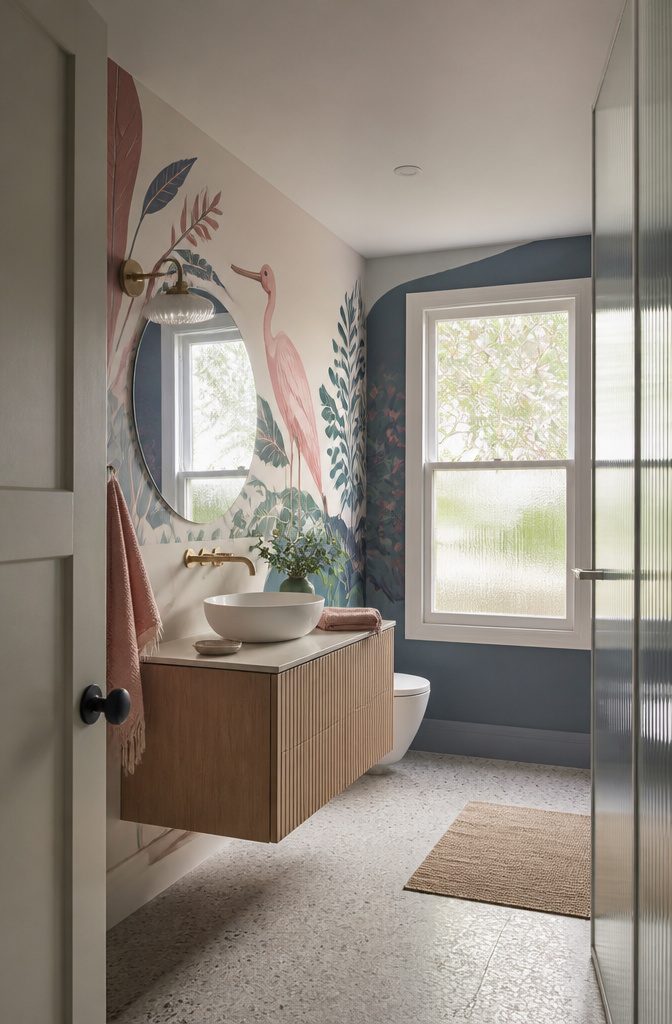
A mural extends the frame onto the wall itself, turning the mirror into part of a larger composition rather than an object sitting on top of it.
The method works best when you treat the wall as one surface and let the painted design fold around the mirror the way Jean Cocteau painted figures and patterns around doorways and shelves in his home on the French Riviera.
Artist Hopie Stockman used this approach in her rental bathroom, drawing from Mughal paintings in Jaipur and Audubon’s Spoonbill prints to paint birds and patterns in her favorite colors directly onto the drywall.
The result makes the room feel like a single work rather than a mirror hung in a neutral box.
I find this option more freeing than trying to dress up the frame itself, because you can paint as far as the design needs to go without worrying about symmetry or hardware.
The commitment level is higher if you own the place, lower than you’d think in a rental where a coat of primer covers it on move-out.
14. Build a Decorative Resin-Mold Frame
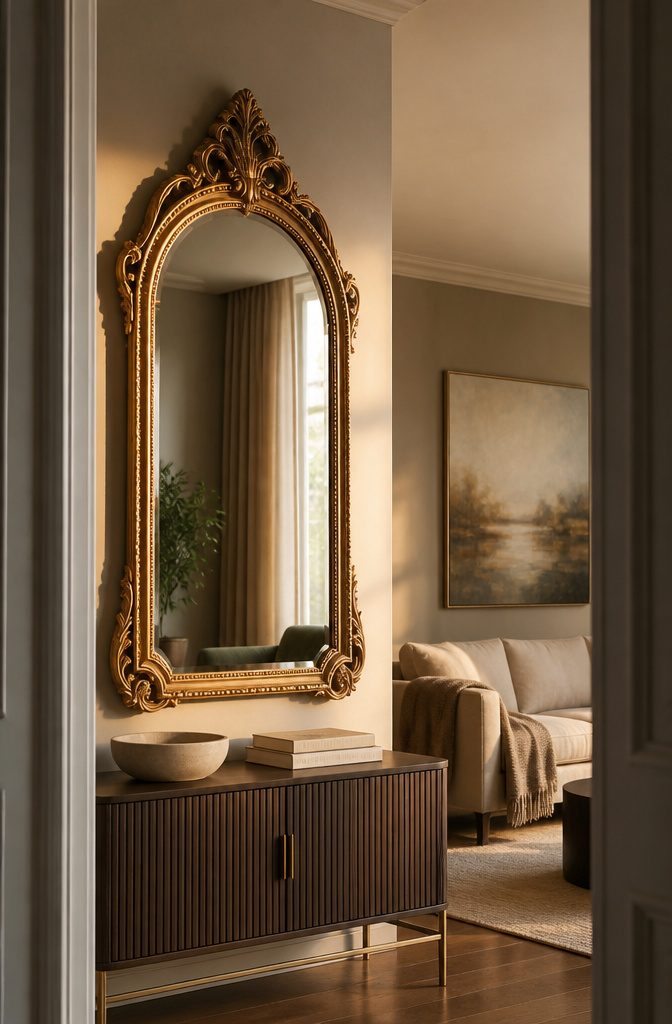
I’ve used this method to turn a plain frameless mirror into something that reads more ornate: add a wood support frame first, then layer decorative trim and resin-mold ornaments on top.
St. Louis blogger Arin Jura mounts the mirror onto scrap wood for stability, then cuts another piece of wood into an arch shape and attaches it to the top, leaving extra space above the mirror for decorative elements.
Decorative trim creates the frame outline, and the real visual weight comes from resin molds. Jura hot-glues small resin pieces around the frame to build up a Baroque-style look without the cost of carved wood.
She finishes with gold paint and Rub-N-Buff for an antiqued effect. The approach works when you want a palatial mirror for contemporary interiors but can’t justify custom millwork.
15. Use Floral or Branch Accents

Preserved flowers and dried branches attach directly to the frame with floral wire or hot glue, and the choice depends mostly on weight.
Wire works better for heavier stems because it distributes tension across multiple anchor points; hot glue is faster for lightweight faux greenery but tends to fail on anything with real mass.
I’ve found that eucalyptus, pussy willow, and pampas grass hold up longer than most other dried materials, and all three stay flexible enough to shape around the frame without snapping.
The botanical look reads romantic when the arrangement stays loose and asymmetrical. Clustering everything at one corner or running a garland along just the top edge leaves more mirror visible and keeps the decoration from competing with the reflection.
Faux greenery is the more practical option if the mirror sits in a bathroom or anywhere with humidity, since real dried flowers shed and fade faster in damp air.
16. Add Beads or Vintage Jewelry
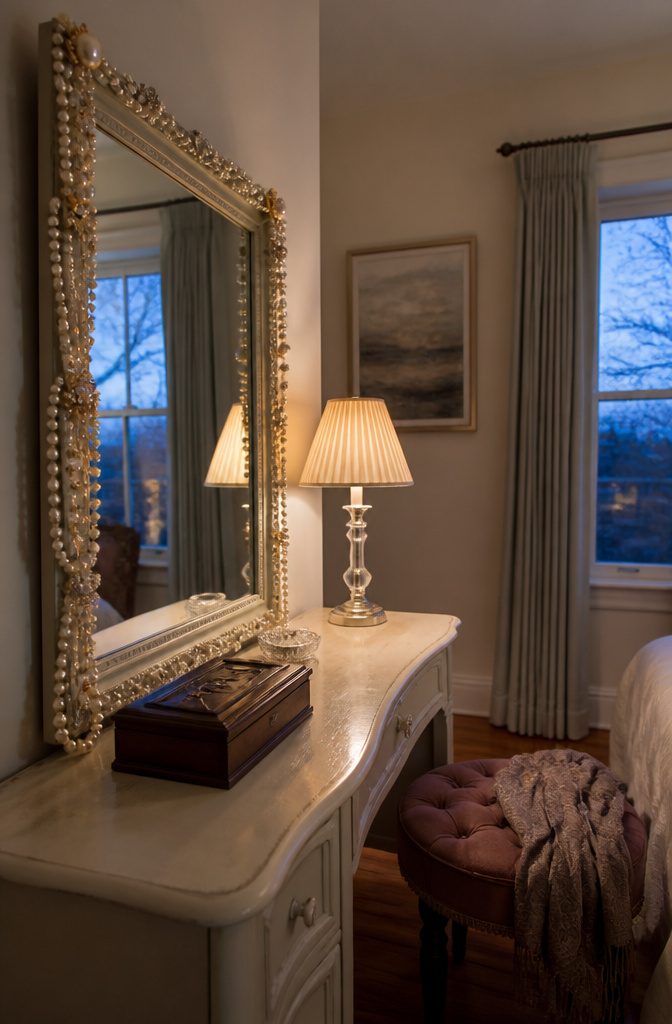
Gluing beads or vintage jewelry pieces around the frame brings sparkle and personality without much work.
Pearl strands, crystal beads, and wooden beads all work well along the edge, and each one changes the look: pearls read formal, crystal catches light for glamour, and wooden beads soften the whole piece.
I prefer hot glue for speed, though E6000 holds tighter if the mirror will be moved often.
Broken brooches, single earrings, and necklace pieces that no longer get worn turn into trim when you attach them directly to the frame.
The advantage here is sentimental weight. A relative’s jewelry becomes part of the room instead of sitting in a drawer, and the repurposed pieces add dimension that flat trim cannot match.
Arrange them loosely rather than in a rigid grid; too much symmetry flattens the vintage look you came for.
17. Use Other Repurposed or Decorative Materials

Wine corks arranged in rows or glued on edge create a textured border that adds casual warmth to a mirror frame.
The natural material brings in color variation that changes with each bottle you open, and whole corks work better than sliced if you want the writing and stamp detail to show.
I find this works best in a kitchen or dining area where the wine story makes sense, and it’s a practical use for something most people have already started collecting.
Adhesive will need to hold the weight, so a construction adhesive or hot glue works more reliably than craft glue.
Vintage flatware arranged radiating outward from the frame turns an ordinary mirror into a conversation piece.
Spoons, forks, and serving pieces in mismatched silver plate catch light differently than a painted or wrapped frame, and the metallic shine holds up in humid spaces where paper or fabric would soften.
Secure each piece firmly enough that it stays put but gently enough that you don’t bend the metal out of shape during installation.
Small clips designed to hold photos or papers can also line a frame edge if the mirror is lightweight, though they add function rather than just decoration.
Personalizing a Mirror to Suit the Room

A decorated mirror frame can turn a generic piece into something that belongs in your space.
I usually think of it as choosing between two goals: either you want the mirror to sit quietly within the room’s existing style, or you want it to become the thing people notice first when they walk in.
Both directions work, and the choice depends on what else is competing for attention on that wall.
When a mirror acts as a focal point, the frame carries most of the visual weight.
That means bolder materials, more texture, or a finish that contrasts with the wall color. I see this work best in entryways and living rooms where the mirror sits alone or anchors a gallery arrangement.
A plain frameless mirror in the same spot reads as functional rather than decorative, and the frame is what closes that gap.
If you want cohesion instead, frame decoration ties the mirror to colors, materials, or themes already present in the room.
A coastal bedroom benefits from shells or rope; a room with warm wood furniture often wants a stained or painted wood frame that picks up the same tones.
The decorated frame becomes part of the larger design rather than an independent statement, and that approach tends to make smaller rooms feel more intentional without adding visual noise.
Choosing a Style or Materials

Choosing a Style or Materials
The look you’re after decides the material before anything else.
Stained or painted wood is what most people reach for when they want a builder-grade mirror to feel finished, and raw wood works if the rest of the room leans natural.
Metal frames give you an industrial edge, though they’re harder to attach cleanly to glass without visible hardware. I tend to favor wood for first projects because mistakes sand out and you can adjust the fit as you go.
Paint opens up more options than stain. White and dark gray are both popular when you want something neutral, but oil-based gold leafing paint gives you a much better luster than acrylic metallics if you’re after gilding.
Tile, rope, fabric, and small embellishments like craft matchsticks can all dress up a plain frame, and each one changes how the mirror reads in the room.
The material you pick doesn’t lock you into one style, but it does decide how much prep and what kind of finish work you’ll be doing.
Frequently Asked Questions
Can you add a frame to an existing mirror?
Yes, you can frame an existing mirror by building a wood frame around it, wrapping rope or fabric over a plain frame, or gluing decorative materials like shells or beads directly to the edges.
Wood frames are the most common approach and can be built for under $30 using basic lumber and screws.
If your mirror already has a frame you want to keep, you can refresh it with paint, metallic leaf, or by adding embellishments on top of the existing structure.
What glue works best for DIY mirror frame projects?
Hot glue works well for lightweight materials like faux greenery, beads, and shells because it sets fast and pulls off cleanly later. E6000 holds tighter for heavier items or mirrors that will be moved often.
Construction adhesive is the better choice for wine corks and other materials with real weight, and premixed tile adhesive works specifically for mosaic borders where you need both grip and grout in a single product.
What are some creative ways to decorate a wall mirror?
You can wrap the frame in rope for a coastal look, attach shells or dried flowers for texture, or glue craft sticks in a radiating sunburst pattern.
Mosaic tile borders, metallic leaf, and fabric wrapping all change the mirror’s appearance without replacing it.
For renters, removable options like frosted vinyl decals, hot-glued embellishments, or LED strips mounted behind the frame add decoration that comes off cleanly when you move.