
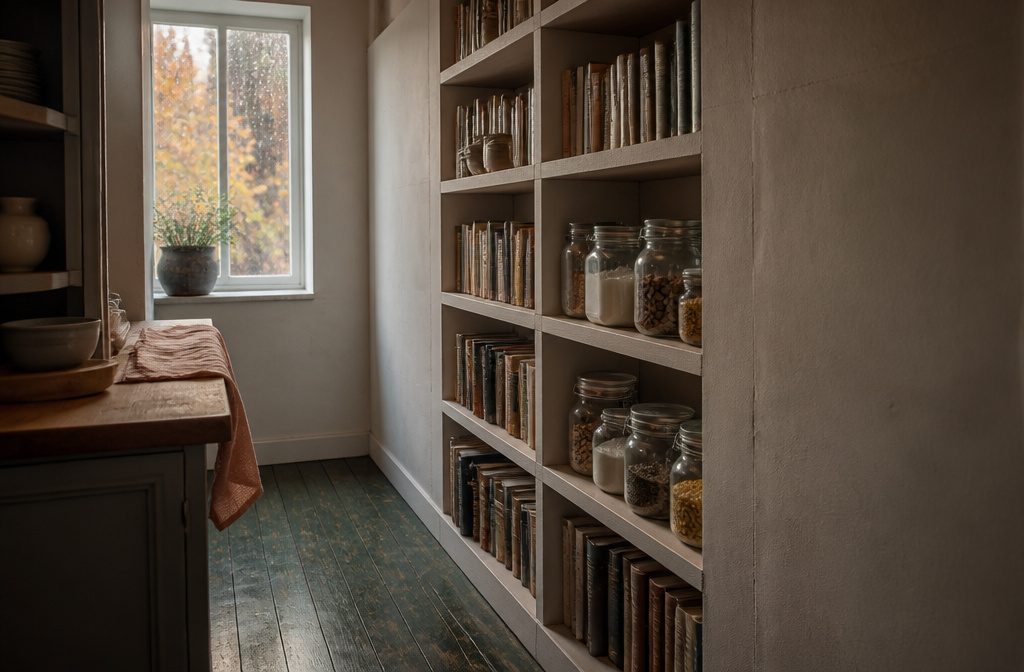
A basic hidden door with concealed hinges and a bookcase front runs $1,000 to $5,000 and takes four days if you handle the carpentry yourself.
Most builds fail because the door sits open a crack or the panel spacing breaks rhythm when it closes.
SOSS hinges sit completely inside the door edge so no barrel shows, and ⅛-inch tile spacers keep the gap between boards consistent across the joint where the door meets the wall.
1. Choose the Location and Purpose

The first call is what the room solves.
A wine cellar needs cool, stable air and no vibration. A playroom for children wants durable surfaces and enough square footage that two kids can move without colliding.
A hobby space for painting or woodworking needs ventilation strong enough to clear fumes and dust. Storage for valuables prioritizes discrete access over comfort.
A game room, library, man-cave, she-shed or meeting room can work almost anywhere if the proportions fit, but a room you plan to spend hours in needs headroom above six and a half feet and enough width that furniture does not crowd the door.
Location follows function. Basement corners offer natural concealment and tend to sit away from load-bearing posts, but check for moisture and low ceilings before committing.
Closets and under-stair spaces hide entrances well and require less structural work, though headroom drops fast under a staircase. Walk the space and note where utilities run; rerouting plumbing or HVAC to make room costs more than most builds justify.
If the room will hold conversations or loud equipment, test whether sound carries to adjoining rooms. Natural light matters for some uses and ruins secrecy for others.
2. Plan the Design and Budget

Once the location is set, drafting a detailed plan means deciding how much of the work you can handle and what needs professional help.
Larger secret rooms require an architect and a licensed contractor — structural changes, permits, and code compliance are not areas to improvise.
If the project stays small and you are comfortable with framing, door hardware, and finish carpentry, a DIY approach can work, though it is still a sizeable job.
The timeline breaks into four phases. Planning takes two to four weeks: nailing down the room’s purpose, evaluating the space, and settling on a budget.
Design and engineering follow, another two to four weeks for detailed plans and permits. Construction runs four to eight weeks — framing, door installation, electrical, and any structural reinforcement.
Finishing takes one to three weeks for paint, flooring, and final testing. Altogether, expect nine to nineteen weeks.
Budget ranges spread wide. Entry-level hidden rooms run $1,000 to $5,000 for a basic bookcase door, minimal structural work, and simple finishes.
Mid-range projects cost $5,000 to $25,000 and include custom doors, professional installation, and code-compliant work. High-end builds reach $25,000 to $100,000 with premium hardware, custom design, and advanced features like automation.
Luxury installations start at $100,000 and climb past $500,000 for bespoke systems, integrated technology, and climate control. Your budget should cover carpentry, hardware, electrical points, wall paint, and clean detailing so the hidden entry blends completely into the surrounding surface.
3. Gather Materials and Tools
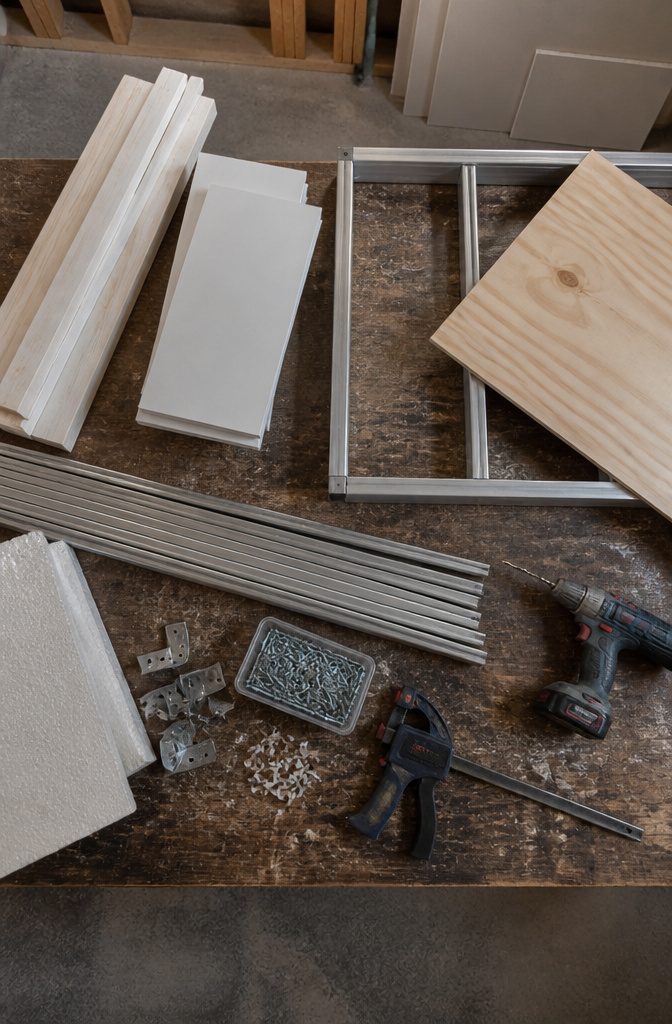
Here’s what you need before you start framing or cutting:
- Two SOSS hinges to keep the pivot invisible
- Framing lumber for the doorway structure
- Drywall sheets for finishing the walls around the entrance
- Primed pine for the door jamb, planed to about ⅜-inch thickness
- 1-inch-thick primed project boards, 2½ inches wide, for the door frame perimeter and interior nailers
- Square aluminum tubing for a lightweight inner frame that stays rigid
- 90-degree brackets and self-tapping metal screws to connect the aluminum
- Two panels of ¼-inch plywood to sandwich the frame and reach standard door thickness
- 1-inch-thick foam insulation to fill the hollow center
- Liquid Nails for bonding the insulation
- ⅛-inch tile spacers for setting door gaps
- Trim, paint, or paneling to match the surrounding wall
- Cabinet clamps to hold seams tight while assembling the door
- A drill with a metal bit for pilot holes through the aluminum
Aluminum tubing keeps the door from warping when you build on an uneven surface. Foam in the center stops it from sounding hollow when someone knocks.
4. Build the Doorway Frame and Jamb
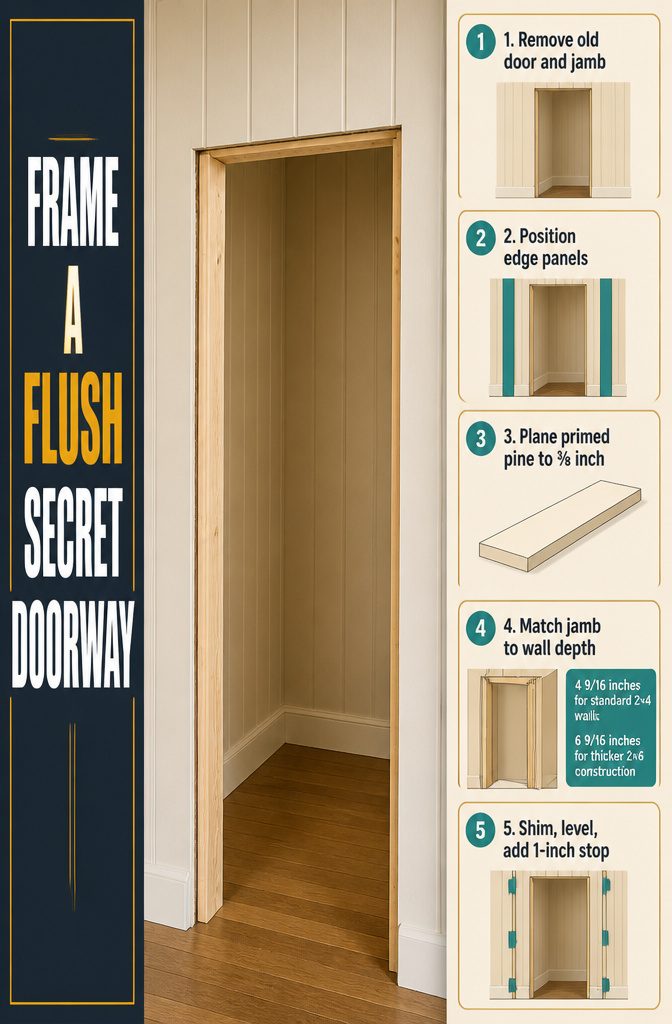
- Remove the old door and jamb completely. Strip out the existing frame so you have a clean opening to work from.
- Set the edge panels in place as your positioning guide. If you’re matching vertical paneling or board-and-batten elsewhere in the room, those edge pieces tell you where the new jamb needs to sit so the seams line up and the door disappears into the wall treatment.
- Build the new jamb from primed pine, planed down to about ⅜ inch thickness. Standard jamb stock is too thick for a flush hidden door, so you’ll need to run each piece through a planer until it sits nearly flat with the surrounding wall.
- Pick your jamb depth based on wall framing: 4 9/16 inches for standard 2×4 walls, 6 9/16 inches for thicker 2×6 construction. Measure from drywall face to drywall face if you’re unsure which you have.
- Shim the jamb every few inches to keep it level and sturdy. Check plumb on both sides and at the head before fastening.
- Add a 1-inch overhang on the handle side to act as a door stop. Without it, the door swings through the frame instead of closing against something solid.
5. Build the Hidden Door

- Cut the aluminum tubing to fit inside a perimeter frame made from 1-inch-thick primed project boards. The square tubing keeps the door level and prevents warping, which matters when you are building on an uneven garage or basement floor.
- Join the corners with 90-degree brackets and self-tapping metal screws, then drill through the aluminum with a metal bit so you can attach the inner metal frame to the outer wooden frame. Use cabinet clamps to pull the seams tight while you work.
- Fill the center with 1-inch-thick foam insulation, secured with Liquid Nails, so the door does not sound hollow when someone knocks on it. Add more 1-inch-thick project boards as nailers wherever you will mount hardware later.
- Sandwich the frame between two ¼-inch plywood panels to reach a standard 1.5-inch thickness. This keeps the door proportioned like any interior door in the house, which helps it disappear.
6. Hang the Door
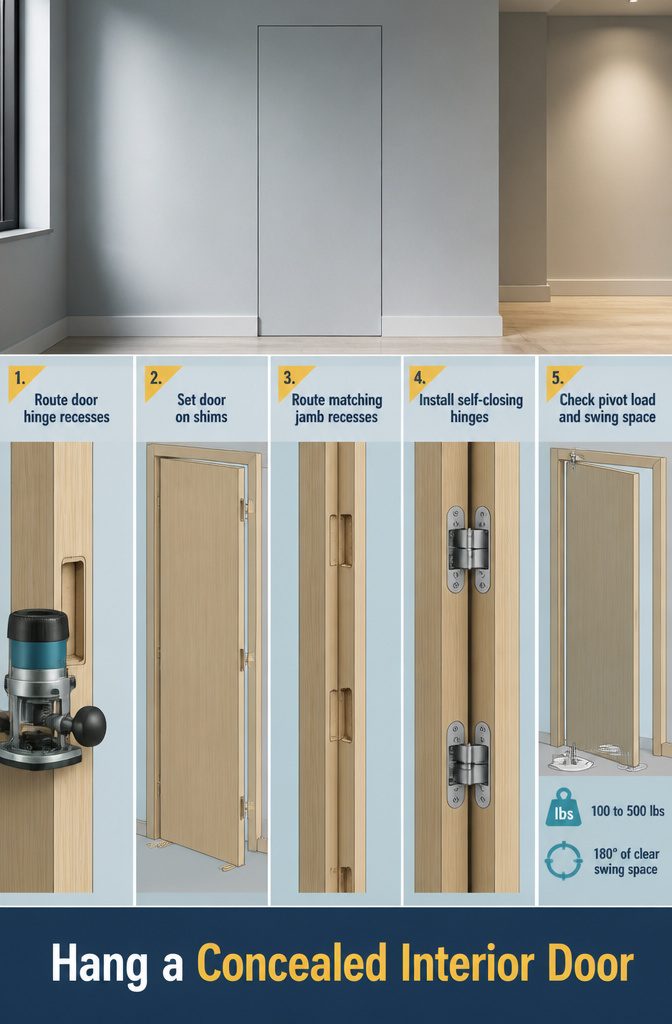
Hang the Door
- Route the hinge locations on the door so the hinges sit flush with the surface. A router set to the hinge plate depth keeps the door face flat and maintains the hidden look.
- Set the door in place using shims to hold it at the correct height while you work. The shims let you adjust alignment before committing to hardware placement.
- Mark the hinge locations on the jamb, then route those spots out as well. Both sides need to be flush or the door will bind or leave a visible gap.
- Install self-closing hinges so the door closes on its own without needing a knob on the outside. This keeps the concealed entrance from requiring any visible hardware to operate.
- If you’re using pivot hinges instead, check the load capacity before you buy. Pivot hardware ranges from 100 to 500 lbs depending on grade, and you’ll need 180° of clear swing space for the door to open fully. Pivot hinges distribute weight through top and bottom points rather than along one edge, which works better for heavier doors but demands more floor clearance.
7. Blend the Door Into the Wall

The finish is where most hidden doors give themselves away. Adding paneling to both the wall and the door face so the surface runs flush makes the door disappear into the wall plane.
When you glue and nail each board, you cut down the vibration and looseness that makes a hollow bookshelf thump when it swings.
The detail that matters most is matching the gaps between panels. A ⅛-inch tile spacer keeps the spacing consistent across every joint, so the door doesn’t break the rhythm when it’s closed.
Even with careful finish work, the door can sit open a crack if the latch doesn’t hold or the weight pulls it forward slightly.
Magnets set into the door edge and the jamb pull it closed and keep it flush without visible hardware.
Invisible hinges like the SOSS hinge sit completely inside the door edge and jamb, so there’s no barrel or pin showing when the door is shut.
Concealment and Entrance Design
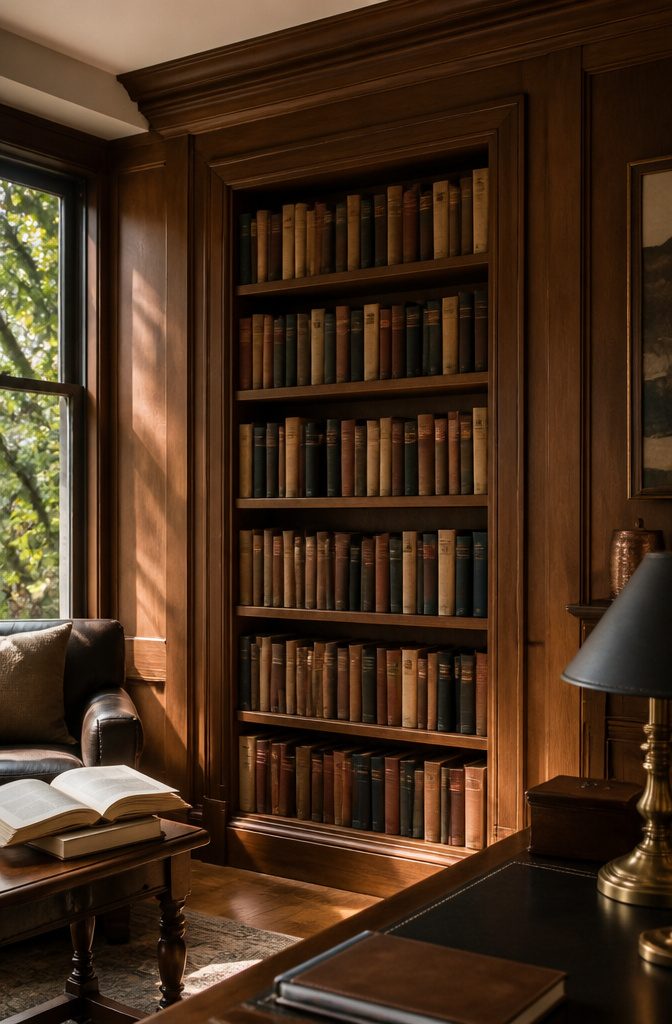
The entrance decides whether the room stays secret or becomes obvious the first time someone leans against the wrong panel.
The most reliable approach is to hide the door behind something ordinary: a bookcase built into the wall, a closet front, a full-height mirror, or a simple wall panel that reads as part of the trim.
The concealment works when the entrance matches nearby surfaces in finish, proportion, and detail, so nothing about it invites a closer look.
A bookshelf on concealed hinges is one of the most common hidden door ideas, and it still works because people expect books to sit still.
One version I keep seeing uses a single book attached to a string that connects to a gate latch on the other side of the unit.
The book tilts back when you pull it, the latch releases, and the entire bookcase swings open.
Foyr covers 27 hidden door ideas in their guide, and most of them rely on the same principle: the entrance has to look like it belongs, or it stops being hidden the moment someone notices the seam.
Safety and Code Compliance
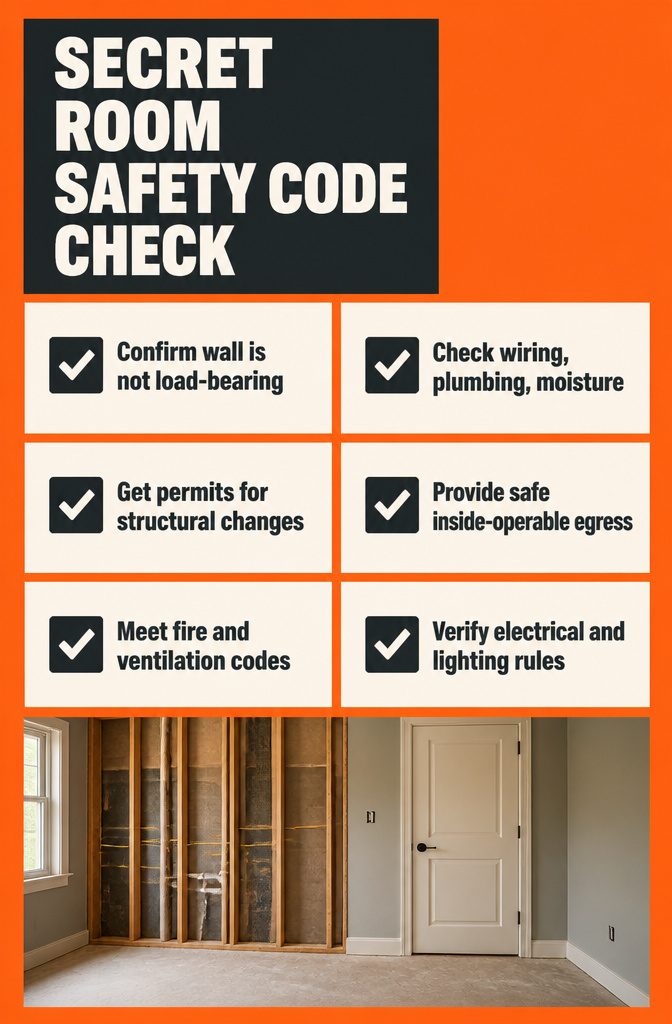
Before you alter any wall, confirm it is not load-bearing.
A misjudgment here risks structural failure and expensive fixes. Check for hidden wiring, plumbing runs, and moisture stains before you cut, and size the door frame to avoid overloading the opening.
Most jurisdictions require permits for structural changes. Building codes treat a hidden room the same as any other:
- Egress: Every room needs a safe exit. Bedrooms need two. The entrance must open from inside.
- Fire safety: Walls meet fire rating standards for their location.
- Ventilation: Proper airflow prevents condensation and mold.
- Electrical: Outlets and wiring follow current safety rules.
- Lighting: Adequate fixtures for the room’s size and use.
Local codes vary. Get professional input from an engineer or architect to confirm compliance before work starts, especially if you are adding electrical or creating enclosed space.
Meeting code protects safety now and prevents complications later if you sell, renovate, or file an insurance claim.
Timeline and When to Call a Professional
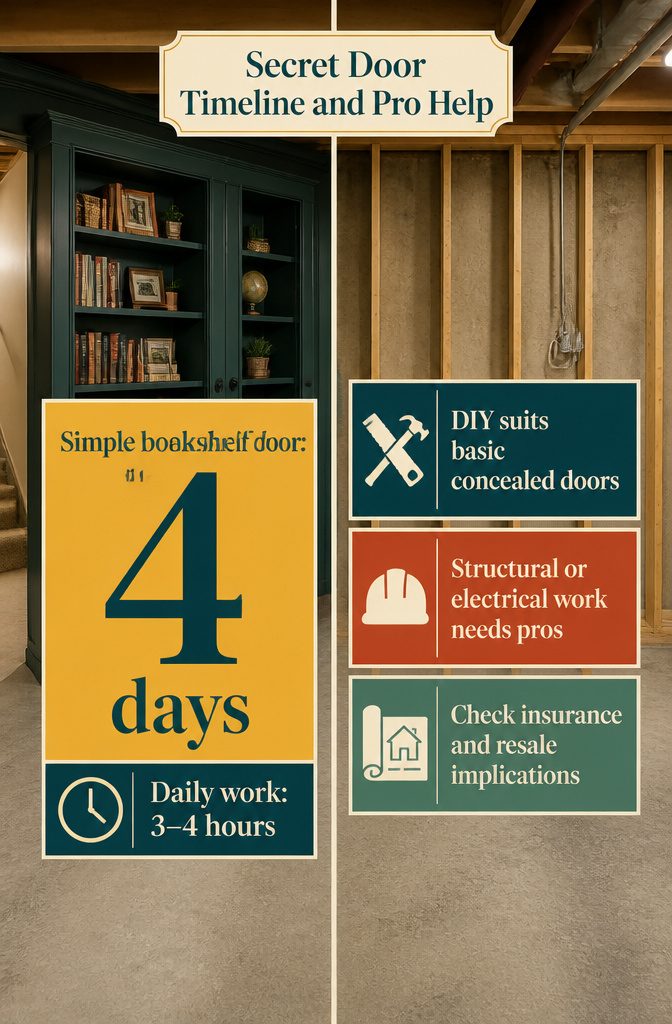
The time investment depends on how much you’re changing. A simple bookcase door can go up in four days, averaging three to four hours a day, assuming you’re comfortable with basic carpentry and have a clear plan.
If you’re adding structural work, electrical wiring, or custom framing, the timeline stretches considerably, and so does the case for hiring help.
For larger secret rooms, I’d bring in an architect and a professional contractor from the start. The planning alone becomes a bigger lift, and anything that touches load-bearing walls or electrical systems needs someone licensed.
DIY makes sense for straightforward projects like a swinging bookshelf or a basic concealed door. Professional installation wins when code compliance, structural changes, or custom millwork enter the picture.
Two other reasons to call someone: major modifications often need to be disclosed to your insurance carrier, and keeping the work compliant protects you if you sell.
A well-designed, code-compliant hidden room can add home value rather than creating a liability during inspection.
Frequently Asked Questions
What is a secret room?
A secret room is a concealed space inside a home, hidden from plain sight and accessed through a disguised entrance.
Common uses include wine cellars, hobby spaces, storage for valuables, playrooms, libraries, and man-caves. The entrance typically hides behind something ordinary like a bookcase, closet front, mirror, or wall panel that matches surrounding surfaces.
How long does it take to build a secret room in a house?
A simple bookcase door takes about 4 days at 3 to 4 hours per day if you handle basic carpentry yourself.
Larger projects involving structural changes, custom framing, or electrical work run 9 to 19 weeks total: 2 to 4 weeks for planning, another 2 to 4 weeks for design and permits, 4 to 8 weeks for construction, and 1 to 3 weeks for finishing.
Will building a secret room affect home insurance?
Major modifications often need to be disclosed to your insurance carrier.
Keeping work code-compliant and maintaining records protects you during claims and if you sell. A well-designed, compliant hidden room can add home value rather than creating a liability during inspection.
Is it legal to build a secret room in a house?
Yes, if you follow local building codes and safety requirements.
Most jurisdictions require permits for structural changes. The room must meet egress, fire safety, ventilation, electrical, and lighting standards, and the entrance must open from inside.
What safety features should a secret room have?
Every room needs a safe exit that opens from inside, and bedrooms need two exits. Walls must meet fire rating standards, ventilation prevents mold, electrical outlets follow current safety rules, and lighting fits the room’s size and use.
Confirm the wall is not load-bearing before you alter it, and check for hidden wiring, plumbing, and moisture.
Do hidden rooms require building permits?
Yes, most jurisdictions require permits for structural changes.
Building codes treat a hidden room the same as any other space. Get professional input from an engineer or architect to confirm compliance before work starts, especially if you are adding electrical or creating enclosed space.
How much does a basic hidden room cost?
Entry-level hidden rooms run $1,000 to $5,000 for a basic bookcase door, minimal structural work, and simple finishes. Mid-range projects cost $5,000 to $25,000, high-end builds reach $25,000 to $100,000, and luxury installations start at $100,000 and climb past $500,000.
Can I add a hidden room to an existing house?
Yes, with proper planning and structural assessment. Basement corners offer natural concealment, closets and under-stair spaces hide entrances well, and walls can accommodate hidden doors if you avoid load-bearing posts and major utilities.
Test whether sound carries to adjoining rooms if the room will hold conversations or loud equipment.
What’s the best location for a hidden room?
Behind bookcases, under stairs, in closets, or behind wall panels where the entrance can match nearby surfaces in finish, proportion, and detail.
Basement corners sit away from load-bearing posts but check for moisture and low ceilings. A room you plan to spend hours in needs headroom above 6.5 feet and enough width that furniture does not crowd the door.
Do hidden rooms add home value?
Yes, when well-designed and code-compliant.
A compliant hidden room protects you during inspection instead of creating a liability. Meeting code prevents complications later if you sell, renovate, or file an insurance claim.
How to make a secret room without construction?
Use existing doorways and add a concealed entrance like a bookcase on hinges or a mirror that swings open.
One approach attaches a single book to a string that connects to a gate latch on the other side of the unit; the book tilts back when you pull it, the latch releases, and the bookcase swings open.
This method requires basic carpentry and hardware installation but avoids framing or structural work.