

Refinishing furniture takes a weekend to a week depending on structural damage, and the step most people skip—cleaning off old wax and grease before they start—is why their new finish peels or blotches within months.
If you’re working with veneer rather than solid wood, you can’t sand aggressively without cutting through the thin layer, which limits your options before you’ve even started.
1. Assess the Piece and Decide What You Want

The first thing to do is figure out whether you’re working with solid wood or veneer.
Check the edges and any unfinished areas like drawer fronts or the underside of a tabletop. Solid wood shows consistent grain running through the thickness.
Veneer is a thin layer glued to a core, and you’ll see a different material or grain direction at the edge. Veneer changes your approach.
Cuban mahogany veneer on older pieces can be double or triple the thickness of modern veneer, which is usually around 1/32 inch, but any veneer limits how much sanding you can do before you break through to the substrate.
Next, look for structural problems.
Wobbly legs may need regluing or tightened screws. Deep gouges, scratches, or nail holes can be filled with epoxy putty or filling compound and sanded flush.
If the piece is valuable or antique, this is the moment to call in a professional. Owners on Reddit wrestle with this question regularly: at what point does damage outweigh the loss in value from refinishing?
If the finish is shot but the structure is sound, you have options. You can revive what’s there, restore it to original condition, update the look with paint or a different finish, or strip it down and refinish completely.
Beeswax is popular for older furniture, but paint won’t stick to a waxed surface, and removing it later is nearly impossible.
2. Clean the Surface Before Anything Else

Before you strip, sand, or refinish anything, you need to remove every trace of dust, grease, old wax, and surface grime.
A gentle grease remover or wood cleaner works for most pieces; apply it with a soft cloth, working across the entire surface.
Then wipe the furniture down with a damp sponge or rag to lift any cleaner residue, dry it with a towel, and let the remaining dampness air out completely.
I treat this step as non-negotiable, because contaminants sit between the wood and whatever you apply next.
New stain, paint, or topcoat will not bond properly over a layer of old wax or kitchen grease, and the finish will peel or blotch within months.
The time you spend cleaning now decides whether the rest of the work holds or fails early.
3. Repair Structural Damage and Surface Flaws
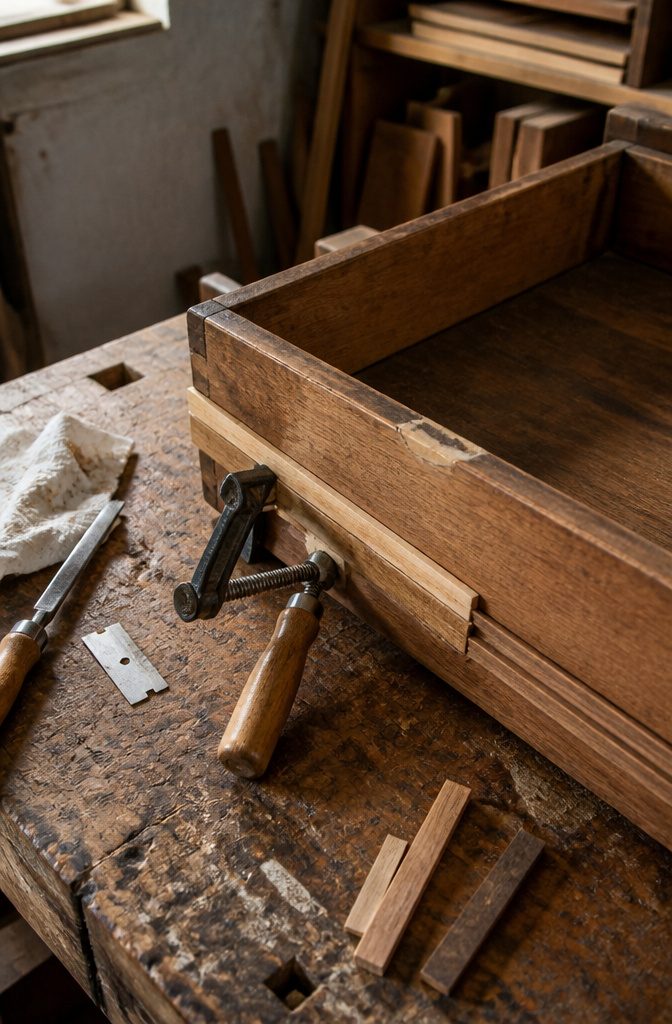
I glue joints before I sand or strip anything, because sawdust and finish residue work their way into seams and stop wood glue from making full contact.
If a chair leg rocks or a table apron pulls away from its rail, clamp the pieces dry first to check the fit, then apply wood glue liberally enough that you see squeeze-out at the joint.
Wipe off the excess with a damp paper towel and leave the clamps on until the glue sets.
Drawer runners hollow out after decades of sliding, and I replace them rather than patching them.
Furniture built before the 1950s was commonly glued with animal hide glue, so removing old runners often means loosening the original bond with denatured alcohol, then separating the wood with a chisel.
Once the runners are off, you can flip the same piece of wood upside down or cut new strips to match.
Drawer sides wear the same way, and if the concave wear has not cut into the groove for the drawer bottom, flatten the damaged area with a router and a ½-inch straight bit, then glue on strips of wood and plane them flush.
Veneer tends to chip around the edges, where something can catch on it. Use a razor to gently check that the veneer isn’t loose from the substrate. If it is, glue it down.
Once the veneer is secure, fill chips and dents with epoxy putty like KwikWood. Clear any loose wood or old glue with a razor first, then mix and apply the epoxy according to the manufacturer’s directions.
After it sets, sand it smooth and treat it like wood through the finishing steps. Matching the color of epoxy to the surrounding wood takes patience, so plan for touch-up stain or finish later.
4. Remove or Prepare the Old Finish

The choice depends on what the existing finish looks like and what you want to end with.
If you’re planning to apply an oil finish or something else that needs contact with bare wood, you’ll be sanding through to raw material.
Start with coarse sandpaper, approximately 120 grit, to remove paint or finish, then work up through medium (150 grit) and fine (220 grit) to smooth the surface.
Sand in the direction of the grain, and stop before you go past 320 grit—wood that’s too smooth won’t hold stain properly.
Chemical strippers offer an alternative when sanding becomes tedious or when you’re dealing with carved details. Most strippers sit for about ten minutes before you wipe the finish away.
Wait at least 24 hours after stripping before you apply any new finish, giving solvents time to evaporate completely. Strippers demand ventilation and eye protection, so the prep adds time.
If the piece has veneer, proceed carefully.
Sanding too aggressively will cut through the thin layer, and once you’ve gone past it, the piece is compromised. For furniture with an intact stain you like, stop after removing the topcoat and move straight to the new finish.
5. Apply Your Chosen Finish
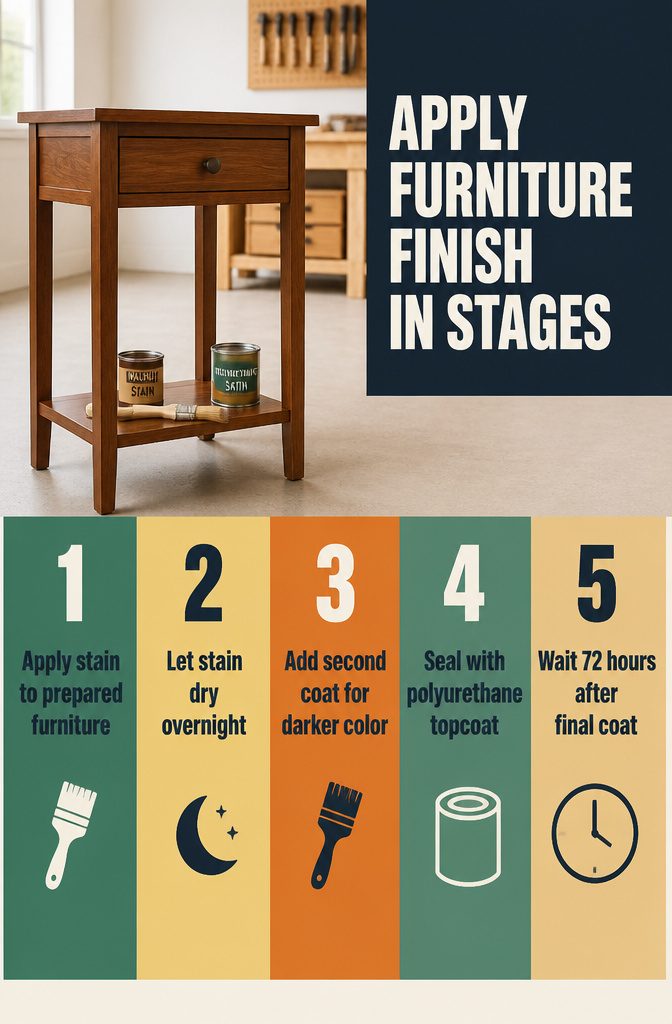
The finish you choose changes how the piece looks and how long that look lasts.
Stain with a clear coat is the default for most furniture: apply the stain, let it dry overnight, add a second coat if you want darker color, then seal it with polyurethane or a similar topcoat.
Oil finishes like tung or Danish oil sit on the surface for 15 to 30 minutes before you wipe off the excess, and they need at least two coats with 24 hours between them and light sanding at 600 grit between applications.
Wait 72 hours after the final coat before you put anything on the piece.
Shellac was used on nearly all furniture from the 1820s to the 1920s, and it still works if you want a period-appropriate gloss.
Lacquer with a sealer goes on faster but needs good ventilation. Paint covers imperfections without the sanding a stain demands.
Wax gives a soft sheen but almost no protection. Gel stain is thicker and easier to control, with 30 minutes to an hour between coats.
6. Let the Piece Cure Before You Use It

The finish may look dry after a few hours, but it needs time to harden all the way through before the piece can take real use.
Gel stain and most topcoats need at least 24 hours to cure, and oil finishes usually take 72 hours before they stop feeling tacky when you press a fingernail into an inconspicuous spot.
Professional lacquer work can take a full week to reach its final hardness, especially in cool or humid conditions.
I’ve seen people set a refinished tabletop back into service too early, and the result is fingerprints that press into the surface, rings from glasses, and dull spots where something dragged across.
The finish still looked complete, but it wasn’t done curing.
Temperature matters here too. A cold garage will add time, while a warm room with good airflow helps the process move faster.
If you’re not sure, wait an extra day. The piece has already been out of service this long, and rushing the final step is the fastest way to undo the work you just finished.
Quick Revival With Oil and Vinegar

- Wipe the furniture with a damp microfiber cloth to clear dust and grime.
- Mix 3 parts olive oil to 1 part vinegar in a small bowl — 3 tablespoons oil and 1 tablespoon vinegar is enough to treat two chairs and a small dresser.
- Dip a soft rag in the solution and rub it into the wood, working in small sections.
- Let it sit for about 30 minutes before using the piece.
This treatment only works on real wood.
Laminate and pressed board won’t take the finish. Cider vinegar, white vinegar, and any cooking oil you have will do the job — no need to buy specialty products.
The oil absorbs into dry wood and brings back a low sheen without needing to wipe it off, unless you see pooling in one spot.
When to Restore Rather Than Refinish
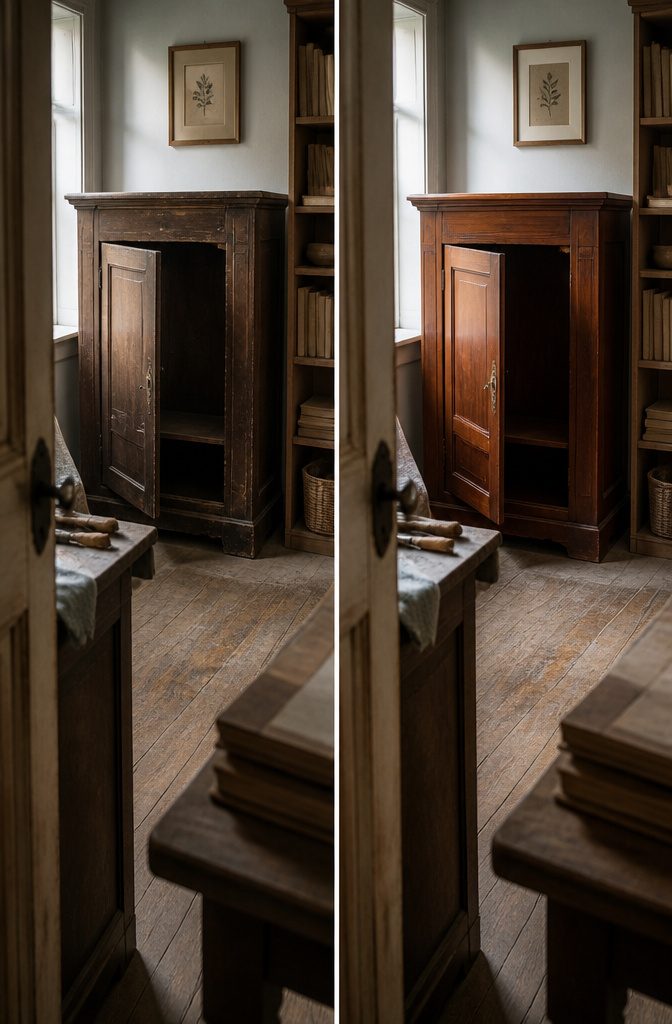
Restoration returns a piece to its period-specific condition, keeping original finishes, hardware, and construction methods intact.
Refinishing prioritizes appearance over history—you sand through decades of patina, apply a modern topcoat, and make the piece look new rather than preserving what made it distinct.
If the furniture carries dates, names, stamps, or other markings, leave them alone. Those details reflect the piece’s history, add character, and raise its value, and covering or sanding them off erases information you cannot put back.
For old or valuable furniture, talk to a professional before you start. A genuine antique needs careful assessment, and restoration work on a significant piece often requires materials and techniques that match the original period.
Veneered furniture with heavy varnish presents another reason to pause: removing that finish without damaging the thin veneer underneath is tricky work for someone learning the process.
If the piece was stored somewhere cold for a long time, let it warm up gradually—moving it straight into a heated room can cause joints to crack as the wood adjusts.
Materials and Products That Work
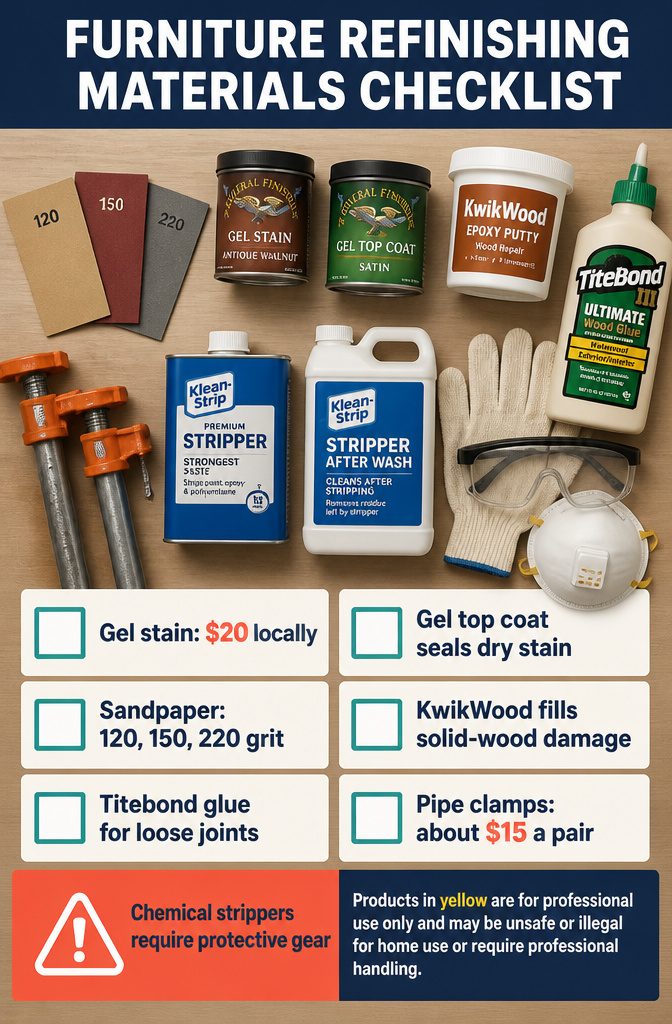
These are the products and prices that worked in real refinishing projects.
Lead with this short intro, then bullet the materials:
The following materials come up in professional and DIY refinishing jobs. Some items like methylene chloride, professional sealer, and nitro-cellulose lacquer are unsafe for home use or require professional handling.
- General Finishes Gel Stain in Antique Walnut — $20 per half-pint locally, $16.95 online
- General Finishes Gel Top Coat in Satin — seals the stain once it dries
- Sandpaper in 120, 150, and 220 grit — the typical professional range; do not sand past 320 grit or the wood will lose its ability to hold stain
- KwikWood epoxy putty — fills chips, dents, and gouges in solid wood
- Titebond Wood Glue — for regluing loose joints; clamp until you see squeeze-out at the perimeter
- Pipe clamps fitted to ½-inch or ¾-inch pipe — a pair of fixtures costs around $15 and works at any length you need, which beats spending $200 on a set of parallel clamps
- Klean-Strip Chemical Stripper — removes paint and finishes when sanding alone won’t cut it
- Klean-Strip Stripper After Wash — used with steel wool to clear residue after the stripper sits
- Methylene chloride — what professionals use to strip furniture cleanly, but not safe or legal for amateur refinishers; only available to licensed businesses
- Professional sanding sealer and nitro-cellulose-based catalyzed lacquer — the finish coat professionals apply after stripping and sanding
Any chemical stripper requires ventilation, eye protection, thick gloves, and a respirator that covers both eyes and lungs.
Upholstery and Hardware Need Attention Too

Furniture restoration runs beyond the wood itself, and ignoring upholstery or hardware leaves a piece looking half-done. Fabric upholstery needs vacuuming first to pull out dust, debris, and pet hair before you touch anything with liquid.
For light stains or mild odors, spot-clean with an upholstery cleaner or fabric-safe detergent, but don’t saturate the material or you’ll drive the stain deeper and risk mildew.
Leather takes a different route: clean and condition it to prevent cracking, especially if the piece sat unused for years. Heavy stains on fabric are better handed off to professional upholstery cleaners than fought at home.
Hardware deserves the same effort.
Remove drawer pulls, handles, and hinges from the piece, then clean them with metal cleaner or polish and a soft cloth. That step removes rust, tarnish, and corrosion, and the metal comes back with the shine it had originally.
Leaving hardware in place while you work on wood finishes guarantees you’ll either skip it or splash stripper on metal that didn’t need it.
Safety Precautions for Stripping and Finishing
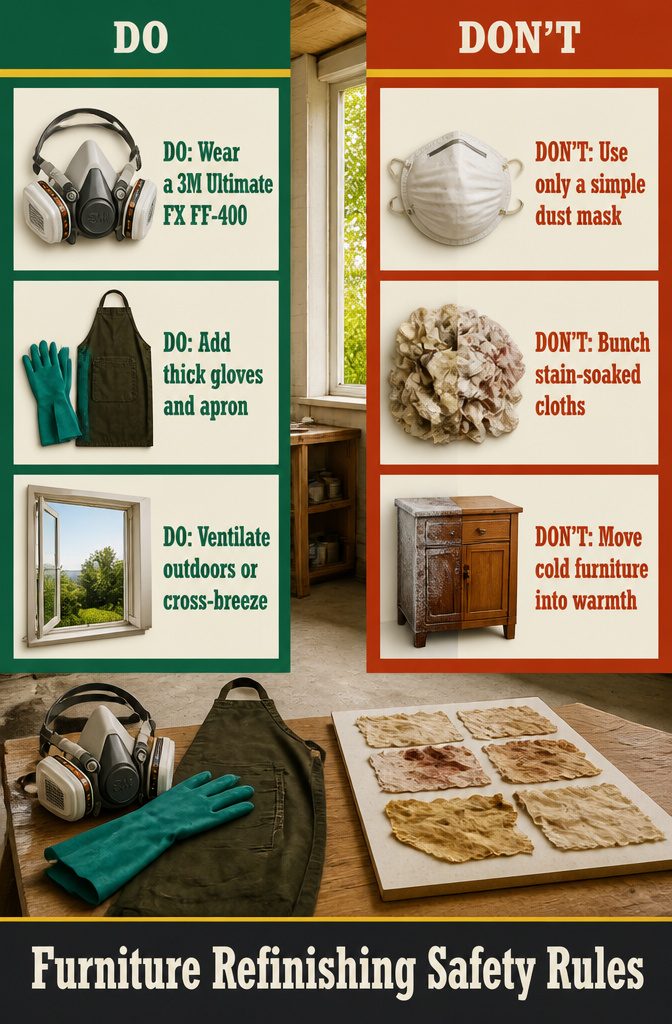
Chemical strippers and oil-based finishes both carry real hazards, so gear up before you open anything.
- Wear a 3M Ultimate FX FF-400 respirator rather than a simple dust mask; it protects your lungs and eyes together and limits fog-up by redirecting exhaled breath.
- Add thick rubber or nitrile gloves, an apron, and separate eye protection if you skip the respirator.
- Work in a well-ventilated area, ideally outdoors or with doors and windows open on opposite walls.
- Oily rags and stain-soaked cloths can ignite on their own if bunched up. Lay them flat to dry completely before disposal.
- If the piece spent time in a cold, damp space, bring it to room temperature gradually. Moving it straight into warm, dry air can crack the joints.
What Professional Refinishing Looks Like

Professional refinishing follows a sequence most DIY guides skip: structural work first, then chemical stripping with methylene chloride, a restricted solvent that requires a business license to purchase from specialty retailers.
The chemical does the heavy lifting on thick finishes and layered paint, but access alone makes professional work different from what you can do at home.
After stripping, the refinisher sands with 150 to 220 grit, then applies two coats of sealer to fill the wood’s open pores before the final finish goes on.
Most shops use a nitrocellulose-based catalyzed lacquer for durability, though shellac is the better choice for older antiques or any piece that might carry silicone residue from commercial polishes.
The timeline stretches longer than the work itself suggests.
A week of solid labor is common, and delays show up from humidity, temperature swings, finish reactions, and a problem called blushing where moisture gets trapped under the topcoat. Weather interrupts curing schedules.
Structural repairs take as long as they take. I find that managing those variables is half the reason to pay for professional work, because rushing any stage compromises what comes after.
Frequently Asked Questions
What are the steps in furniture refinishing?
Clean the surface to remove dust and grease, repair structural damage like loose joints or veneer chips, remove or prepare the old finish by sanding or stripping, apply your chosen stain or topcoat, and let the piece cure for at least 24 hours before use.
Professional work adds a sanding sealer before the final finish goes on.
Is it better to refinish or restore antique furniture?
Restore when you want to preserve the original finish, hardware, and period-specific condition.
Refinish when appearance matters more than history, or when the old finish is damaged beyond repair. If the piece has dates, names, or stamps, restoration keeps those details intact.
What products do professionals use for furniture refinishing?
Professionals use methylene chloride to strip finishes, a chemical restricted to licensed businesses because of safety concerns.
After sanding, they apply 2 coats of professional sealer to fill the wood’s pores, then finish with nitrocellulose-based catalyzed lacquer or shellac for older antiques.
How do you get a smooth lacquer finish?
Remove the old finish completely, sand the wood smooth without going past 320 grit, and apply enough sealer to fill the pores before the lacquer goes on. The sealer does most of the work by creating an even base layer.
What safety precautions are needed for furniture stripping?
Work in a well-ventilated area with doors and windows open on opposite walls.
Wear a respirator like the 3M Ultimate FX FF-400, thick rubber or nitrile gloves, eye protection, and an apron. Lay oily rags flat to dry completely before disposal, because bunched rags can ignite on their own.
Is methylene chloride safe for furniture refinishing?
No, methylene chloride is not safe for amateur refinishers. It requires careful handling to prevent injury and environmental harm, so specialty retailers only sell it to businesses with a valid license.
Do I need to sand furniture after stripping?
Yes, sanding smooths the wood while leaving enough texture for stain and finish to bond properly. Start with 120 grit to remove any remaining finish, then work up through 150 and 220 grit, always moving in the direction of the grain.
What grit sandpaper is best for furniture refinishing?
Start with 120 grit to remove paint or finish, then move to 150 grit and finish with 220 grit for a smooth surface. Stop before you reach 320 grit, because wood that’s too smooth won’t hold stain.
What does sealer do before finishing?
Sealer fills the open pores in wood so the topcoat lies smooth and even. Professionals apply 2 coats of sealer after sanding and before lacquer, which makes the difference between a flat finish and one that shows every grain irregularity.
Is shellac a good sealer for antique furniture?
Yes, shellac suits older antiques because it was the standard finish on furniture built from the 1820s to the 1920s. It also works well on pieces that may carry silicone residue from commercial polishes, where other finishes might react poorly.
How long does professional furniture refinishing take?
A week of solid work is typical, though delays from humidity, temperature swings, finish reactions, and structural repairs can stretch the timeline. Weather interrupts curing schedules, and problems like blushing, where moisture gets trapped under the topcoat, add time.
What is the best way to sand wood furniture?
Sand in the direction of the grain, starting with 120 grit to remove old finish, then 150 grit, then 220 grit to smooth the surface. Stop before 320 grit, or the wood becomes too smooth to hold stain properly.
What to put on wood to bring it back to life?
Mix 3 parts olive oil to 1 part vinegar, rub it into the wood with a soft rag, and let it sit for 30 minutes.
The oil absorbs into dry wood and brings back a low sheen without needing to wipe it off, though this only works on real wood, not laminate.
Can I paint over already painted wood furniture?
Yes, but clean the surface first to remove dust, grease, and old wax, because contaminants stop new paint from bonding. If the old finish is wax-based, paint won’t stick at all, and removing wax later is nearly impossible.