

An organized storage area gets you off the floor, onto shelves with clear labels, and down to quarterly checks instead of weekend-long digs through stacks.
Most people underestimate how long sorting takes and leave half-finished bins in the middle of the room for weeks.
The layout matters more than the containers: a 3-foot center aisle and waist-height placement for frequent-use items mean you can grab what you need without rearranging three boxes first.
1. Pick One Space and Set a Realistic Plan

Pick One Space and Set a Realistic Plan
The first move is to choose a single storage area rather than trying to organize everything at once.
A basement, a hall closet, or even one shelf inside a garage counts as a space. Draw a boundary you can finish, because storage jobs expand fast when the scope stays fuzzy.
If the area is large, work one section at a time. A garage organized bay by bay takes less stamina than trying to clear the whole floor in a weekend.
When time is tight, plan in two-hour blocks. That length keeps the work manageable without requiring a full Saturday.
The mistake I see most often is underestimating how long sorting takes.
Pulling items out, deciding what stays, and putting things back always runs longer than the mental picture suggests. A realistic timeline means you finish instead of leaving half-sorted bins in the middle of the room for weeks.
2. Measure the Space and Take Inventory

Measure the Space and Take Inventory
Before you pull anything off a shelf, measure the room. I record width, depth, and ceiling height first, then note where outlets sit, whether windows let in direct sun, and how the door swings.
A storage area that looks roomy can surprise you when you realize a water heater eats two feet or the only access is a narrow staircase. Measure twice so you know what shelving units and bins will actually fit.
Next, photograph what you have. I walk the space with my phone, shooting wide angles and close-ups of cluttered corners, then list categories rather than counting every item.
The photos become a reference when I shop for containers, and the list tells me whether I need six bins or sixteen.
If you share the space, map out zones now so each person’s belongings stay separate and everyone knows where their things live.
3. Sort Everything and Decide What Stays

Pull everything into the open and make four piles: keep, donate, sell, trash. Anything you use regularly, anything valuable, and anything you genuinely need stays.
Gently used items someone else would benefit from go to donations. Things worth money but no longer worth keeping can be sold.
Damaged or obsolete items belong in the trash. The system works because it eliminates the maybe pile, the one that keeps clutter stuck in place for months.
For clothing, if you haven’t worn it in two years, it goes.
For everything else, the rule tightens to one year. Broken items you keep planning to fix and projects you keep postponing fall into the same category: if the plan hasn’t happened yet, it probably won’t.
Set a timer at two or three minutes per item to stop emotional attachment from slowing you down.
This stage is about sorting only. Skip the urge to organize as you go, because it tangles the process and burns you out before the system is in place.
4. Move Items That Belong Elsewhere and Group What Remains
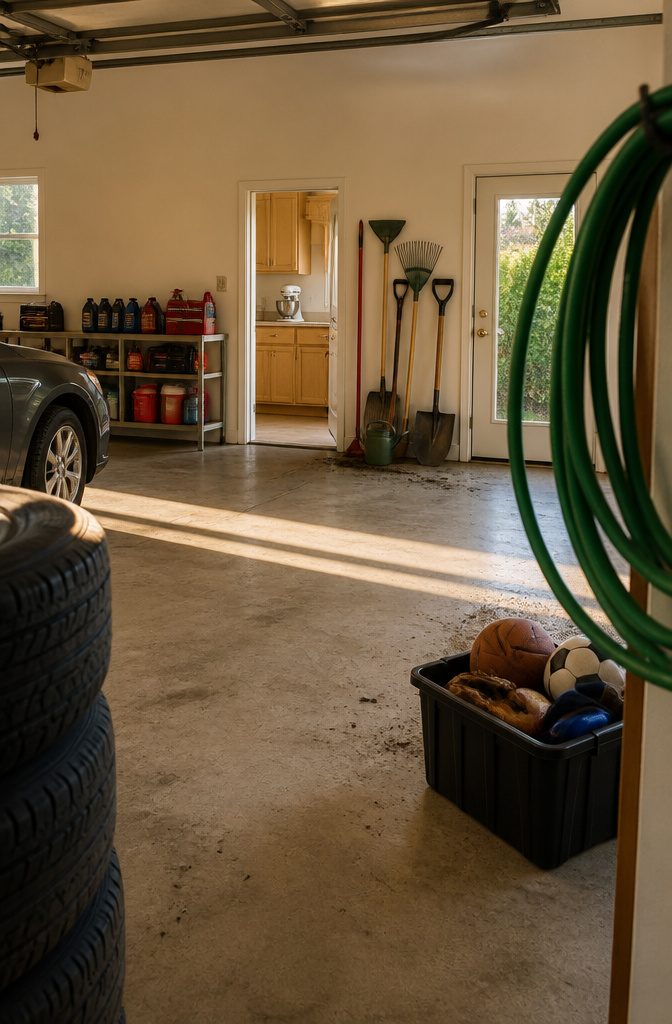
Once you’ve pulled out what doesn’t belong, relocate anything that would work better elsewhere before you organize what’s left.
That professional mixer sitting in a closet moves to the kitchen; seasonal sweaters can go under the bed or into attic storage.
Take every item that genuinely fits another space and move it there, then turn your attention to what remains.
What stays gets grouped by category or by how you’ll actually use it. Automotive supplies go near the car area, gardening tools near outdoor access, sports equipment where active family members can grab it without moving other boxes.
Similar items pack together—holiday decorations with holiday decorations, not scattered across three zones. If you’re working with a wide variety of belongings, group them first, then decide where each group lands based on access and frequency.
5. Design the Layout and Choose Storage

I sketch the layout before I move anything into place.
The mistake I see most often is stacking boxes and bags without a system, which means pulling half the room apart every time something in back turns out to be the thing you need.
I start by placing large items like furniture or appliances at the back or against the sides, then position frequently used belongings near the front where they stay within reach.
A center aisle at least 3 feet wide lets you walk through the space without rearranging what you already put down, and that width matters more than most people expect when the unit fills up.
Vertical space is the part renters and new homeowners leave empty.
Floating shelves, wall-mounted hooks, and tall bookcases hold as much as the floor does without taking up floor area, and over-the-door organizers work especially well in apartments where square footage is limited.
I put heavy items at ground level, medium-weight boxes at waist height, and lighter belongings up top, keeping a gap below the ceiling for air movement.
The shelving you choose should match what you store: small drawers and bins for craft supplies or jewelry, larger shelves and open bins for camping gear or seasonal decor.
6. Install Shelving, Bins, and Hooks
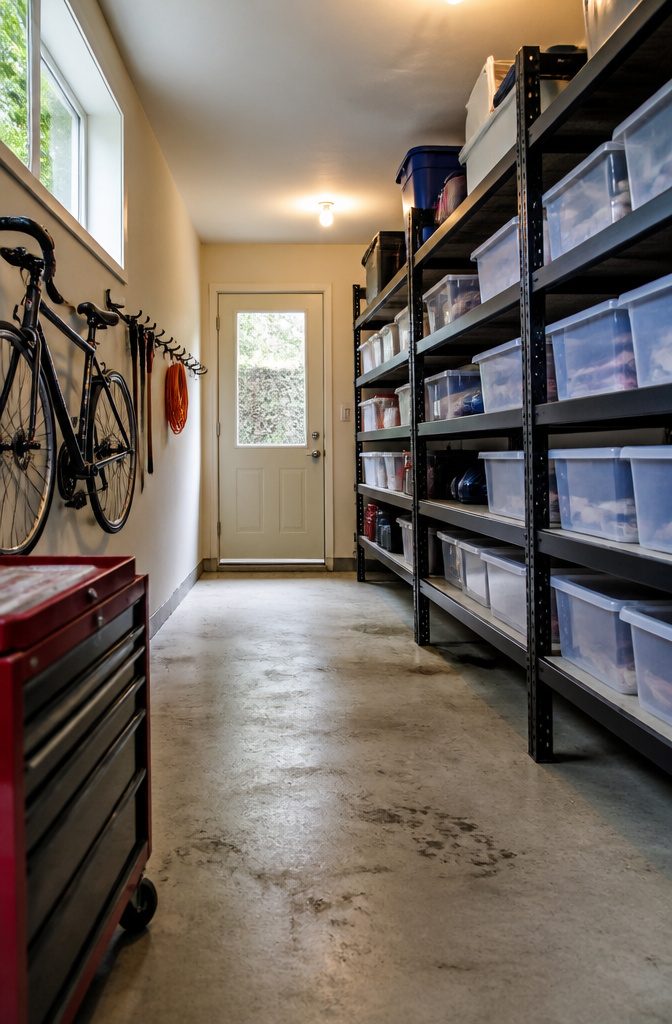
I put shelves on the walls before I think about anything else, because keeping boxes off the floor matters twice: it lets air move underneath so moisture can’t sit there, and it means you can actually see what you have without dismantling a stack.
Heavy-duty metal shelving rated for at least 250 pounds per shelf handles the weight most storage rooms ask for, and if you’re stacking bins, you can go up to 8 feet high or five bins tall before the system starts feeling unstable.
I use the same brand of bin all the way through so everything stacks cleanly without gaps or wobble, and clear bins win over opaque ones when you need to grab something without opening four containers first.
Hooks take over one wall for anything that hangs: bikes, extension cords, folding chairs.
Pegboards handle smaller tools and accessories if you’re storing workshop gear, but most storage rooms do better with straightforward shelving and a few wall hooks than with systems that need constant adjustment.
7. Label Containers and Keep an Inventory

Label every container clearly so you can identify what sits inside without pulling it off the shelf.
A good label system cuts retrieval time and stops you from buying a second set of light bulbs because you forgot the first box.
Write directly on bins with a paint pen, use adhesive labels on cardboard boxes, or clip tags onto wire shelving. The format matters less than consistency: pick one method and apply it everywhere in the storage area.
An inventory record takes the labeling one step further. I keep a simple digital list that notes where each category lives, down to the specific shelf or bin number.
When I add something to storage or pull an item out, I update the record immediately. That habit prevents the system from drifting back into chaos.
The Itemlist app makes this faster by letting you scan barcodes and attach photos to each entry, and the cloud sync means you can check your inventory from the hardware store instead of guessing whether you already own a drill bit set.
Business storage demands this kind of tracking, but even personal storage runs smoother when you know exactly where the holiday decorations or camping gear ended up six months ago.
8. Check the System Quarterly and Revise as Needed

A system stops working the moment you stop checking it.
Set quarterly visits to the storage area — mark them like you would an oil change — to dust shelves, look for moisture damage, and make sure pest deterrents are still in place.
Tighten any loose bolts on shelving, verify that pathways stay clear, and check that climate-sensitive items show no signs of warping or mold.
Once a year, go deeper.
I look at whether the layout still matches how I actually use the space, whether I can find things without moving three boxes, and whether anything stored there has sat untouched long enough that it no longer deserves the real estate.
If you move, change jobs, or add a person to the household, that counts as a trigger to reassess early rather than waiting for the calendar.
Tie reviews to something you already do.
When I swap out seasonal gear or holiday decorations, I use that same afternoon to reorganize the whole unit, rotating front stock to the back and pulling forward anything I’ll need in the next few months.
Use Vertical Space and Overlooked Areas

Storage areas rarely fill up horizontally before they run out of wall and ceiling height. Using vertical space and overlooked spots creates usable storage without claiming more floor area.
- Wall-mounted shelves and tall bookcases let you store items up to the ceiling, with the things you need less frequently going higher up.
- Over-the-door organizers turn the empty space behind doors into storage for shoes, accessories, cleaning supplies, or pantry goods—especially useful in apartments where every square foot matters.
- Pegboards and wall-mounted hooks hold items without eating into floor space, and they keep frequently used tools or supplies in sight.
- Under-bed storage containers and the space above cabinets are easy to overlook but work well for seasonal clothing, extra bedding, or anything that doesn’t need to be grabbed daily.
I measure both horizontally and vertically before deciding where shelves and hooks go. Heavy items sit at ground level, medium-weight ones at waist height, lighter items up top—but always with clearance below the ceiling for ventilation.
Place Items Based on How Often You Reach for Them

Frequent-use items belong at waist or shoulder height, where you can reach them without climbing or crouching. Less-used belongings go higher, toward the back, or in corners that take more effort to access.
I place holiday decorations on top shelves and camping gear behind furniture, while tools I need monthly stay near the entrance where I can grab them in seconds.
A clear aisle down the middle of the room matters more than people expect. When every square foot is packed, you end up moving three boxes to reach one item, and the system collapses within weeks.
Leave enough room to walk in and reach the back wall without rearranging the front. If the layout forces you to unstack boxes every time you need something seasonal, the placement is wrong.
Heavy items anchor the bottom of any stack so lighter boxes stay stable on top, and seasonal swaps sit near the door where you can pull them during changeovers without disturbing the rest.
This setup keeps the most-touched belongings in easy reach and pushes the rarely-needed ones to spots you visit twice a year.
Protect Belongings From Moisture and Climate

Moisture ruins more stored items than most people expect, and a few simple moves keep belongings safe whether you’re working with a basement, garage, shed, or rented unit.
- Keep everything off the floor. Even a few inches of clearance protects against flooding, condensation, and ground moisture that wicks up through concrete.
- Use sealed plastic bins for fabrics, paper, and documents. Cardboard absorbs moisture quickly and offers almost no protection in damp spaces.
- Skip plastic furniture covers in areas where temperature swings. Condensation forms underneath and traps moisture against wood and upholstery.
- Store temperature-sensitive items in climate-controlled space if you can. Electronics, wooden furniture, and important documents need stable conditions to stay intact.
- Dry everything completely before packing it away. Residual moisture locked inside a closed bin turns into mold within weeks.
Frequently Asked Questions
How do I organize my thoughts?
Start by choosing one specific storage area and setting a realistic timeline, then sort everything into four clear categories: keep, donate, sell, and trash.
Work through items quickly with a two or three minute limit per piece to prevent emotional attachment from slowing decisions.
Group what remains by category or how you’ll actually use it, then design a layout that places frequent-use items within easy reach and rarely-needed belongings toward the back or on high shelves.
What should I remove first when decluttering?
Pull out everything that belongs in another space before you organize what remains, like kitchen tools stored in closets or seasonal clothing that should move to attic storage.
Once those items are relocated, sort what’s left into four piles: keep, donate, sell, and trash. Anything you haven’t used in a year, broken items you keep planning to fix, and projects you keep postponing should all go immediately.
What is the 50% rule for clutter?
Instead, it recommends using a one-year standard for most belongings and a two-year rule for clothing: if you haven’t worn it or used it within that timeframe, it goes.
Set a two or three minute timer per item during sorting to stop emotional attachment from interfering with decisions.