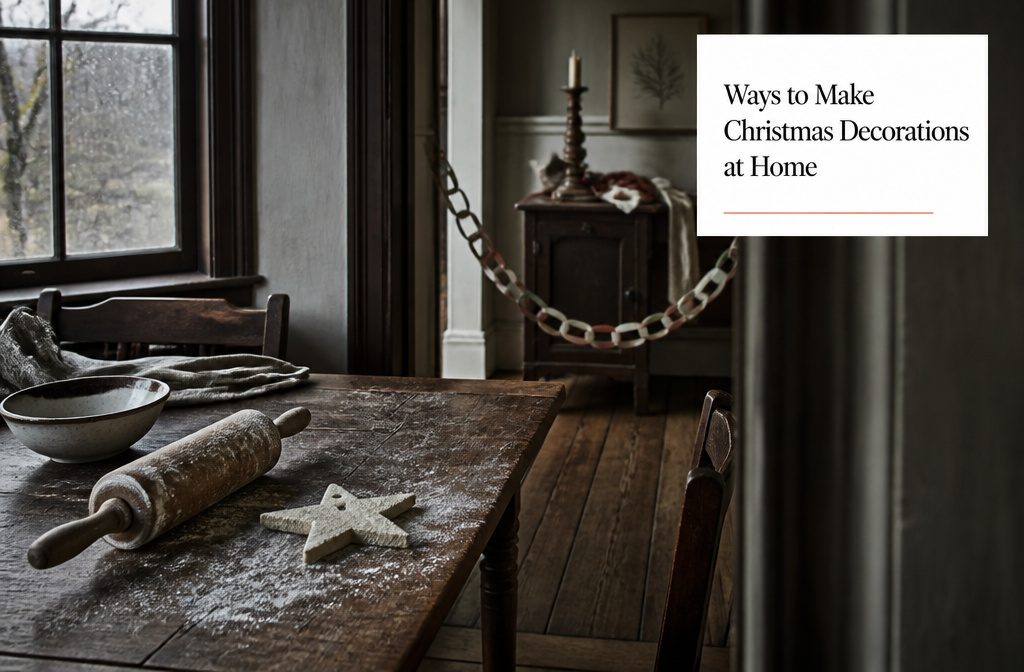
Christmas decorations divide between paper chains that cost nothing and carved centerpieces that eat up a weekend, and the split comes down to how much time you’re willing to trade for permanence.
Paper lasts one season and stores flat; wood and fabric survive years but demand more setup. Salt dough uses four cups of flour and one cup of salt, bakes at 325°F, and gives you ornaments that hold paint without cracking.
1. Paper Chains or Paper Garlands

Construction paper strips stapled into loops still hang on mantels every December because the method asks for nothing more than paper, scissors, and a stapler.
Cut strips to 3×6 inches and 3×4.5 inches—the two sizes keep the garland from reading as a perfect grid.
Loop one strip into a circle and fasten the ends with a staple or glue, then thread the next strip through before closing it. Keep going until the chain reaches the length you want.
I find construction paper easier to handle than tissue paper, which tears if a child pulls too hard during assembly, and wrapping paper works when you have scraps left from gifts.
Metallic foil paper catches light better than flat stock, so a silver or gold chain holds up next to string lights without disappearing.
The garland goes fast once the strips are cut, and it hangs wherever a nail or hook will hold it: across a doorway, along a banister, or looped on the tree.
2. Paper Trees
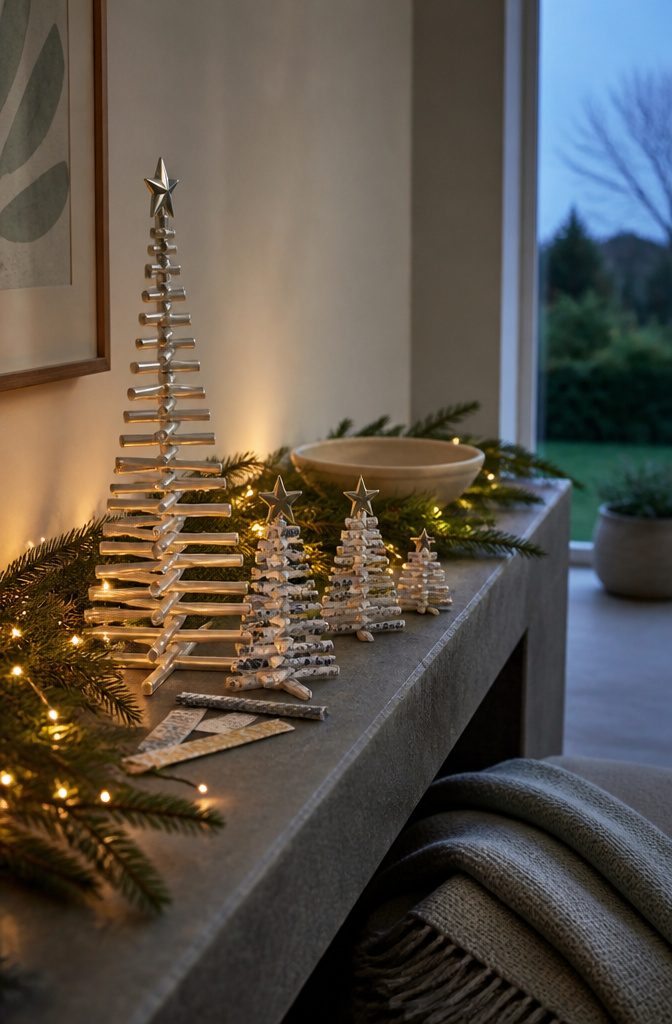
Folded paper forms a tree fast, and the construction shows through in a way that looks deliberate rather than sloppy.
The simplest version uses paper straws laid horizontally across two vertical base straws, smallest at the top and tallest at the bottom, fixed with hot glue.
A star at the peak finishes it. The same logic works with construction paper cut into strips and layered from narrow to wide, though the straws hold their shape without fussing.
Origami trees take longer but pack flat for storage, and monochromatic patterns with metallic accents read more grown-up than full-color prints.
Accordion-fold versions give a rounded, softer silhouette—West Elm sold them for a while, and the DIY route uses pleated paper wrapped into a cone.
Both fold methods let you use scrap paper if the pattern works, which matters when you are making six or eight to fill a mantel.
3. Paper Stars
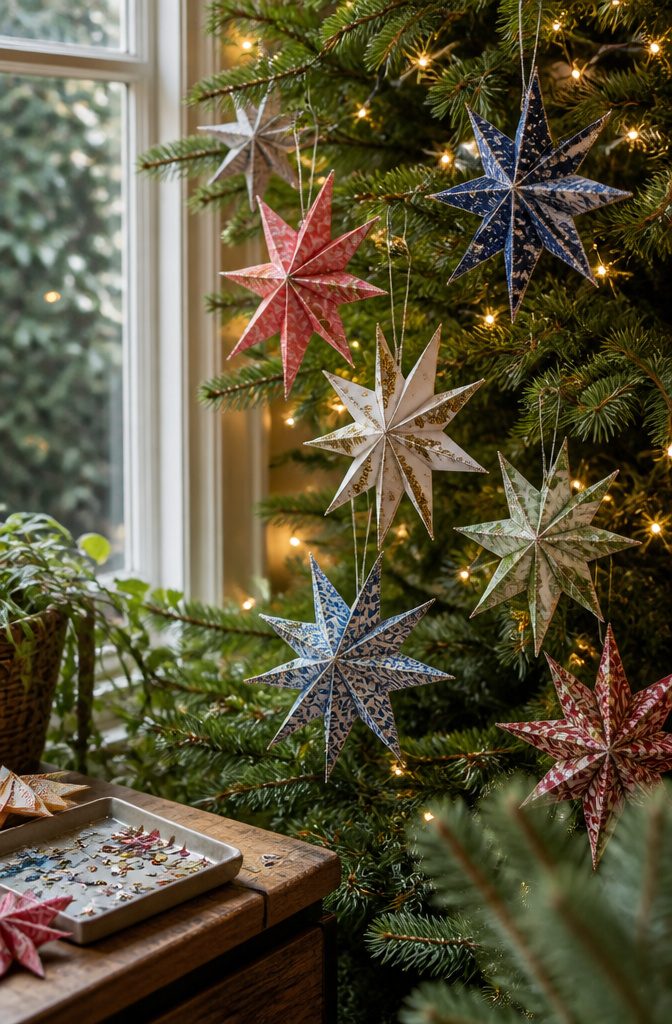
Folded paper stars catch light from across a room, which is why they work so well hung in a window or layered across a tree.
Origami stars use repeated valley and mountain folds to build dimension without glue, and the method is forgiving enough that you can make a dozen in an evening once the first one clicks.
I fold mine from squares of scrapbook paper or old sheet music, anything with a pattern that shows through the folds.
Waldorf stars are another route: they’re traditionally displayed in classrooms, made by weaving two strips of paper through each other until the points lock. Both styles look good hung at different heights on monofilament.
If the paper reads too plain once it’s folded, cover the points with glitter or sequins before you hang them. I brush a thin layer of white glue on each edge, then tap off the excess glitter over a tray.
Sequins stay put better if you press them into place one at a time rather than scattering them. The sparkle doubles under string lights.
4. Paper Snowflakes
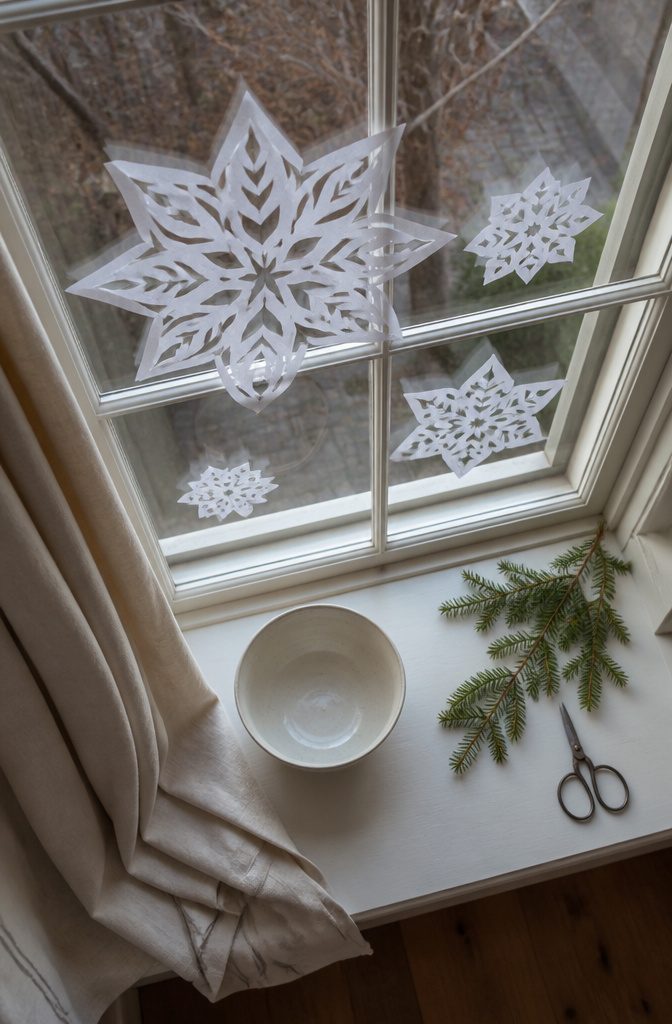
Paper snowflakes work two ways: fold a square of paper in quarters or eighths, cut shapes along the folded edges, then unfold to find a symmetrical pattern. The more folds you make before cutting, the more intricate the result.
White printer paper is enough, though tissue paper cuts more easily for younger hands. A single sheet gives you one snowflake, so making enough to fill a window or drape across a room means repeating the process.
I hang them flat against glass with a small piece of tape behind each point, where the adhesive won’t show from the street.
For a tree, scale the paper down to three or four inches square before you start folding, then thread fishing line through one of the outer points.
The same snowflake design reads completely different at window scale versus ornament scale, which is why I cut a few sizes even when the pattern stays the same.
5. Paper Houses or Villages

Paper houses sit flat until you fold them, and once they’re up they hold a shape gingerbread never could on a branch.
Lia Griffith’s free SVG and PDF template gives you the fold lines and window cuts already sized for an ornament, so you’re printing and scoring rather than measuring from scratch.
The assembly is quick—most people finish one in under ten minutes—and the small scale means you can run a dozen in an afternoon without burning through cardstock.
I’d put these on the tree before I’d set them on a mantel.
The depth is shallow enough that they don’t catch light the way a ceramic house does, but hung against green branches with a bulb behind them, the windows glow.
You can also group several into a village scene if you vary the roof heights and keep the bases level, though that works better as a windowsill arrangement than something structural.
6. Paper Candles

Paper candle ornaments give you the look of candles on your tree without the fire hazard that would come with hanging real flames.
They’re lighter and cheaper than individual LED clip-on candles, and you can make a full set in an afternoon with materials you probably already have.
The basic build uses a rolled paper tube for the body and a metallic mini cupcake liner for the flame. Flatten the liner, cut flame shapes from gold and orange metallic paper, and glue them to the liner.
A small circle of silver paper in the center adds the highlight. Roll a piece of paper into a tube, tape it closed, then cut a small slit in the top.
Slip the flame into the slit and glue it in place. A loop of twine on the back finishes the hanger.
The metallic liner catches light without needing a real bulb, which keeps the weight down and the ornament simple.
I’d make these in batches rather than one at a time, since cutting and gluing go faster when you set up stations for each step.
7. Paper Ornaments in 3D, Vintage, and Honeycomb Forms

Paper adds structure when you fold it right. Flatten ten cupcake liners, fold each in half, and glue them at the center with a small dot so both edges meet.
Stack all ten with glue dots at the top and bottom of each layer, then connect the first and last liner to close the sphere. The result hangs on the tree and reads three-dimensional from every angle.
Vintage-style ornaments made from colored paper work the same way structurally but look cleaner than the ruffled liner version. Cut matching shapes, score the folds, and stack them into a ball or teardrop.
They survive a fall better than glass, which matters if you have kids or curious pets. Honeycomb forms fold flat for storage and open into diamonds or bells when you pull the thread taut.
All three methods use paper you already have or can pick up for a few dollars, and none require a template if you are willing to freehand the shapes.
8. Paper Leaf Garlands

Paper leaf garlands are strung or linked together to form chains, and the shape holds up whether you keep them plain or work in a few berries for color.
The leaves are cut from paper, then threaded or glued end to end.
Red berries scattered through the length give the garland a Christmas look without losing the simplicity that makes it work on a dinner table or along a mantel.
Some versions lean into a subtle winter feel with glittering berries and delicate leaf shapes that read more frosty than festive.
The appeal is the same either way: you control the length, the spacing, and how much accent color shows up.
Paper takes paint, glitter, or metallic finish easily, so a single template can produce garlands that look completely different depending on what you reach for in the last step.
9. Paper Santa Figures or Garlands
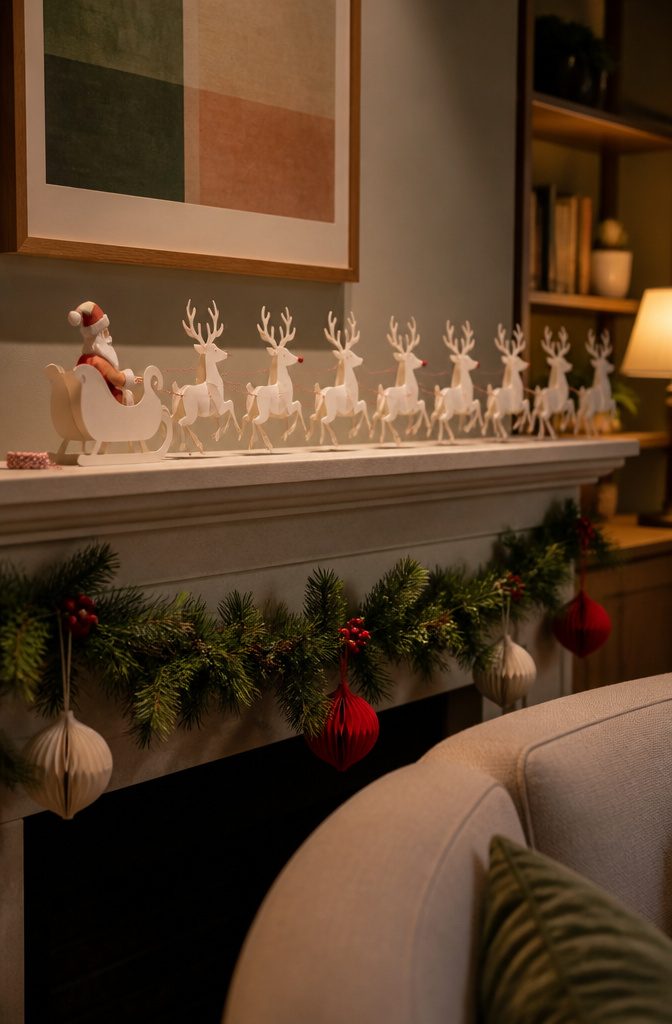
Paper Santa makes sense as folded origami or as part of a sleigh-and-reindeer garland.
The origami version folds into a freestanding figure you can hang from the tree with string glued to the back, and different papers change the outfit without changing the technique.
The garland version builds a whole scene: Santa in his sleigh pulled by eight reindeer across a string, with a red sequin marking Rudolph’s nose.
I prefer the garland when I want something that fills horizontal space above a doorway or along a mantel, and the origami Santa when I need individual ornaments that can hang at different heights on the tree.
Both use paper you already have, and neither needs paint or wire.
10. Wreaths Decorated With Ornaments, Greenery, or Tinsel
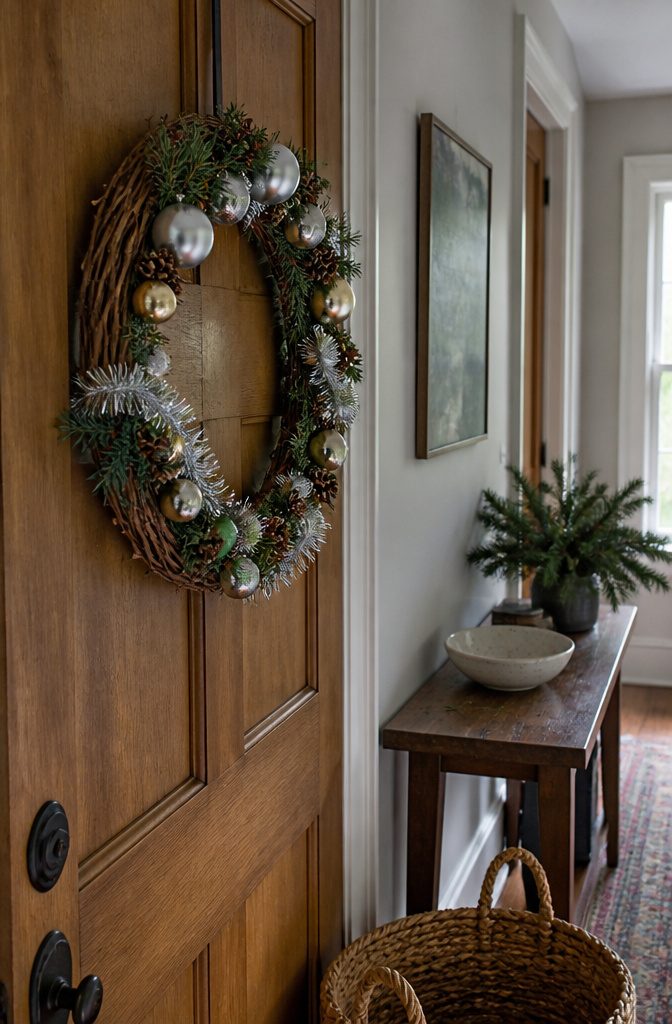
A wreath form turns into a finished piece when you cover it with ornaments, greenery, tinsel, or paper. Wire frames and faux twig frames both work, and the choice comes down to how much texture you want showing through.
Wire disappears under a heavy layer of ornaments; twig gives you a rustic base that looks intentional even where gaps remain.
Hot glue or super glue holds ornaments in place.
I go with hot glue for lightweight plastic balls and super glue when the ornament has any real weight. Arrange everything before you commit to glue, because repositioning after the fact tears up the frame or snaps an ornament neck.
Pinecones in different sizes fill gaps without adding much cost, and sparkly garland wraps around the whole thing if you want more coverage.
Tinsel works the same way but needs a lighter hand. Too much pressure while wrapping tangles it into clumps, and the wreath ends up looking matted instead of sparkly.
For a variation, glue tinsel and small Christmas notions inside solid-backed aluminum cookie cutters, then hang those as ornaments on a greenery wreath.
11. Dried-Orange Decorations

Dried oranges show up in garlands, ornaments, and tucked into wreaths because they hold their shape and smell faintly of citrus for weeks.
You can dry them in an oven on a low setting or in a food dehydrator—an Excalibur is one I see recommended often.
The oven route costs nothing extra but ties up your kitchen for hours; the dehydrator runs independently and finishes faster if you already own one.
Once the slices are dry, string them on twine with miniature bells between each piece for garland, or loop festive ribbon through the center to hang them as ornaments.
If ribbon slips, a careful dot of superglue or an ornament hook on one side keeps them secure.
The same dried fruit works tucked into fresh greenery on a mantel or woven through branches on the tree. Cranberries dry the same way and add deep red next to the orange rounds.
12. Orange-and-Clove Pomanders

Cloves pressed into an orange make a scented decoration that sits nicely in a bowl or scattered through a centerpiece. Use a toothpick or push pin to punch shallow holes in the skin, then press whole cloves into the openings.
I arrange them in stripes or spirals rather than covering the whole surface, which lets the orange color show and makes the cloves go further.
The scent is immediate and fills a room faster than most candles, but the decoration itself lasts four to five days at room temperature.
That timing matters more than it sounds like it would: make them a week early and they’ll be past their best before anyone arrives.
Wait until the week of Christmas to put them together, and they’ll still look and smell good when it counts.
13. Mason Jar Decorations or Candle Holders

Frosted glass spray paint turns a plain mason jar into something that looks snow-dusted without the mess, and the whole project takes about fifteen minutes of active work.
Spray the outside of the jar in light, even coats, let it dry completely, then fill it with faux evergreen stems or pinecones. A plaid ribbon around the mouth of the jar finishes the look.
These work well as candleholders on a dinner table or mantel, and if you drop a strand of battery-operated string lights inside, you get a soft, diffused glow that reads cozy without being too bright.
The other route is wrapping the jar in fabric, usually a piece of an old sweater.
The texture hides the glass completely and gives you a chunky, winter-weight vase that sits well on a side table or windowsill. Both methods are low-cost and forgiving if your cutting or spraying is not perfect.
14. Pinecone Decorations
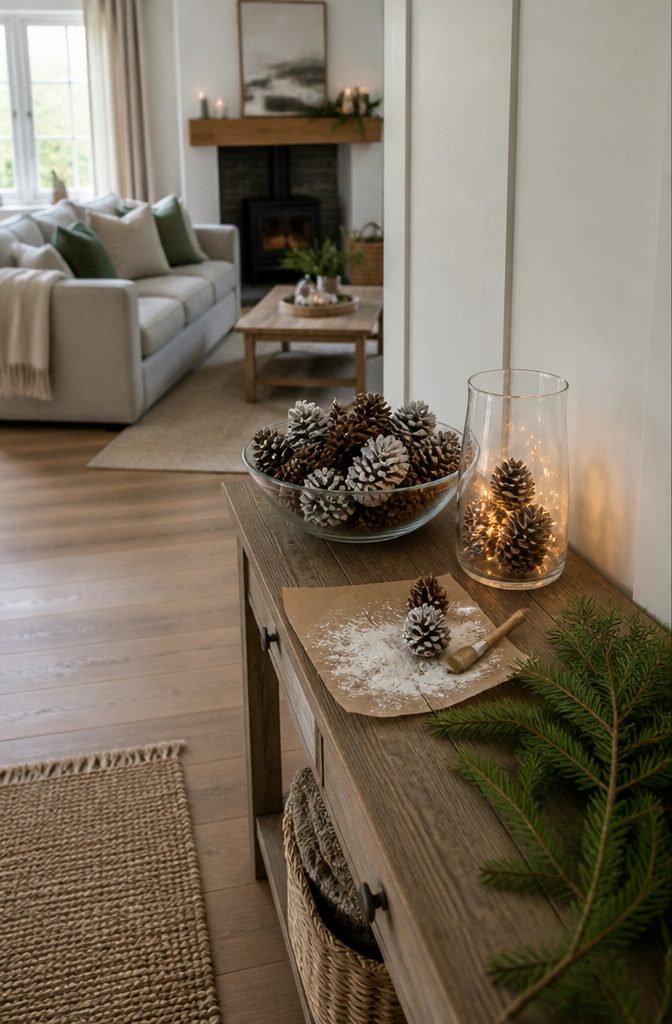
Pinecones work as garland material, bowl filler, or the base for a snowy tabletop display.
The first step matters more than the finish: bake pinecones on a cookie sheet at 250°F for 30 minutes to kill any bugs hiding inside before you bring them indoors.
I collect mine straight from the yard, rinse off loose dirt, and run them through the oven while I set up the rest of the project.
Once they’re clean, you can string them into garland with twine or fishing line, pile them in a clear glass bowl on the console table, or dust them with white paint for a winter look.
The snow-covered version pairs well with fairy lights in a hurricane vase, and the same pinecones move from fall straight through to January if you add the white coat after Thanksgiving.
Free material, low effort, and the kind of texture that reads expensive when you group enough of them together.
15. Christmas-Tree Ornaments From Craft Sticks, Clothespins, or Household Materials
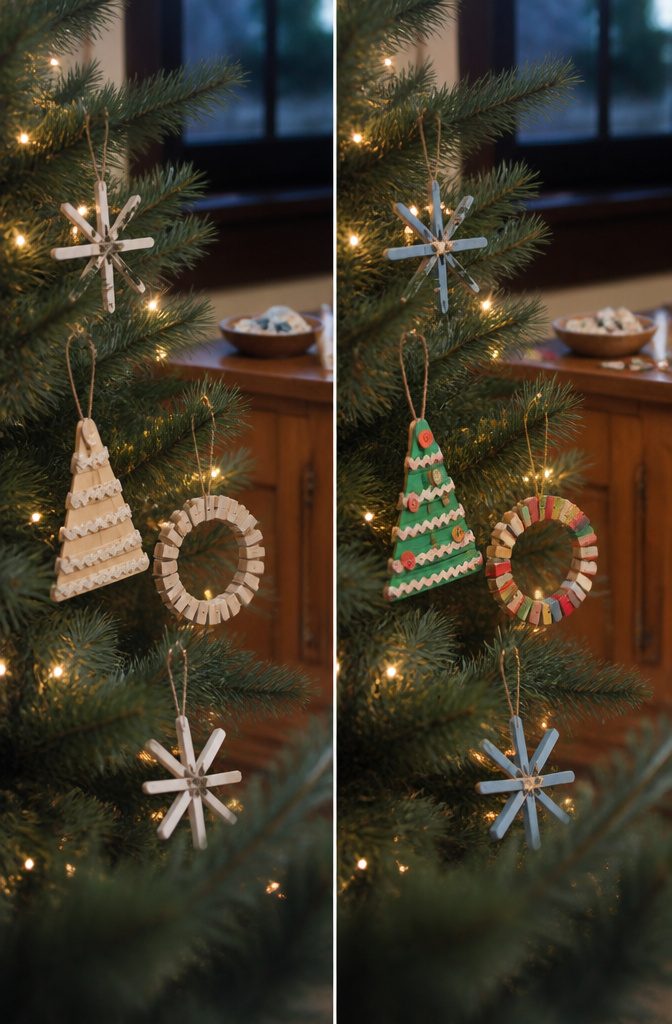
Craft sticks glued into a tree shape and painted green with acrylic paint make small hanging ornaments that take up almost no storage.
Cut the sticks to size so the shape tapers toward the top, hot-glue them together, then wrap the finished tree with rickrack and add buttons or mini ornaments.
If you want to skip the craft store entirely, use actual sticks from the yard and kitchen twine for the garland.
Clothespins work the same way but assemble into a circular ornament instead of a tree.
Remove the springs from 14 mini clothespins, turn each half around and glue the pieces back to back, then glue the pins together in a ring. Regular-size clothespins work if that’s what you have on hand.
Add a loop of gold twine to one pin for hanging. I like this one for kids’ playdates because the assembly is simple and the result holds up better than paper.
Popsicle sticks glued into snowflake shapes give you another hanging option. Arrange the sticks in whatever formation reads as a snowflake, paint them, then add glitter if the piece needs more contrast against the tree.
16. Salt-Dough Ornaments

Mix four cups of all-purpose flour and one cup of salt in a bowl, then add water slowly until the mixture holds together like dough.
Knead it smooth, roll it out, and cut shapes with cookie cutters or press them by hand. Punch a small hole near the top of each piece if you want to hang it later with ribbon or a hook.
Bake the shapes at 325°F for an hour or until they feel hard all the way through.
Let them cool completely before you paint them. Acrylic paint sticks well to the baked dough and covers evenly, so you can add details or keep the design simple depending on how much time you have.
The recipe makes enough for a full tree’s worth of ornaments, and the dough costs almost nothing compared to buying premade blanks.
17. Tree or Wall Signs and Art

A painted wooden picket turns into seasonal art with acrylic paint in green, red, and white. The shape works for a toy soldier, a snowman, string lights painted on in white, or a candy cane striped down the slat.
A treated dog-ear picket from the hardware store costs less than two dollars and gives you the surface ready to go.
Framed sheet music from a thrift-store Christmas book makes a whole gallery wall for a dollar.
I’d pick pages with readable notation rather than bent or torn ones, and black frames keep the focus on the print instead of the frame style.
Canvas gets a Christmas tree built from felt, with buttons glued on as ornaments. Paint the background first, cut the tree shape from green felt, then glue it down before adding the buttons.
Public-domain winter prints work the same way—cabin scenes, snowy woods, anything that reads winter rather than Christmas-specific so it stays up past December.
18. Garlands From Pipe Cleaners, Greenery, or Reused Materials
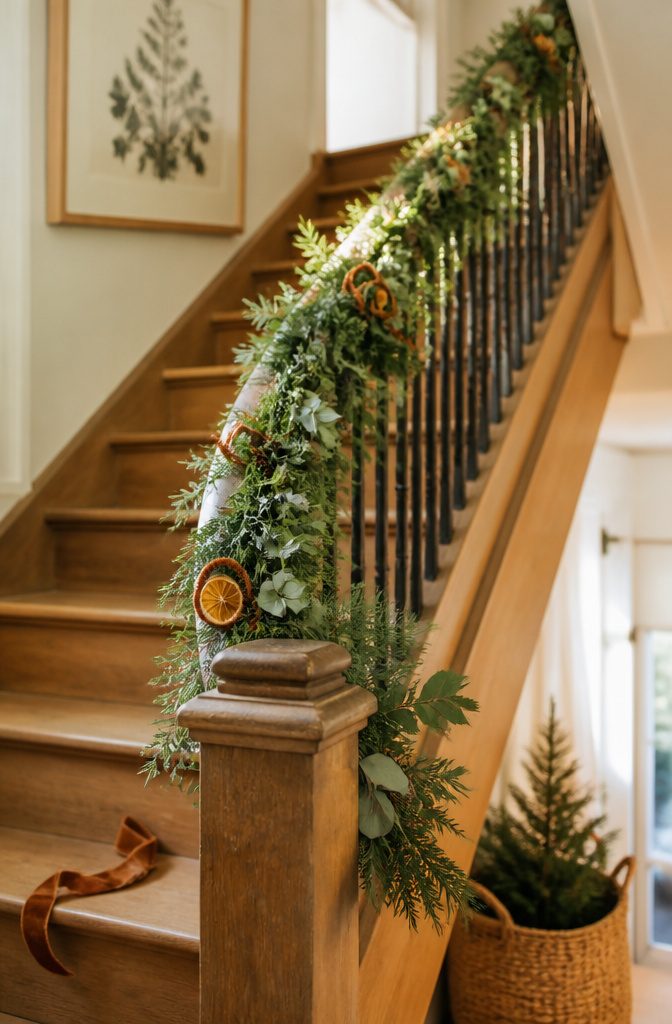
Pipe cleaners offer the fastest assembly: loop pieces together and twist the ends closed, and you have garland in minutes with no glue and no drying time.
It works well when kids are making it, because the material bends without breaking and the garland holds its shape once twisted.
For a layered look that reads more expensive than it is, take mismatched strands of faux greenery and wire them together along a banister or mantel.
The overlap hides gaps and gives the impression of fullness even when each piece on its own would look thin. You can add ribbon or dried oranges if the base layer needs more interest.
Fresh trimmings from tree lots work the same way structurally but need to be attached quickly before they dry out.
Fasten them to banisters with pipe cleaners and ribbon, and if you want the green to last more than a few days, spray everything with Wilt Pruf to slow moisture loss.
19. Candle or Table Centerpieces

A centerpiece pulls together candles, greenery, and whatever vessel you have that looks deliberate on a table.
The simplest version is evergreen branches anchored in floral foam inside a bowl or wide candle holder—prune small bits from outdoor pine, fir, spruce, or cedar, or use artificial stems if you don’t have access to real ones.
The foam keeps everything upright without fussing with wire.
Another route is cinnamon sticks glued to ribbon, wrapped around a pillar candle, and tucked with greenery. It takes ten minutes and smells right.
Frosted mason jars work as holders rather than arrangements themselves. Spray the glass with frosted paint, let it dry, then fill with faux pinecones or evergreen stems.
Tie plaid ribbon at the mouth. Drop string lights inside if you want a low glow on the table instead of overhead brightness.
20. Fabric or Yarn Trees

Yarn wraps around a styrofoam cone to give you a small tree that sits on a mantel or groups on a side table.
The material decides the texture: ribbon remnants make a smooth, tailored tree if you spiral them tight and glue each pass, while chunky yarn builds up a shaggier look.
You can leave the cone showing at the bottom for a pedestal effect, or wrap all the way down and tuck the end under.
The same method works with fabric scraps cut into strips, and you can mix colors by switching partway up the cone. I reach for this when I want something scaled to a small room.
A foam cone runs about two dollars, and you likely have leftover ribbon or yarn already. The glue gun does the real work; hand tension keeps the wrap even as you go.
21. Advent Displays or Calendars

Any object with 24 or 25 slots can turn into a countdown display. I’ve seen fabric pockets hung on a ladder, numbered matchboxes glued to a board, and glass jars lined up on a mantel.
The storybook version works especially well with young children: one Christmas picture book stored in a vintage suitcase, pulled out and read at bedtime each night leading up to December 25.
The ritual matters more than the container—any suitcase or basket with a lid keeps the stack hidden until the evening arrives.
A printed advent calendar stuck to a votive candle takes up no space at all.
Print the numbered grid on cardstock, wrap it around a glass holder, and light it each evening as the date changes. The approach suits small apartments where a standing display competes for counter room.
For something more decorative, string a line of oversized paper bulbs across a wall and tuck a small treat inside each one.
The bulbs read as wall art until someone pulls the day’s number down, which makes the display do two jobs at once.
22. Gift or Wrapping Decorations

Tags and wrapping turn into decorations themselves when you repurpose luggage tags or badge holders as stocking labels. These cost under $1 each, and safety-pinning them to plain stockings gives them a finished look without custom embroidery.
You can print your own inserts or design name tags from scratch in Canva if you want something more personal than a handwritten card.
Another direction is upcycled gift tags made from old Christmas cards, scrap wrapping paper, or cardboard you already have.
The appeal is that each one ends up slightly different, which reads as intentional rather than inconsistent when the materials and colors stay in the same family.
I find this works best when you commit to the homemade texture instead of trying to make it look store-bought.
If you want the wrapping itself to feel like part of the decor, coordinate the paper to match your tree or mantel colors and carry the same ribbon or ornament style onto the packages.
It is not complicated, but it does make the pile under the tree look like it belongs there rather than like grab-bag leftovers from three different stores.
23. Reused Household or Thrifted Objects as Decor
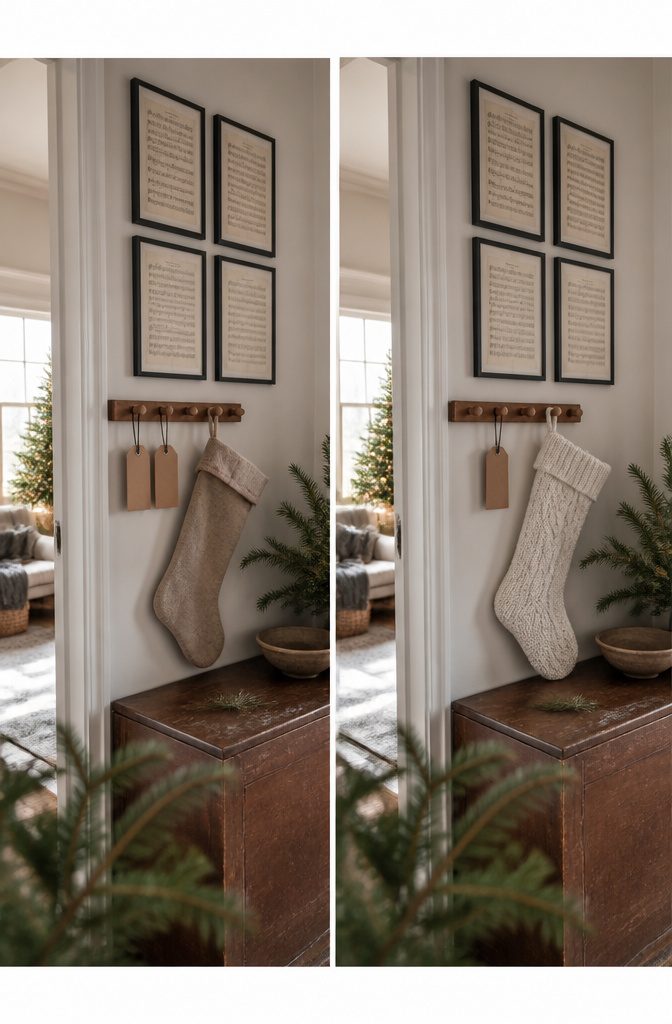
Luggage tags and thrift-store finds make surprisingly finished decorations when you let them take on a seasonal role.
Luggage tags under $1 each can be safety-pinned to stockings as name labels, and the metal hardware gives even a basic Target stocking a custom look.
I’ve done the same with old lanyard badge holders, which cost about the same and hold a printed card just as well. Choose tags that already look clean and minimal rather than trying to disguise something overly branded.
Framed sheet music is another good option when you want a full gallery wall for almost nothing.
A book of Christmas sheet music from a thrift store runs around $1, and the pages frame up as subtle art that reads festive without being loud.
You can fill a whole wall for the price of one store-bought print, and the typography holds up better than most holiday graphics.
The appeal here is that reused objects bring real material into the room without the handmade craft look that can cheapen the effect.
24. Oversized Outdoor Decorations

Large ball ornaments hung from your porch or garage ceiling are one of the fastest ways to fill outdoor space with color.
The simplest version uses bouncy balls in different colors with a small galvanized bucket or spray-painted takeout container superglued upside down on top.
That’s the cap. For the hanging loop, use about 6 inches of silver craft wire bent into a circle or hook and glued to the bucket.
The same idea scales down if you want lights instead of ornaments: cut wooden ovals, construction paper, or cardboard into bulb shapes and wire them the same way.
I keep a few of the lights matched to the front door color and the rest in red or green, which reads Christmas without looking like you bought a kit.
25. Paper Table Decorations
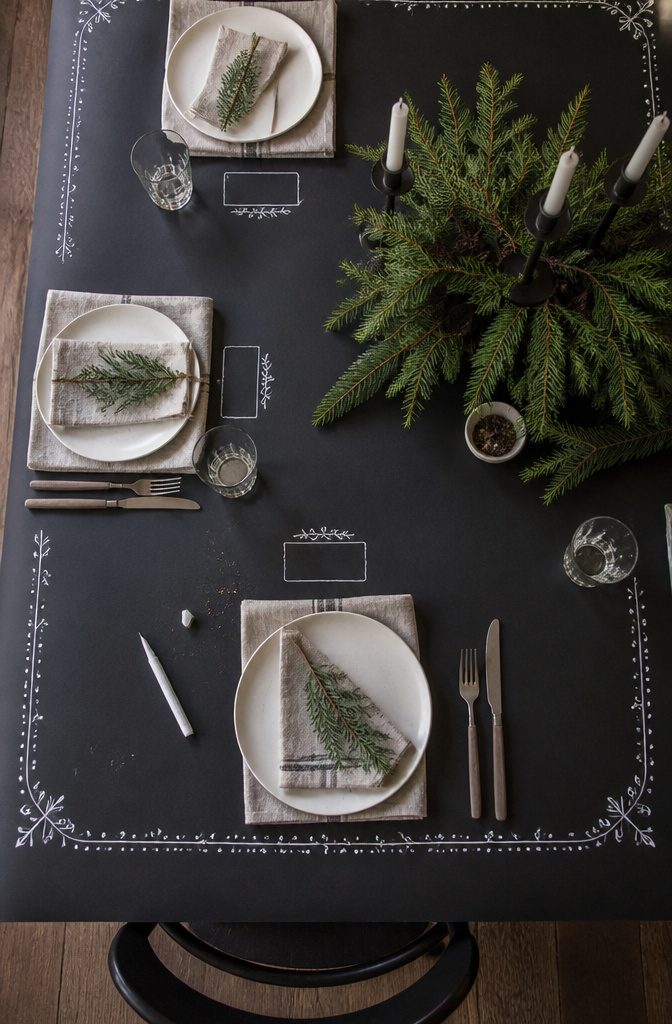
A black butcher-paper tablecloth gives you something to draw on and turns cleanup into one step.
I keep the paper matte rather than glossy so pencil and paint both hold. You can sketch place cards directly where each guest sits, or add border patterns that pick up shapes from the rest of the room.
The reason butcher paper wins over fabric is that you stop worrying about spills the moment dinner starts. Once the meal ends, roll the whole thing up and the table underneath stays clean.
I usually run the paper past the table edge by four inches on each side, then tape underneath so it sits flat.
If you want the drawn details to stand out, white ink on black shows up better than metallic paint, which can look muddy in low light.
Frequently Asked Questions
How do you decorate your room for Christmas?
Start with a focal point like a small tree or wreath, then add paper decorations, string lights, and a few natural elements like pinecones or dried oranges.
Keep the scale small so the room doesn’t feel crowded, and concentrate decoration on one or two surfaces rather than covering every wall.
What are some easy homemade Christmas decorations I can make?
Paper chains, folded paper stars, and salt-dough ornaments are the fastest to make and need only basic supplies. Paper chains take minutes once strips are cut, stars fold in an evening, and salt dough costs almost nothing per batch.
How to decorate for Christmas with little money?
Collect pinecones and evergreen branches from your yard, make decorations from paper and salt dough, and pick up candles and ornaments at dollar stores.
Thrift stores carry holiday items year-round for under a dollar, and fairy lights add impact for a few dollars per strand.
How can I decorate for Christmas without being overwhelmed?
Clear one room completely before adding any decoration, then focus on just the mantel and tree instead of the whole house.
Use what you already own rather than buying new pieces for every surface, and add small bits over several days instead of finishing everything in one session.