
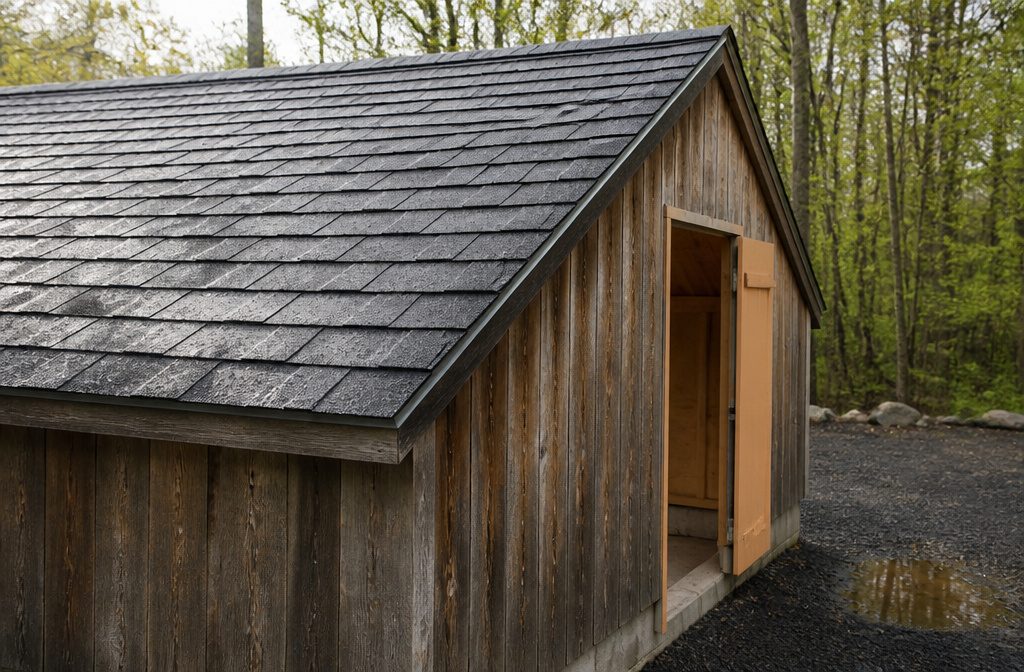
A storage shed built from plans costs $30 for the drawings and a few weekends of framing, flooring, and roofing work.
Most builders lose time to one stage: weatherproofing the roof. Asphalt shingles demand a precise 6-inch offset between rows, and any vertical seam that lines up becomes a leak point the first season.
1. Plan the shed and check local rules
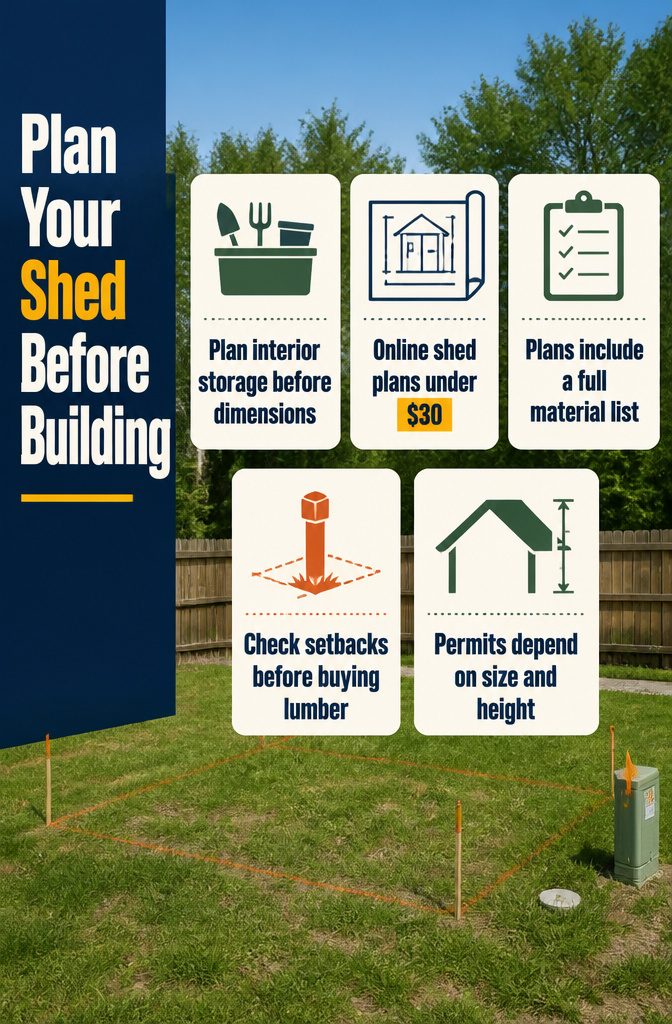
Start by thinking through what the shed needs to hold before you settle on size or design. A storage shed for garden tools demands far less floor space than one that houses a riding mower, canoes, and outdoor furniture.
I plan the interior first: how many shelves I need, whether a potting bench fits along one wall, where hooks and pegboard make sense.
Once I know the layout inside, the exterior dimensions follow naturally, and I avoid building something that looks right but holds nothing useful.
Shed plans run from simple gable designs to colonial-style structures with high-pitched roofs and windows.
I selected plans online for under $30, which included a full material list. That list made it simple to compare quotes from building supply stores and talk through lumber grades and fastener choices with counter staff.
The double doors in my design let me wheel equipment straight in without lifting or tilting, and the high roof pitch gave me vertical clearance for longer-handled tools.
Pick a plan that suits what you’re storing, not what looks appealing in a rendering.
Check setbacks, height limits, and permit rules before you buy lumber. Local planning and building departments set how close a shed can sit to a property line, how tall it can rise, and whether you need a permit at all.
Size and height both matter, and adding electrical or plumbing often changes the requirement.
Utility easements and HOA rules add another layer. I’ve never pulled a permit for a shed, but I still checked setback requirements to avoid building too close to the property line and having to relocate it later.
The time to learn the restrictions is while the shed is still a drawing, not after the roof is on.
Buying a prefab shed in a box doesn’t exempt you from local rules; the building department cares about the structure in your yard, not how it got there.
2. Choose and prepare the site
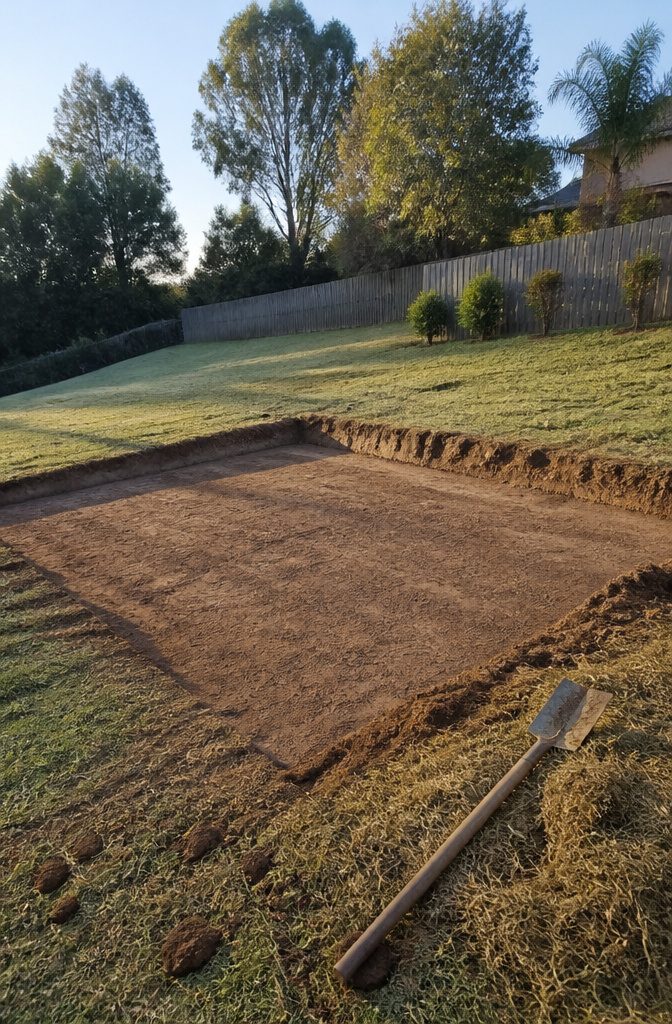
Pick level ground away from low spots where water collects after rain. I’ve watched too many weekend builds turn into drainage projects because someone chose a pretty spot at the bottom of a slope without thinking about where runoff goes.
Clear the area of plants, rocks, and debris before you do anything else. A clean, level surface makes every step after this one easier.
If the site slopes, you’ll need to excavate and level it out.
One builder’s rule is to get within four inches of level across a ten-foot span. Anything steeper than that and you’re into heavy shimming or extra foundation work.
Remove dirt from the high side and fill the low side, then compact it well. Native soils with some binding ability hold better than loose fill.
Before you dig anywhere, locate underground utilities.
A misplaced shovel can turn a shed project into an expensive repair call. Most areas have a free service that marks buried lines.
Avoid building near trees if you can.
Falling branches, sap, and leaf litter will add maintenance work. Open ground also dries faster and gives you room to work during the build.
3. Build a stable, level foundation

The foundation keeps the floor off the ground and level, and the method you pick depends on what the site gives you. Concrete blocks paired with pressure-treated wood rails work when the ground is already close to level.
Set the rails under the band joists, add a third rail every eight feet of depth if you are using two-by-six joists, and check that the perimeter is square before you start framing.
You will need to dig out high spots so everything sits on the same plane.
A gravel bed works when you want the joists sitting directly on stone instead of on rails.
Dig out a rectangle six inches deep and about a foot wider than the shed on all sides. For a five-by-eight shed, that comes to seven by ten feet.
Fill it with gravel, compact it, and set the joists on top. This method needs more excavation up front but skips the rail step.
Posts and beams handle sloped ground.
Dig footings, set posts, cut notches for the beam to rest in, and bolt everything together. A two-by-eight beam fits a one-and-a-half-inch-deep notch; larger spans need a doubled beam and six-by-six posts with a three-inch notch.
The shed floor ends up raised like a deck, which means you either live with the gap underneath or build a skirt to close it off.
A concrete slab is permanent, stable, and closer to the ground than a wood platform.
It costs about the same if you pour it yourself, but it locks the shed in place. I would use it for a workshop with heavy equipment, not for something I might move later.
4. Frame the floor and install decking

- Lay out the rim joists first. For a typical shed platform, you need two rim joists that run the full length — 8 feet for a 5×8 shed. Set them parallel, then measure and mark where the common joists will attach. Most shed floors use joists spaced 16 inches on center, meaning the center of each joist sits exactly 16 inches from the next. Mark 3/4 inch behind each 16-inch point so 4×8 plywood sheets line up cleanly in the middle of the joists later.
- Install the common joists between the rims. Use three 3-inch screws per connection for 2×6 joists, four for 2×8s. Check square by measuring corner to corner diagonally — both measurements should match. Once the frame is square, fasten the whole platform to your foundation.
- Attach the plywood decking. Use 3/4-inch plywood with the grain running perpendicular to the joists. Dry-fit the first sheet in a corner to confirm alignment, then screw it down with 2½-inch screws every 6 inches along the perimeter and every 12 inches in the field. Offset the second row by 4 feet so seams don’t line up on the same joist. Construction adhesive under each sheet reduces creaking.
5. Frame and raise the walls
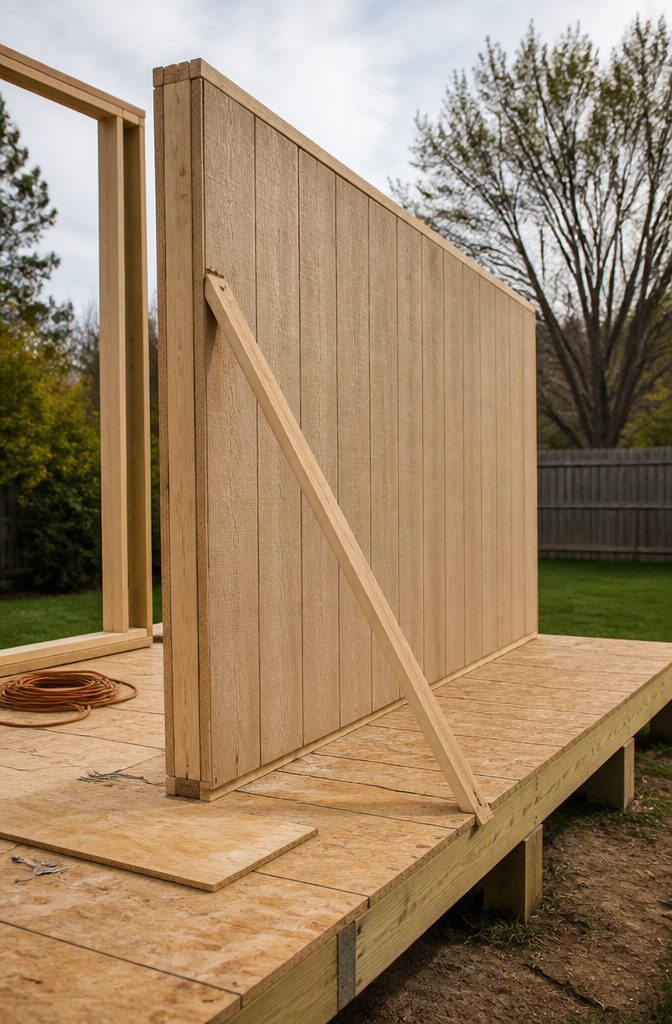
I build the walls flat on the floor deck, because squaring them on the ground is easier than squaring them after they’re upright. Each wall gets measured corner to corner once the studs are nailed to the plates.
Pull the measurements equal and the wall is square. For walls with door or window openings, I frame the rough opening to match the unit I’m installing, then check square again before I move on.
One choice that saves time later: install sheet siding while the walls are still down. T1-11 plywood goes on fast when you’re not fighting gravity, and the siding itself helps hold the frame square once it’s nailed.
The downside is weight. A sided wall is noticeably heavier to tip up, but I would rather lift once than wrestle full sheets into place on a ladder.
I start with one of the long walls that has no openings. It’s the simplest frame to assemble and the easiest to brace once it’s standing.
After nailing through the bottom plate into the floor framing, I use diagonal 2x4s from the wall studs down to the deck to hold it plumb while I raise the others.
The remaining walls go faster because they tie into corners that are already braced.
Raising walls is not one-person work. I ask for help every time, and if the walls are sided, I ask early.
6. Frame and sheath the roof

With the walls plumb and braced, the roof trusses go up next. Space them every two feet along the top plates of the load-bearing walls.
Start by raising the two end trusses first — these sit flush with the front and back walls and get gussets on the inside faces only so exterior siding can run flat to the edge.
Secure each truss with hurricane brackets or metal fasteners at the top plate connection.
Once the outer pair is up, lift the rest into place one at a time, fastening each before moving to the next. A temporary piece of trim run across the rafters keeps them aligned and plumb while you work.
Roof sheathing follows once all trusses are secure.
Use 1/2-inch or 5/8-inch plywood, starting at the lower corner of one side and running each sheet perpendicular to the rafters. Stagger the joints as you move up the roof.
If the trusses went up square, the sheathing will land on the rafters without shimming. If they didn’t, you’ll find out now when a sheet misses its fastening surface.
7. Weatherproof the roof

- Wait for the roof boards to dry completely before covering them. Moisture trapped under felt or shingles leads to rot, and once the roof is sealed, there’s no way for that moisture to escape.
- Lay roofing felt or tar paper starting at the bottom edge and working up. Staple it down row by row, overlapping each sheet so the upper layer covers the lower one. Water travels downward, and any seam that faces the wrong way becomes a leak point. The felt keeps moisture from reaching the sheathing while letting the wood breathe.
Roofing materials have to overlap in the direction the water is traveling.
That principle applies to every material you put on: felt, drip edge, shingles.
- Install drip edge along the eaves first, then up the rake edges. Use the same aluminum roofing nails you’ll use for shingles. The drip edge directs water off the roof without running back under the materials.
- For asphalt shingles, mark a ½-inch overhang at the roof edge, then snap chalk lines at 12 inches (the height of a full shingle) and every 5 inches after that. The lines keep the reveals straight.
- Start the first course with trimmed shingle tabs at the bottom edge, then work up row by row, offsetting each row 6 inches from the one below to stagger the seams. Long vertical seams let water through.
- At the ridge, cut individual tabs from spare or damaged shingles, trim the corners at an angle, and install them perpendicular to the main shingles, overlapping 5 inches over each other across the peak.
8. Install siding, windows, and doors

The order varies by design. Some builds finish siding first and install windows and doors into the sheathed walls.
Others frame the openings, hang the door, glaze the windows, then apply siding around them. Neither sequence is wrong, but the order you choose affects how much trim work you’ll do after the fact.
Framed openings need to match the hardware. A standard rough opening for a shed door runs around 36½ inches wide by 6 feet 9 inches tall, and windows often land at 2 feet by 3 feet.
If you’re building the door yourself, cut three-quarter-inch plywood a quarter-inch smaller on all sides than the rough opening, line the edges with one-by-four trim, and add an X brace at the bottom.
Steel pre-hung doors simplify the job at roughly $110 each and eliminate most of the fitting headaches.
Fitting a door to swing freely usually means trimming the bottom at least once. In one case, the door needed three passes with a saw before it cleared the threshold.
Hang the door with heavy-duty hinges on one side and a padlock latch on the other, and trim the opening so the door sits snug without binding.
9. Finish and protect the shed
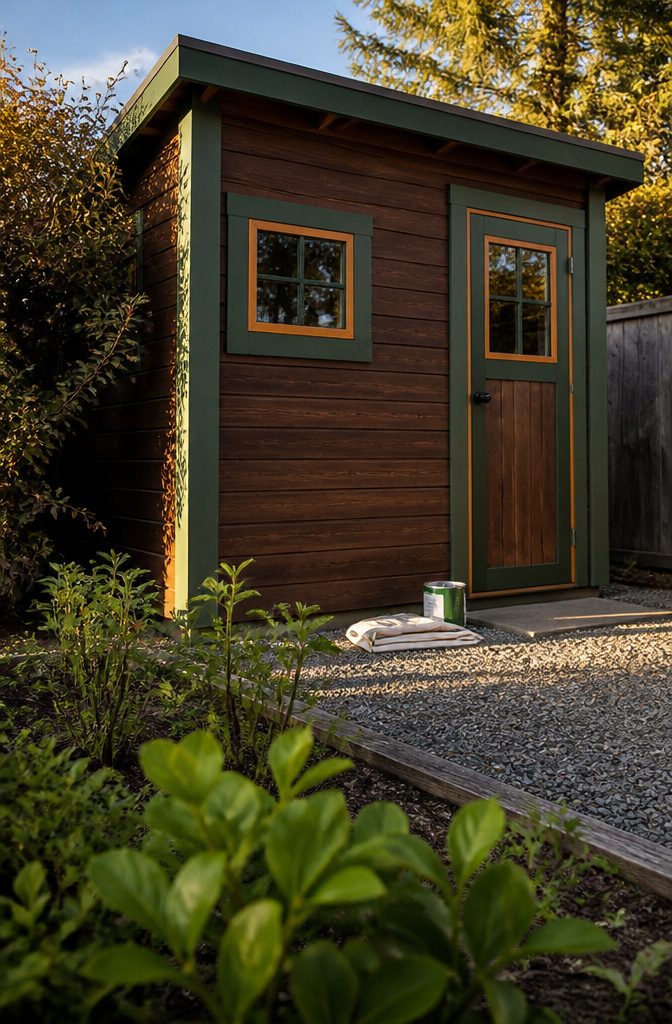
Once the siding and windows are in, apply a solid stain or exterior paint to protect the wood from moisture and sun.
I’ve found that a durable solid stain covers well and shows off trim details better than a lighter finish.
One builder used Oxford Brown, a rich chocolate tone that matched other outbuildings on the property, then painted window frames in Clover Patch green with reveals in April Love orange and Child of the Moon yellow for a cabin feel.
Paint or a waterproofing polymer should always go on exposed wood before the weather gets to it.
Adding trim changes how the shed reads from a distance.
Wide corner boards and wide window casing make sheet siding look deliberate instead of plain. PVC trim holds paint well and won’t rot, though dark colors can melt it in direct sun.
Fiber cement costs less but must be painted to stay protected, and it dulls saw blades fast. Engineered wood-fiber trim handles like real wood and comes textured or smooth.
10. Check the completed shed and plan for use

Once the structure is up and the weatherproofing is done, a few practical details decide whether the shed actually works for what you need it to store.
- Sketch the interior layout before you load it. A mower takes up floor space, shelves eat wall space, and you need an aisle wide enough that you aren’t pulling three things out to reach the fourth. Drawing where the shelves go saves aggravation later.
- Add a shallow tool nook if storage isn’t the main use. Placing an interior wall 12 inches from the shed’s back creates quick access to lawn and garden gear without cluttering the main floor.
- Choose door hardware at the store. Most shed plans skip specific hinges and handles, so pick what you like at the home improvement aisle and expect to trim the door bottom a few times before it swings freely.
- Plan for power during design, even if you aren’t wiring it yet. Extension cords work for occasional portable tool use, but a shed meant as a real workspace deserves proper electrical planning with a licensed electrician and the local building department involved from the start.
- Check drainage around the perimeter. Water pooling near the foundation shortens the shed’s life faster than most other mistakes.
Build from plans, buy a kit, or build from scratch

I built my last shed from purchased plans that cost less than thirty dollars, and the level of detail surprised me: full material lists, cut dimensions, and assembly sequences that kept me from guessing at every joint.
Plans give you control over materials and let you adjust dimensions without the constraints most kits lock you into.
A kit simplifies the process by bundling pre-cut materials with instructions, but customization is limited and cost savings over plans are often minimal.
Building from scratch without plans is possible if you have strong framing experience, though you’ll spend time working out structural details that purchased plans resolve immediately.
For straightforward storage where speed matters more than custom features, a prefab shed or kit can make more sense.
I’ve found that building from plans costs less than hiring professionals or ordering a delivered shed, but expect the project to take significant time and manual labor rather than a quick weekend.
Get help for heavy and high work
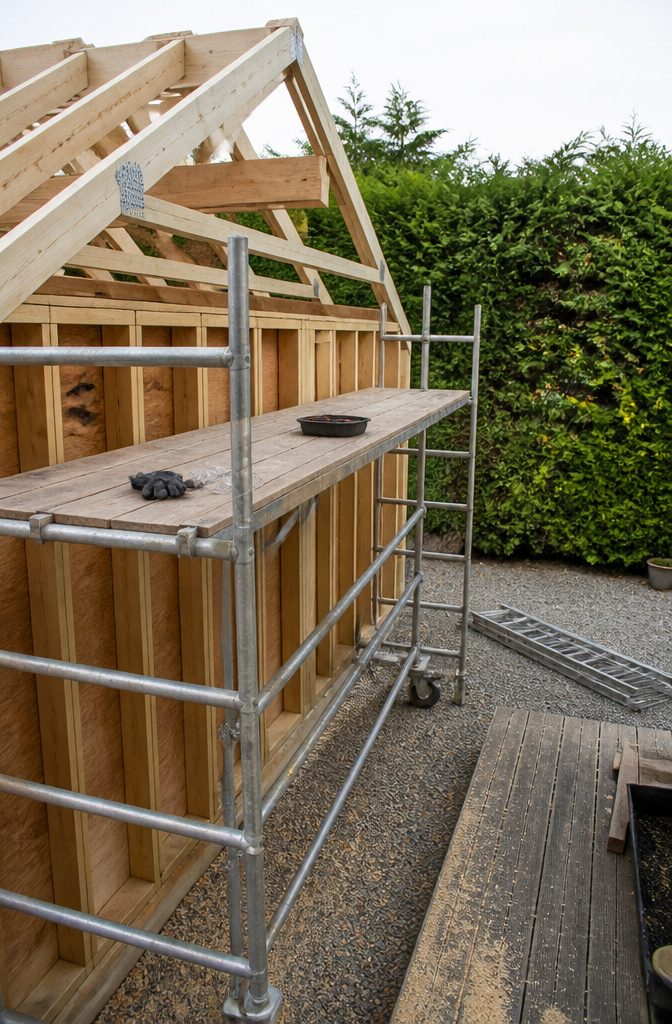
Lifting framed walls into position and working at roof height both call for at least one other person on site.
A single wall assembly built flat on the deck can weigh several hundred pounds once the studs, plates, and sheathing are nailed together, and tipping it vertical without help risks injury and damage to the frame.
The same goes for roof members.
One builder working alone found that even individual rafters demanded a second set of hands to hold the ridge steady while the opposite end was fastened. Trying to hoist an entire roof truss assembly is out of the question.
Once the walls are up, roof work introduces height. Moving a ladder repeatedly around the perimeter eats time and raises the chance of a fall.
Renting scaffolding with wheels makes more sense. A 5-foot section with three planks rents for $100–$200 per week, and the stable platform lets you keep tools and materials within reach instead of climbing down every few minutes.
Protective gear matters too: gloves, safety glasses, and solid footing prevent the small mistakes that stop a project cold.
Add power, insulation, or ventilation if the shed is a workshop

Workshop power should be planned before you start building, not bolted on later.
Permanent wiring to a detached structure typically involves permits, inspections, and a licensed electrician, so this is a conversation to have with your local building department during the planning stage rather than after the walls are up.
Running an extension cord across the yard for occasional use with a portable tool is one thing. A shed meant to function as an actual powered workspace deserves a proper electrical plan from the start.
Insulation follows the same logic.
A storage shed for lawn tools doesn’t need it. A space meant for regular work in hot or cold weather should be designed around that purpose.
If your shed sits in a humid climate, proper ventilation methods matter.
Hot, humid air lingers at the top of the shed, so grates and turbine roof vents installed toward the top most points achieve maximum efficiency and keep the space from turning into a swamp box every summer.
Frequently Asked Questions
Is it cheaper to buy or build a shed?
Building from plans typically costs less than hiring professionals or ordering a delivered shed, though the savings depend on materials and whether you already own the tools.
A kit simplifies the process but offers minimal cost advantage over plans. Building from scratch without plans is possible with framing experience but adds time working out structural details that purchased plans resolve immediately.
Do I need a permit to build a shed?
It depends on local rules that vary by place, size, height, and whether you add electrical or plumbing.
Check setback requirements, height limits, utility easements, and HOA restrictions with your planning or building department before buying lumber. Buying a prefab shed does not exempt you from local regulations.
What foundation should I use for a shed?
Concrete blocks with pressure-treated rails work on level ground, a gravel bed handles joists sitting directly on stone, and posts with beams suit sloped sites.
A concrete slab is permanent and stable but locks the shed in place. Pick the method based on your site conditions and whether you might move the structure later.
How do I figure out the materials I’ll need?
Purchased plans include a full material list with cut dimensions and quantities, which lets you compare quotes from building supply stores and discuss lumber grades with counter staff. Plans costing under $30 provide this detail and eliminate guesswork at every joint.
How should I choose a shed location?
Pick level ground away from low spots where water collects after rain, and clear the area of plants, rocks, and debris before starting.
Avoid building near trees to reduce maintenance from falling branches, sap, and leaf litter. Check that the site meets setback requirements and does not sit on utility easements.
How far apart should studs be on a shed?
Most shed floors use joists spaced 16 inches on center, meaning the center of each joist sits exactly 16 inches from the next. This spacing lets 4×8 plywood sheets line up cleanly in the middle of the joists.