I’ve found that keeping rugs clean starts with weekly vacuuming in the direction of the pile. This approach is effective for removing embedded dirt and dust.
Blot spills immediately instead of rubbing, and rotate your rug every few months so it wears evenly. Test cleaners on hidden corners first, pick the right method for your rug type, and dry completely to prevent mold. Felt discs under furniture legs save you from permanent marks. These steps form the foundation of effective rug maintenance.
Vacuum Weekly in the Direction of the Pile

I’ve learned the hard way that vacuuming your rugs weekly makes a real difference. When I started paying attention to the direction of the pile, my rugs stayed looking fresher longer.
Vacuuming with the pile, not against it, actually protects your delicate fibers. I used to push my vacuum any which way, and I’d notice more shedding and loose threads. Now I’m careful about the direction, and it’s helped prevent shedding substantially.
Weekly vacuuming removes dust and dirt before they settle deep into the fibers. I run my vacuum slowly in one direction, following the pile’s natural lay. This simple rug care step has extended the life of my rugs considerably. It’s become part of my routine and takes just minutes longer than careless vacuuming.
Blot Spills Immediately to Prevent Stains From Setting

The moment something spills on your rug, you’ve got a small window to prevent a permanent stain. When I grab a paper towel or colorless cloth immediately, I blot the spill instead of rubbing it. Rubbing pushes the stain deeper into the fibers, which makes it harder to remove later.
For regular spills, I blot to allow absorption. With greasy messes, I apply dish soap mixed with water, then blot away the grease. For other stains, I spray a 1:1 water-and-vinegar solution lightly and blot it up.
After each blot, I re-blot with a dry cloth to remove remaining moisture. Leftover dampness can set stains permanently. Acting quickly prevents the stain from setting in the first place.
Rotate Your Rug Every Three to Six Months

I’ve found that rotating my rug every three to six months makes a real difference in how it holds up over time. When I skip this step, I notice the traffic areas get compressed and worn faster than the edges, plus one side fades more from the sun than the other. By turning my rug regularly, I keep the wear and color change even across the whole thing, which extends its life considerably longer than leaving it in place.
Even Fading And Wear
Ever notice how one corner of your rug looks darker or more worn than the rest. Rotation is an effective strategy for keeping your rug looking uniform.
To prevent uneven wear and fading:
- Rotate your rug every three to six months to distribute foot traffic evenly
- Change the rug’s orientation so sunlight hits different areas
- Move furniture around occasionally to shift pressure points
- Mark your calendar so you don’t forget this important maintenance task
When you skip rotation, one section gets hammered while another stays pristine. Regular rotation protects your investment and keeps the pattern and color consistent across the entire surface. This maintenance task produces measurable results in extending your rug’s lifespan and appearance.
Preventing Compressed Fiber Marks
While even fading gets a lot of attention, there’s another problem that sneaks up on rugs: flattened fibers that won’t bounce back. I watched my furniture create permanent dents in rugs I loved, and rotation proved to be my best defense.
| Rotation Frequency | Benefit | Result |
|---|---|---|
| Every 3-6 months | Distributes foot traffic | Even wear |
| Regular schedule | Prevents compressed patches | Uniform pile |
| Paired with underlays | Minimizes indentations | Extended life |
| With furniture pads | Reduces crushing | Better appearance |
| Consistent practice | Maintains elevation | Professional look |
I rotate my rug every few months to spread out wear patterns. I also use rug pads and furniture felt discs underneath my pieces. These steps prevent compressed fiber marks from becoming permanent problems.
Extending Long-Term Rug Life
To keep your rug looking fresh and wearing evenly, rotate it every three to six months. This simple step significantly extends rug lifespan.
Here’s why rotating your rug matters:
- Distributes foot traffic evenly across all areas
- Prevents concentrated wear under doorways and furniture
- Reduces fiber compression in the same spots
- Supports even aging throughout the entire rug
Regular vacuuming combined with rotation maximizes rug lifespan. If you’re using underlays or padding, rotate those too to prevent localized indentations. This maintenance approach keeps your rug looking newer longer. Wear happens gradually across the whole surface rather than creating tired spots. Your rug will stay more uniform and comfortable underfoot when you maintain this schedule.
Test Cleaners on Hidden Corners First
Why do I always jump straight to cleaning the most visible part of a rug? Testing cleaners first prevents damage and costly mistakes.
Before deep cleaning, I do a spot test in a hidden corner. I mix a small amount of cleaner with water and apply it to an inconspicuous area. Then I wait and watch carefully for dye bleeding or damage to delicate fibers.
This simple step checks two crucial things: colorfastness and whether the cleaner works with my rug’s material. I also check the care label for any restrictions. If my spot test shows no problems, I know it’s safe to proceed with my full cleaning plan.
Testing takes five minutes but prevents damage that could cost hundreds of dollars to repair.
Pick the Right Cleaning Method for Your Rug Type
I’ve learned that picking the right cleaning method depends on what your rug’s made of. If I’m cleaning a delicate wool or natural-fiber rug, I stick with cold water and gentle dry methods like powder or foam. Synthetic rugs give me more flexibility to use warmer water and stronger cleaners. Matching your water temperature and cleaning solution to your rug’s material prevents accidental damage.
Fiber-Specific Cleaning Solutions
Different rugs need different care. Choosing the right cleaning solutions makes the difference between a fresh rug and a ruined one.
- Test colors first on a hidden corner to check dye fastness
- Use cold water for wool rugs to prevent damage
- Choose rug shampoo or mild dish detergent instead of carpet cleaners
- Apply warmer water and stronger solutions only for synthetic fibers
When cleaning a wool rug, stick with cold water and gentle solutions. For synthetics, you can use stronger products. Always do a color test beforehand to prevent color bleed and keep your rug looking vibrant. The right solution matters as much as the technique itself.
Water Temperature Considerations
When should you reach for cold water instead of warm? Washing temperature makes all the difference for your rug fibers. Wool rugs demand cold water, as hot water shrinks and damages them. Synthetic fibers tolerate warmer water better, but you should always test colorfastness first on hidden corners. Delicate fibers like silk need minimal moisture and cool water. Your cleaning method depends entirely on fiber type. Before choosing your water temperature, perform spot tests on inconspicuous areas. This prevents moisture damage and protects your investment. Getting the right balance between effective cleaning and fiber protection requires practice and familiarity with your specific rug materials.
Method Selection by Material
How do you know which cleaning method works best for your rug? Different materials need different approaches.
Here’s what you should know:
- Wool rugs require cold water and mild rug shampoo to protect the fibers
- Synthetic fiber rugs can handle hotter water and stronger cleaning solutions
- Viscose and artsilk rugs need professional cleaning since they’re too absorbent for water
- All rugs benefit from a color test on a hidden corner first
Perform a color test before cleaning anything. This prevents dye bleeding. For wool, use cold water and gentle products. Synthetic rugs allow more flexibility, but avoid oversaturation. When uncertain, call professionals rather than risk damage.
Protect Your Floors With a Rug Underlay
Why do I use a rug underlay under every rug in my home? A quality underlay prevents my rugs from sliding around, which means less wear on high-traffic areas and safer footing for my family. I position the underlay two inches smaller than my rug’s edge, which keeps it from lifting or bunching up. I also rotate my rugs seasonally and keep them away from direct sunlight to preserve their colors. Combined with proper placement, these steps have dramatically extended my rugs’ lifespans. When you add felt discs under furniture legs, you’re creating a protection system that reduces stains, prevents shifting, and minimizes damage to your flooring underneath.
Deep Clean With the Right Technique
Regular vacuuming keeps your rug looking fresh, but deep cleaning removes dirt and grime trapped deep in the fibers that your vacuum can’t reach. Choosing the right deep cleaning technique makes a significant difference for moisture control and stain removal.
Here’s what I recommend:
- Perform a spot test first to check for dye bleeding
- Use steam cleaning for heavy dirt, or dry powder for delicate fibers
- Apply minimal moisture to high-pile rugs and blot spills promptly
- Dry thoroughly by flipping the rug and using fans
Clear furniture before starting and let cleaner sit as directed. The drying phase is critical. Air-dry the rug flat in a well-ventilated space to prevent mold growth. This extended drying time prevents moisture damage and extends your rug’s lifespan.
Dry Your Rug Completely to Stop Mold
Getting your rug completely dry is just as important as the cleaning itself. Use a wet-dry vacuum or squeegee first to pull out as much water as you can, then rely on air circulation from fans and dehumidifiers to finish the job. Check corners and edges carefully since moisture tends to hide there.
Aim for about 48 hours of drying time, flipping the rug halfway through and monitoring it regularly. Keeping the rug damp for extended periods creates conditions where mold grows and odors develop.
Air Circulation Techniques
How quickly your rug dries after cleaning prevents mold and mildew. Air circulation is essential during drying time. To get the job done:
- Open all nearby windows to let fresh air flow through your space
- Turn on fans to create air movement around and under the rug
- Use a dehumidifier in humid areas to pull moisture from the air
- Elevate the rug on chairs so air reaches underneath
Flip your rug halfway through drying to ensure both sides dry evenly. This ventilation approach cuts drying time significantly and prevents mold growth. Check for damp spots before putting the rug back down, and avoid leaving it wet for extended periods.
Drying Timeline Guidelines
After you’ve cleaned your rug, the drying part is just as important as the washing, if not more critical. A proper drying timeline prevents mold and keeps your rug fresh. Aim for about 48 hours of drying time before walking on it again.
Lay the rug flat to air dry first, then flip it to dry the underside evenly. Open windows and run fans to boost air flow. In humid rooms, use dehumidifiers to speed things up. Check the edges and corners carefully since they dry slowest. Touch the fibers regularly. They should feel cool and completely dry before you use the rug again.
Moisture Prevention Strategies
While the drying timeline gets your rug on the path to recovery, preventing moisture from sticking around is what actually saves it from mold and odors.
Completely drying your rug requires a strategic approach. Here’s what works:
- Use a wet-dry vacuum to pull out excess water immediately after cleaning
- Position fans and open windows to boost air circulation throughout your space
- Run a dehumidifier in humid climates to speed moisture removal
- Elevate the rug on supports so air flows underneath
Give your rugs about 48 hours of drying time, checking corners and edges carefully. These moisture prevention strategies aren’t complicated, but they’re essential. Skipping steps risks that musty smell developing. Thorough drying keeps your rugs fresh and your floors protected.
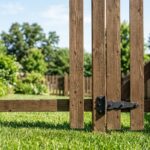
Prevent Furniture Marks With Felt Discs
When I’ve left my couch in one spot for too long, I’ve noticed the ugly dents it leaves on my rug. Felt discs are an effective defense against this. These simple pads distribute weight evenly across rug fibers, preventing concentrated pressure that creates permanent marks.
I size my discs to extend slightly beyond each furniture leg, maximizing contact area. Pairing them with rug underlays provides extra protection against slipping and wear.
| Task | Benefit |
|---|---|
| Apply felt discs to legs | Reduces indentation marks |
| Combine with rug underlays | Prevents slipping and wear |
| Inspect and clean regularly | Avoids dirt transfer |
I check my discs monthly and clean them to prevent tracking dirt onto my rug. This routine prevents permanent indentations and extends the life of both floors and rugs.
Treat Pet Stains With Enzymatic Cleaners
Pet accidents happen, and they’re one of the toughest challenges when keeping rugs clean. Enzymatic cleaners are the most effective defense against pet stains and odor removal.
Here’s the process:
- Blot the spot immediately with paper towels to remove surface liquid
- Apply enzymatic cleaner diluted according to label directions
- Allow proper contact time for the cleaner to break down odor-causing residues
- Rinse thoroughly and dry completely to prevent mold
Don’t over-wet the carpet, as that spreads the problem. Instead, use enough moisture to cover the stained area and let the enzymatic cleaner work. After treating, rinse well to remove cleaner residues, then ensure the spot dries completely. This method effectively removes pet stains and prevents odor recurrence.